DAVIS Vantage Pro ISS, 2003 & later User Manual
Page 5
Preparing the ISS for Installation: Assemble the Anemometer
3
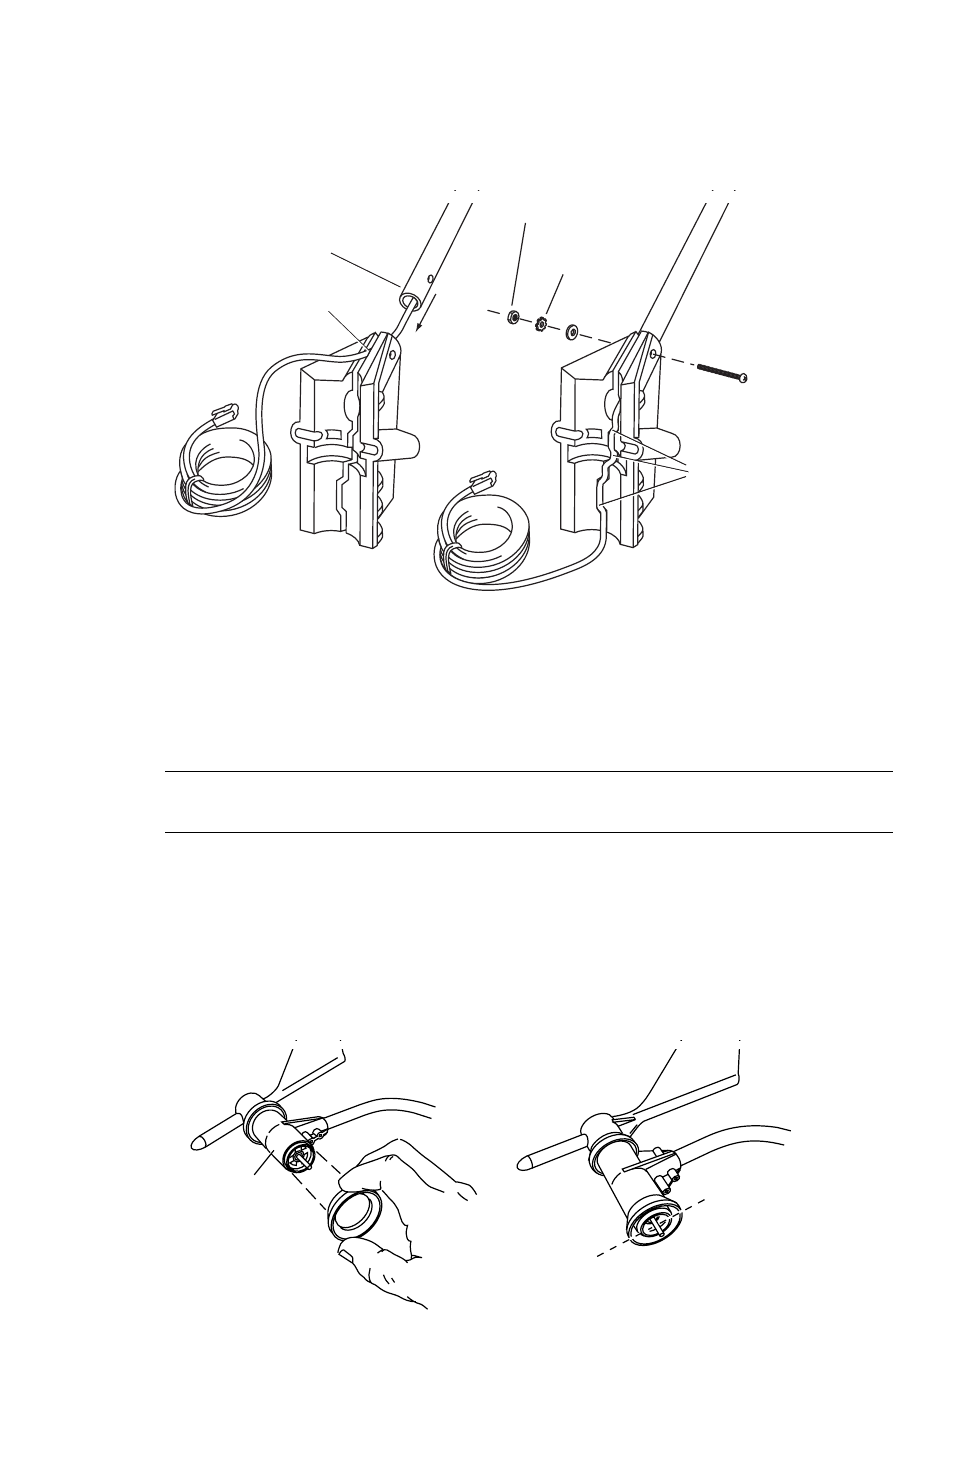
Attaching Anemometer Arm to Base
1. Insert the anemometer arm into the base, sliding the cable through the notch in the
base as shown in illustration.
Be sure to line up the small hole in the arm with the holes in the base.
2. Insert the machine screw through the holes in the base and arm.
3. Slide the flat washer, tooth-lock washer and hex nut onto the machine screw. Tighten
the hex nut while holding the screw with a Phillips screwdriver to prevent it from turn-
ing.
4. PRESS the sensor cable firmly and completely into the zig-zagging channel in the
base, taking up any slack between arm and base.
Note: The U-bolt used to mount the ISS can pinch or cause wear on the anemometer cable if the cable
is not pressed completely into the channel,.
Attaching the Drip Ring and Wind Cups
The drip ring attaches to the bottom edge of the anemometer head to help protect the
wind cups from icing over. Install the drip ring first, then install the wind cups.
1. Place the black plastic drip ring on the bottom edge of the anemometer head. Gently
push the drip ring onto the head until it clicks into place.
2. Make sure the lower edge of the drip ring is aligned with the lower edge of the ane-
mometer head.
Slide cable
through notch
Important:
Press cable
firmly into
channel
#4 x 1-1/8"
Machine Screw
#4 Tooth
Lock Washer
#4 Flat
Washer
#4-40
Hex Nut
Insert anemometer
arm into base
Anemometer
Head
Drip Ring
Lower edge of drip ring aligned
with lower edge of anemometer head
Attaching the Drip Ring