Appendix a: wireless transmitter ids, Changing iss transmitter id – DAVIS Vantage Pro ISS, 2003 & later User Manual
Page 21
Appendix A: Wireless Transmitter IDs: Changing ISS Transmitter ID
19
Appendix A: Wireless Transmitter IDs
Changing ISS Transmitter ID
Each wireless transmitting station, including the Integrated Sensor Suite (ISS), uses one
of eight selectable transmitter IDs. DIP switches #1, 2 and 3 on the transmitter allows you
to control the ID — or “channel” — the station will transmit on. (DIP switch #4 is used for
transmission testing, not for transmitter ID.)
Note: The transmitter and receiver communicate with each other only when both are set to the same ID.
The default transmitter ID is “1” for both the ISS and the Vantage Pro console, and should
work fine for most situations. In some cases, such as those listed below, you may want to
change the transmitter ID.
• Another Davis Instruments wireless weather station operating nearby already
uses transmitter ID ‘1’.
• You purchased additional wireless transmitting stations with your Vantage Pro or
Vantage Pro Plus and want to designate one of them as Station No. 1 instead of
the ISS.
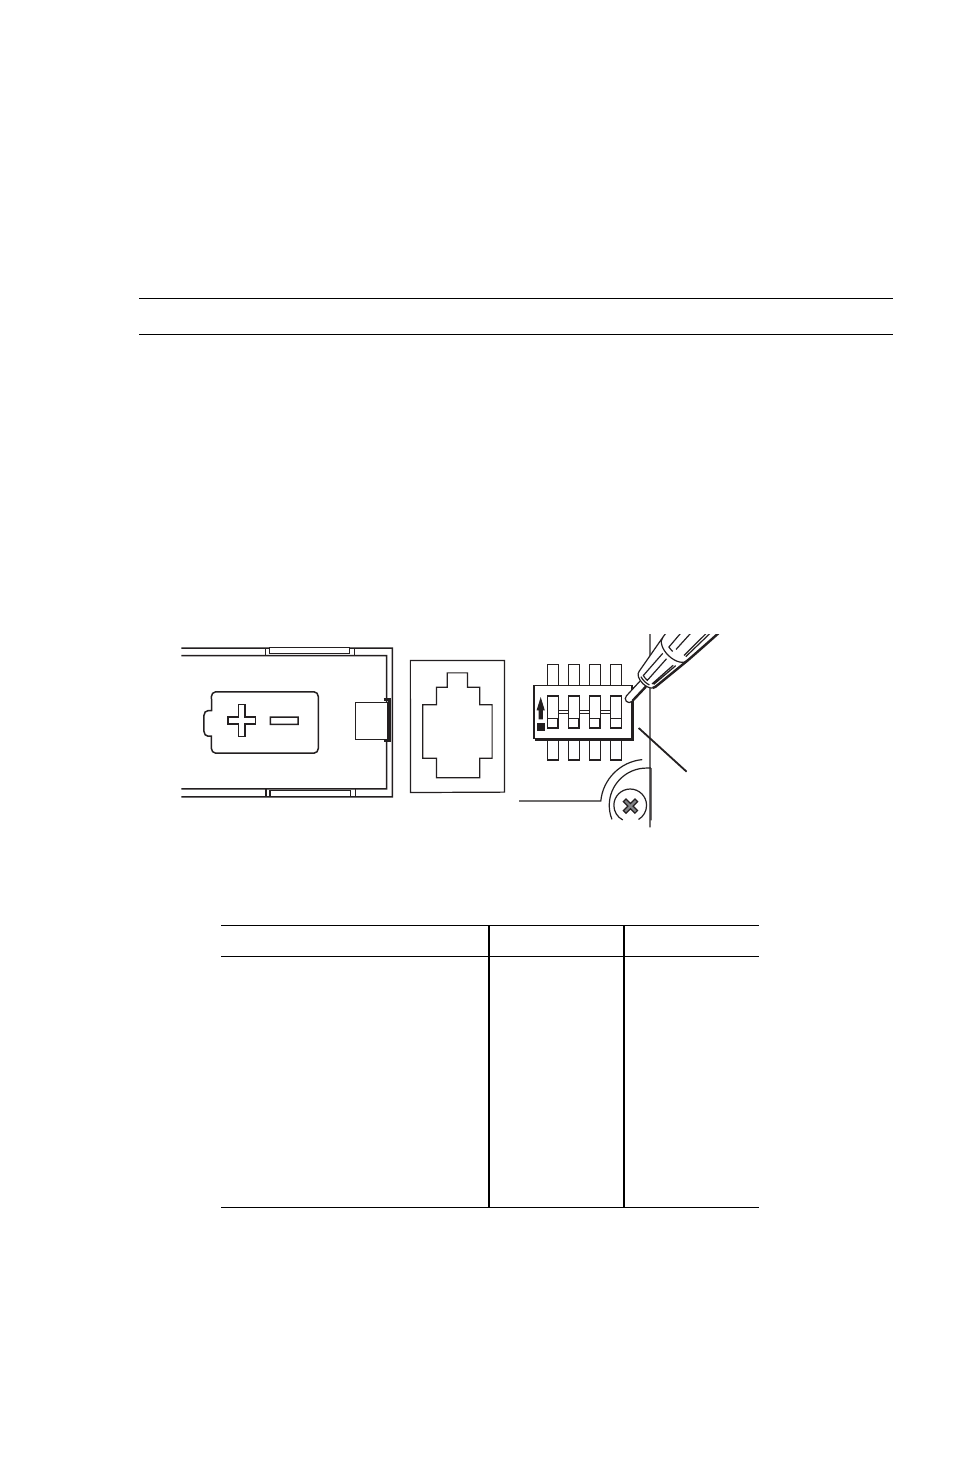
On the ISS the transmitter ID is set using the DIP switches located on the Sensor
Interface Module (SIM). To access the SIM, open the SIM housing cover. See “Open the
SIM Housing Cover” on page 4.
Transmitter ID DIP Switches in Top-right Corner of SIM
To change to another ID, use a ballpoint pen or paper clip to toggle DIP switches #1, 2,
and 3. The settings for transmitter IDs 1 – 8 are shown in the table below:
Use this table to ensure that each wireless transmitting station in your system is
broadcasting on its own transmitter ID.
Be sure to set your Vantage Pro console to the same IDs as the transmitters, as
described in the Vantage Pro Console Manual.
ID Code
Switch 1
Switch 2
Switch 3
#1
(default)
off
off
off
#2
off
off
ON
#3
off
ON
off
#4
off
ON
ON
#5
ON
off
off
#6
ON
off
ON
#7
ON
ON
off
#8
ON
ON
ON
1
2
3
4
ON
DIP Switches