Installation – JKS OGS151 User Manual
Page 2
JKSOGS151
JKS Adjustable Track Bar Installation
2 Page
Installation
1. REMOVE REAR TRACK BAR
Raise and support vehicle chassis with jack
stands positioned in front of the rear lower sus-
pension arm brackets. Remove rear wheels from
vehicle.
Raise and support axle housing with a hydraulic
jack.
HINT: To relieve tension from mounting bolts,
axle should be evenly supported with suspension
at normal ride height.
If equipped, remove and discard plastic dust shield
covering the bolt that secures rear track bar to the
OE bracket.
Remove rear track bar mounting hardware from
axle and chassis brackets.
HINT: A T55 Torx
driver may be required to remove hardware.
Remove track bar from vehicle and retain hard-
ware.
2. INSTALL ANGLED CV TRACK BAR
BRACKET (OPTIONAL)
If Adjustable Trackbar PN OGS151B was purchased, a
special Angled CV Bracket PN OGS160 was also supplied.
The purpose of this bracket is to re-establish proper align-
ment of the axle bracket with the track bar. This is neces-
sary whenever the axle is rotated to align the pinion with a
CV type driveshaft.
If vehicle has already been equipped with a similar
aftermarket angled track bar bracket, disregard
this step and proceed to next section.
Install JKS Angled CV Track Bar Bracket PN
OGS160 (or equivalent) at this time, according to
the installation instructions provided with the part.
PN OGS160 is supplied with JKS Adjustable
Trackbar PN OGS151B, or available separately if
installing PN OGS151.
3. LUBRICATE BUSHINGS AT EACH END
OF ADJUSTABLE TRACKBAR
Locate bag of parts containing Polyurethane
Bushing Halves (E) and Sleeve (D).
Liberally apply wheel bearing grease to surface of
bushings.
Assemble Polyurethane Bushing Halves (E) and
Sleeve (D) at Chassis End (A) of track bar as indi-
cated in the parts diagram on page 1.
Using a Grease Gun with Zerk Fitting Coupler,
slowly inject wheel bearing grease into the Grease
Zerk (J) at Axle End (C) of track bar.
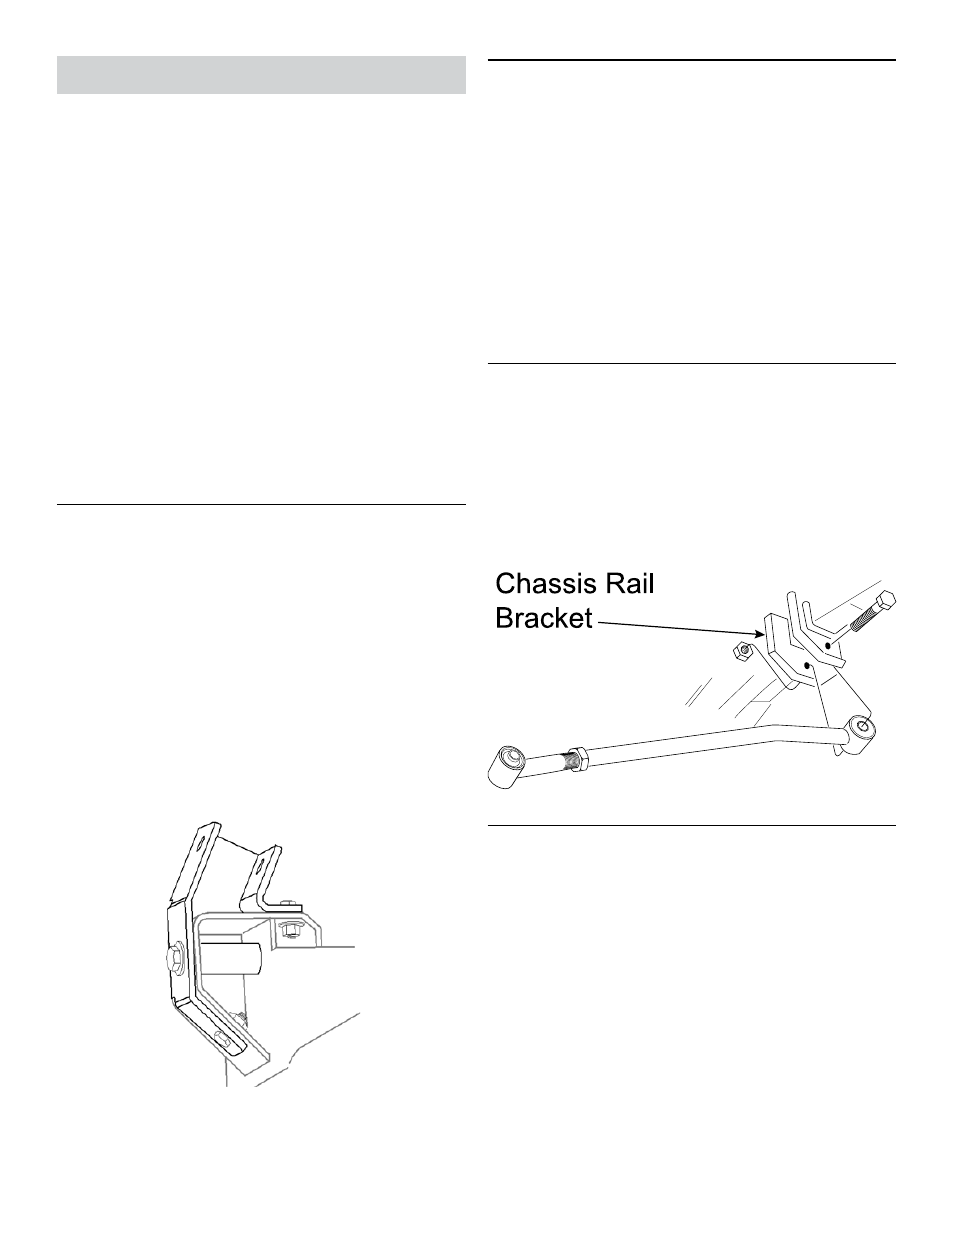
4. MOUNT ADJUSTABLE TRACKBAR TO
CHASSIS RAIL BRACKET
Apply anti-seize lubricant to bolt threads of original
track bar mounting hardware.
Mount Chassis End (A) of Adjustable Trackbar
to the chassis rail bracket and loosely install the
original mounting hardware.
HINT: When installed
correctly, the bend in Adjustable Trackbar should
point up.
5. CENTER REAR AXLE HOUSING
The rear axle housing must be in perfect lateral alignment
with vehicle chassis before Adjustable Trackbar installation
can be completed.
Re-install wheels and lower vehicle to ground.
IMPORTANT: Vehicle must be at normal ride
height, on level ground, with the suspension sup-
porting the full vehicle weight.
Determine if the axle housing is centered by mea-
suring the distance between the tire and chassis,
using the exact same points on each side of the
vehicle to ensure accuracy.
HINT: For example,
measure from the edge of a tire tread lug to the
outboard side of the chassis, then repeat the mea-
surement on the other side of vehicle using exact
same points.