Installation – JKS BSE201 User Manual
Page 2
JKSBSE201
JKS Hydraulic Bump Shocks Installation
2 Page
Installation
1. REMOVE FRONT COIL SPRINGS
Remove the front coil springs per the factory ser-
vice manual instructions for your vehicle.
HINT: A coil spring compressor is useful for removal.
Depending on the application, it may be necessary
to completely or partially remove any of the
following components before spring can be free
from upper mount.
Â
Shock Absorber
Â
Swaybar
Â
Brake Line
Â
ABS Wire
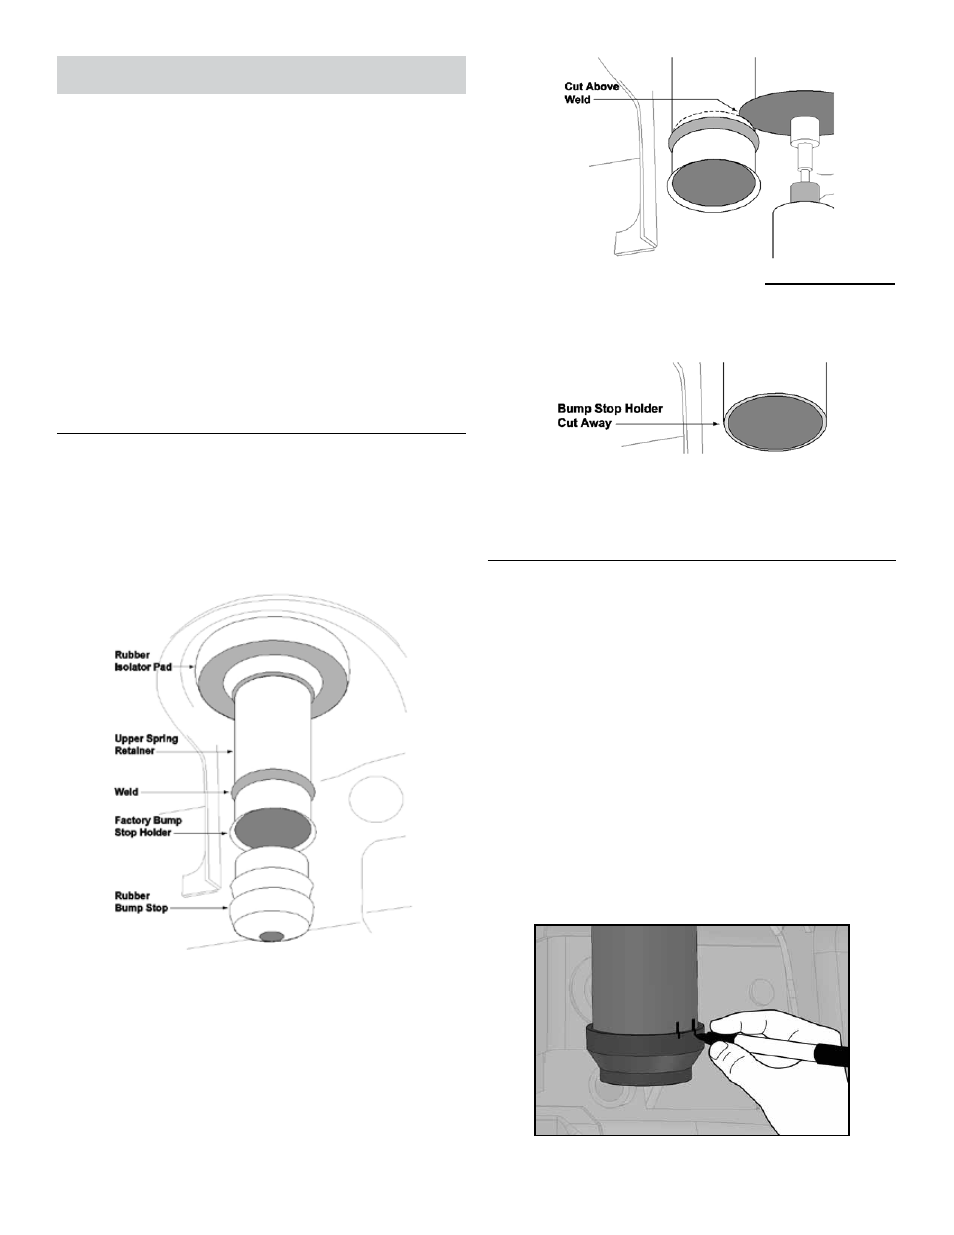
2. MODIFY SPRING RETAINER
The factory bump stop holder is welded to the upper spring
retainer and must be permanently removed in order to
install the Hydraulic BumpShocks.
Pry the original rubber bump stop (jounce bumper)
free from the bump stop holder.
Locate the factory weld that secures the bump
stop holder to the upper coil spring retainer.
Cut away the bump stop holder immediately above
the weld as illustrated.
HINT: A die grinder with
cut-off wheel or reciprocating saw is useful for cut-
ting away the bump stop holder.
Remove any sharp edges from the cut portion of
the upper spring retainer.
HINT: A file or deburring
tool is useful for removing sharp edges.
3. PREPARE FOR WELDING
Locate the supplied Jounce Adapters (C). The
adapters are zinc plated from the factory to pre-
vent corrosion. In preparation for welding, a small
amount of plating must be removed to ensure the
areas to be welded are clean.
Slide the enlarged (non-threaded) end of the
Jounce Adapter (C) onto the upper spring retainer
until fully seated. Hold in position while completing
the next step.
Mark the perimeters of the upper spring retainer
AND the Jounce Adapter (C) where they meet at
three (3) locations that are accessible for weld-
ing. Each weld location should be at least 1/2” in
length and spaced evenly apart.
HINT: A felt tip
marker or similar marking tool is useful for marking
weld locations.
HINT: A pair of vertical lines spaced 0.5” apart is
used to mark each weld location.