JKS 6100 User Manual
Page 2
JKS6100
JKS Adjustable Control Arm Installation
2 Page
Raise the axle housing back into position and sup-
port with a hydraulic jack. HINT: The axle housing
should be evenly supported and the suspension
at normal ride height. Do not attempt removal or
installation with the suspension extended, or the
axle drooped, as this will place tension on suspen-
sion arm mounting hardware.
Remove the lower suspension arm nut and bolt
from the axle housing bracket. Retain the original
mounting hardware.
Â
FRONT INSTALLATION – If front axle is equipped
with cam adjusters (see illustration below), scribe
or paint alignment marks for re-installation refer-
ence.
Remove the nut and bolt from the chassis rail
bracket. Retain the original mounting hardware.
Remove the original lower suspension arm from
the vehicle.
2. SET CONTROL ARM LENGTH
Adjustable Control Arms are fully collapsed when
supplied from JKS and must be adjusted to the de-
sired lengths before installation.
The working length of each lower Control Arm can be
increased (up to 2.25” longer), decreased (up to 1.0”
shorter), or exactly the same as the OE suspension
arm.
Determine ideal Control Arm length for your ap-
plication by considering factors such as:
Â
Length of OE suspension arm
Â
Tire Clearance
Â
Pinion Angle / Caster
Â
Rotate adjustable end of Control Arm until the
desired length is achieved.
Adjust corresponding Control Arm to exact same
length.
Use flat washer shims
to fill void between
bracket and bushing
VOID
9/16” SAE
FLAT
WASHER
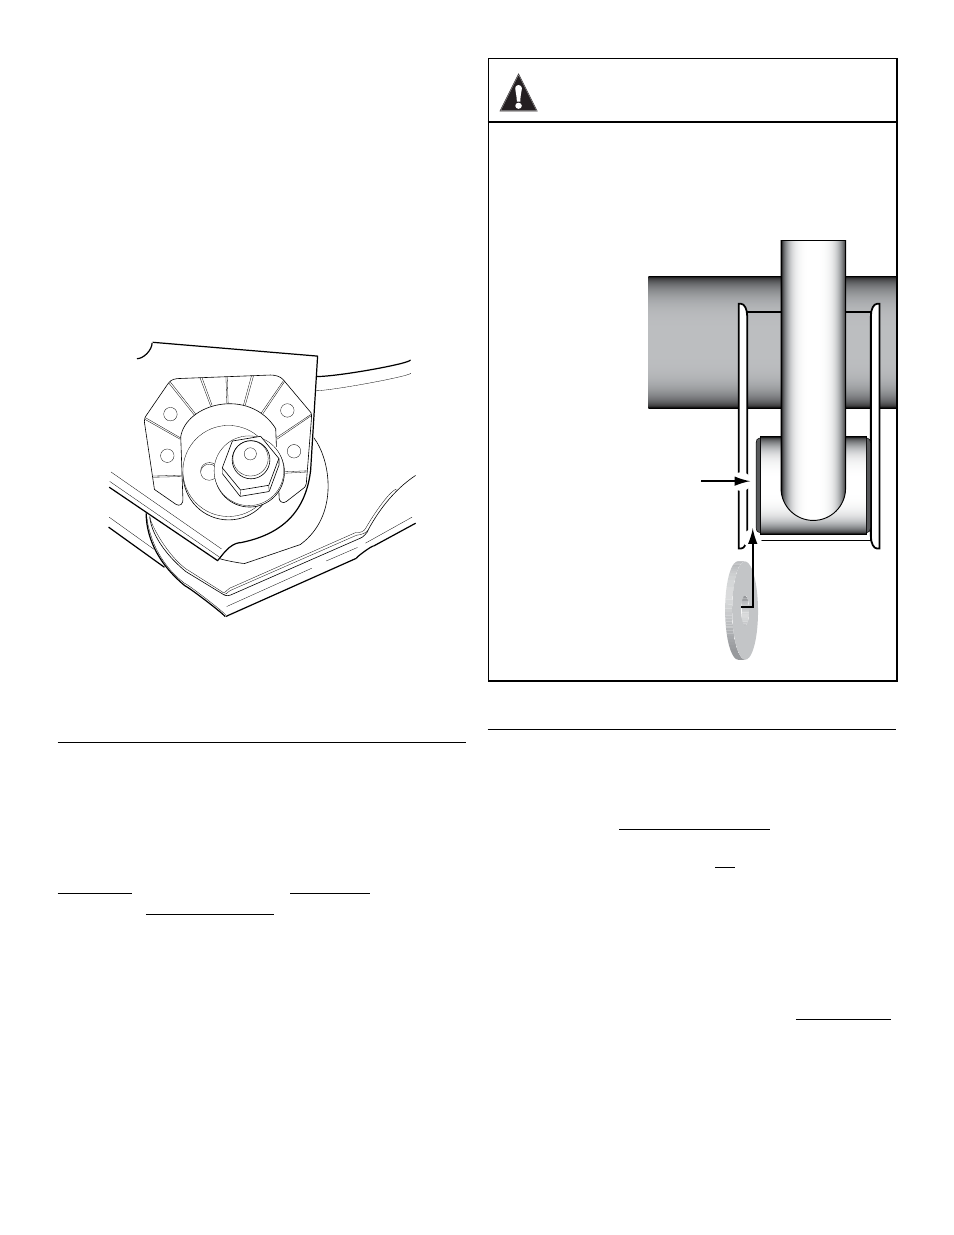
GRAND CHEROKEE WJ NOTE
IMPORTANT NOTE REGARDING FLAT WASHER
SHIMS FOR GRAND CHEROKEE WJ MODELS
The factory suspension arm brackets on the chassis and
axle are wider than the Adjustable Control Arm bushings.
Therefore, it will be
necessary to insert
flat washer shims
between the bracket
and bushing to fill this
void as illustrated.
Flat washers are sup-
plied with rear Control
Arms
(PN 6125) only.
Enough washers are
included with PN 6125
for both front and rear
Control Arms.
If you are not install-
ing rear control arms
at this time, you
can source the flat
washers (9/16” SAE)
for your front Control
Arms from your local
hardware store.
3. INSTALL CONTROL ARM
Apply anti-seize lubricant to bolt threads of original
mounting hardware.
Mount the non-rotating (BLACK) end of Adjustable
Control Arm to the chassis rail bracket with the
greaseable fitting facing UP.
Â
GRAND CHEROKEE WJ ONLY - Insert two
(2) flat washer shims – one on each side of
bushing – to fill the void between the chassis
bracket and Control Arm bushing.
HINT: Flat
washers must be installed to ensure proper
bushing performance and reliability.
Install the original mounting bolt and finger tighten
the nut.
DO NOT torque mounting hardware
until instructed.