Installation – JKS 9605 User Manual
Page 2
JKS9605
JKS Shock Adapter Installation
2 Page
Installation
1. REMOVE SHOCK ABSORBERS
Remove the front wheels to provide unrestricted
access to shock absorbers.
Remove front “stem” type shock absorbers per
factory service manual instructions for vehicle.
2. INSTALL SHOCK ADAPTER ONTO
SHOCK ABSORBER
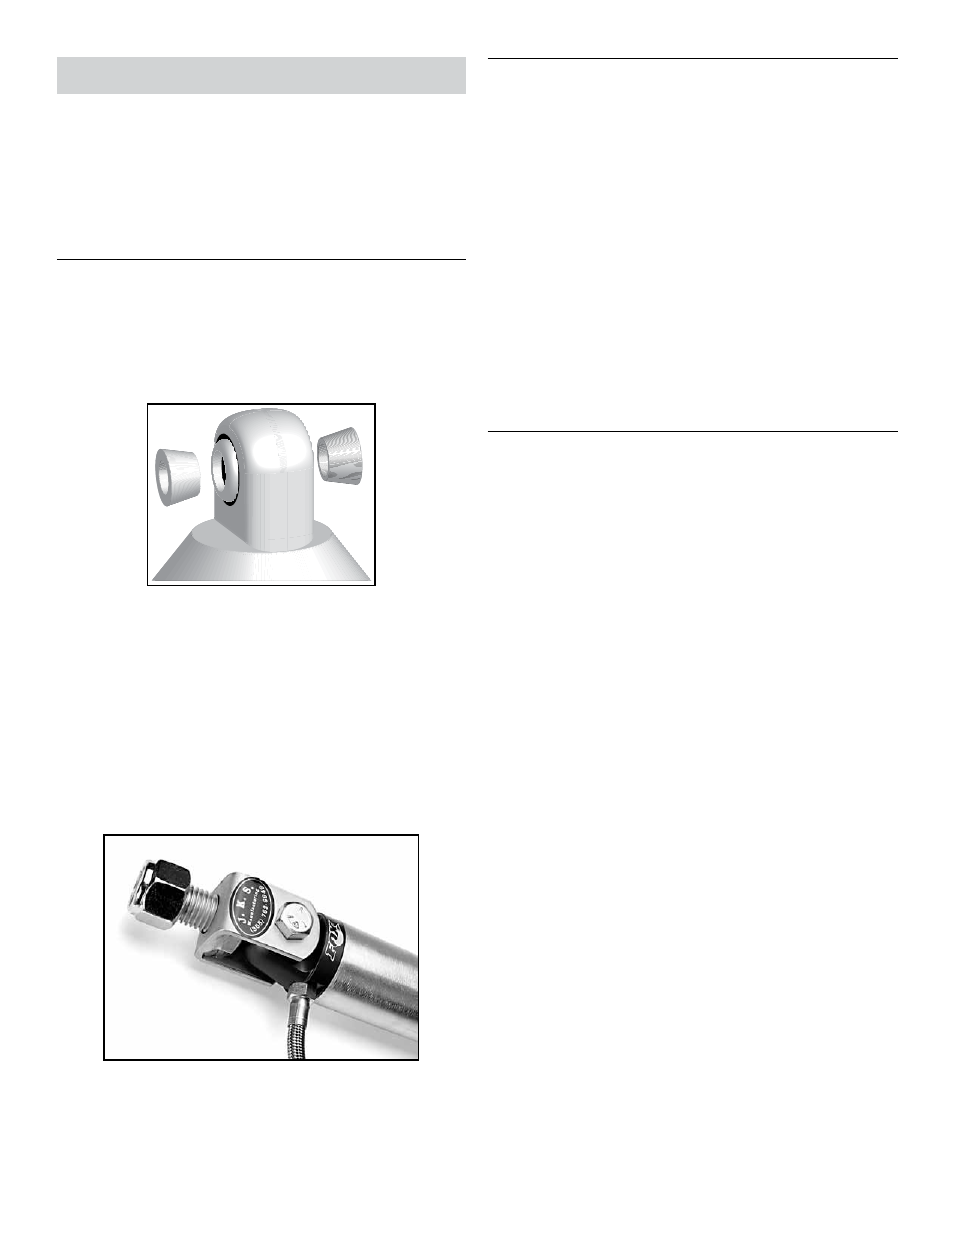
Place a Conical Spacer (E) on each side of shock
absorber’s spherical bearing (see illustration), and
slide into the Shock Adapter (A) until mounting
holes align.
HINT: Position Conical Spacers with narrow ends facing
spherical bearing.
Insert a 1/2” x 2-1/4” Bolt (C) through mounting
hole and thread into a 1/2” Ovalok Nut (D).
Secure Shock Adapter (A) in a bench vice and
tighten the 1/2” x 2-1/4” Bolt (C) to 60 ft-lbs. using
a torque wrench.
While still secured in vice, completely thread
the M20 Nylock Nut (B) onto threaded stud and
remove.
HINT: This cuts a groove in the Nylock
material, making final installation easier.
3. RE-INSTALL SHOCK ABSORBERS
Insert threaded stud of Shock Adapter (A) through
original shock mounting hole in upper fender well
of vehicle.
IMPORTANT: Position Shock Adapter with head of
1/2” bolt (C) facing forward (toward front of vehicle) to
ensure unrestricted shock movement.
Install M20 Nylock Nut (B) onto threaded stud of
Shock Adapter (A) from above the shock mount-
ing bracket.
HINT: Shock may be used as a lever
to hold Shock Adapter in position while installing
Nylock Nut.
Tighten the M20 Nylock Nut (B) to 80 ft-lbs using a
torque wrench.
©2013 JKS Manufacturing, Inc & Aftermarketing, LLC
Revision Date 10/31/2013