JKS OGS999 User Manual
Page 3
JKSOGS999
JKS Adjustable Cross-Over Shock Mount Installation
Page 3
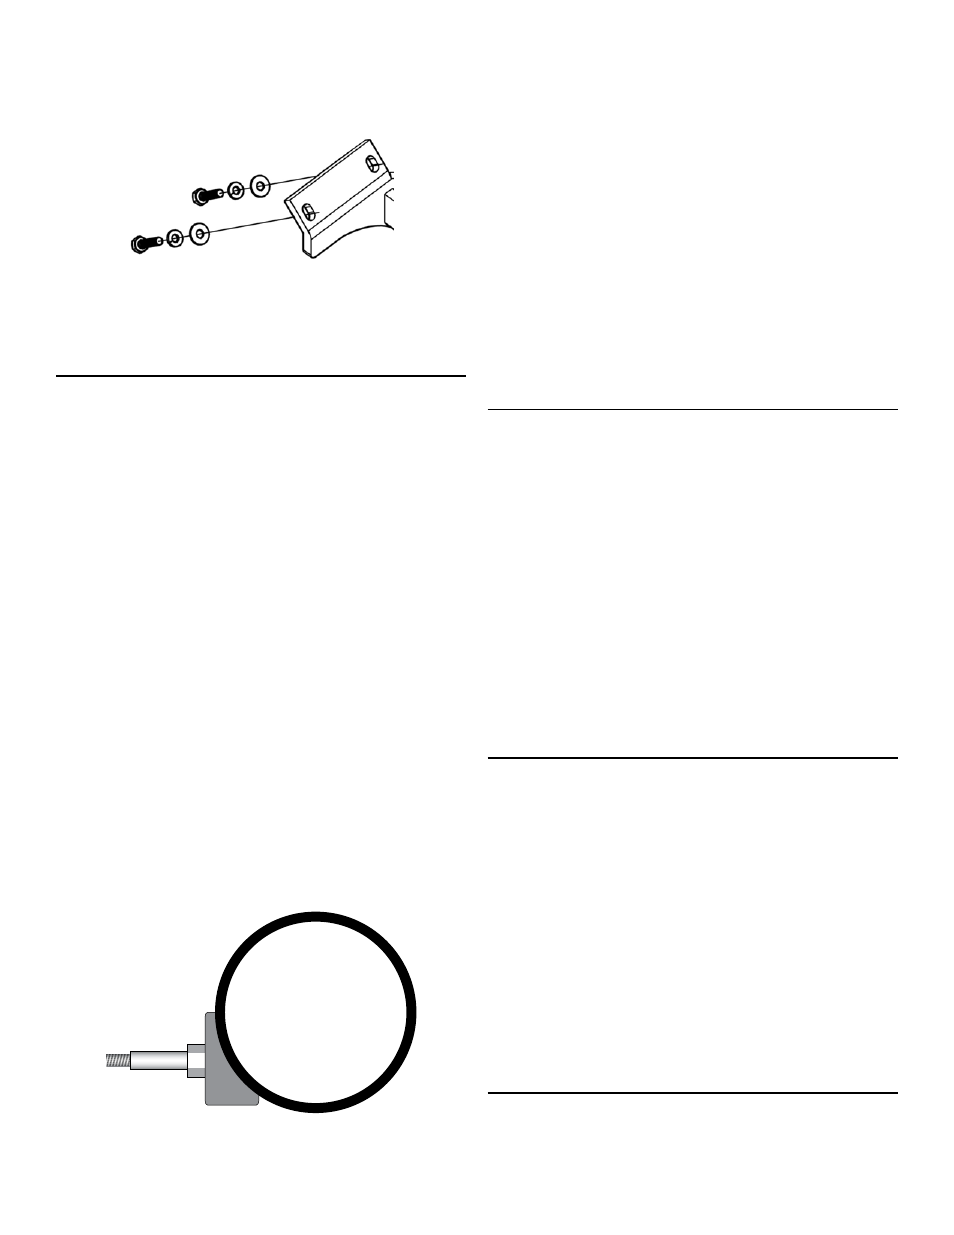
Insert the appropriate bolt assembly through
each hole in mounting flange and loosely thread
into mounting hole to hold the Cross-Over Shock
Mount in place.
With all four mounting bolts loosely installed, make
sure Cross-Over Shock Mount rests completely
flat against chassis and tighten each bolt to 25-35
ft-lbs using a torque wrench.
4. INSTALL REAR AXLE SHOCK MOUNTS
(OPTIONAL)
Refer to the following instructions only if you will be install-
ing optional Rear Axle Shock Mounts PN OGS922 (SOLD
SEPARATELY) in combination with the Cross-Over Shock
Mount.
HINT: The benefit of installing Rear Axle Shock
Mounts at this time is the ability to re-install your existing
shock absorbers. If not installing Rear Axle Shock Mounts,
it will be necessary to install new shock absorbers of the
appropriate length as determined by vehicle’s lift height
and shock mounting configuration.
Remove the factory rear shock mounts from the
axle housing.
HINT: A grinding wheel or cutting
torch may be useful for removing factory shock
mounts, although extreme care must be used to
ensure axle housing is not damaged in process.
Grind or sand away any remaining material, paint
or debris from axle housing to prepare surface for
Rear Axle Shock Mounts. Surface must be com-
pletely free of any contaminants.
Secure stud to weld-on bracket using a 5/8” Locking
Nut. Tighten nut to 65 ft-lbs using a torque wrench.
Position Rear Axle Shock Mounts on the axle hous-
ing between each pair of leaf spring U-bolts. New
shock mounts should be oriented as indicated below.
HINT: Hex Stud must be parallel with level ground.
Carefully weld the Rear Axle Shock Mount to the
axle housing, making sure the Hex Stud remains
parallel with ground.
IMPORTANT: Avoid overheating axle housing by allow-
ing the surface to cool off regularly.
Once all welding is complete, spray paint weld-on
shock mount and any bare metal on axle to pre-
vent corrosion. All exposed metal must be com-
pletely covered.
Apply a thin coating of wheel bearing grease to
smooth surface of Hex Shock Stud.
Use the remaining 5/8” and 7/16” Flat Washers
to “sandwich” the shock absorber bushing, and
secure the shock to the Hex Stud with the 7/16”
Locking Nut. Tighten nut until shock bushing be-
gins to bulge, but do not overtighten.
5. INSTALL SHOCK ABSORBERS
Secure stud to Cross-Over Shock Mount using a
5/8” Locking Nut (C). Tighten the nut to 65 ft-lbs
using a torque wrench.
Apply a thin coating of wheel bearing grease to
smooth surface of Hex Shock Stud (B).
Slide a 5/8” Flat Washer (D) onto stud, followed by
the upper end of shock absorber.
Secure upper end of shock absorber to Hex Shock
Stud (B) with the remaining 7/16” Flat Washer (E)
and 7/16” Locking Nut (F). Tighten nut until shock
bushing begins to bulge, but do not overtighten.
Secure lower end of shock absorber to factory
shock mount on axle, or optional Rear Axle Shock
Mounts PN OGS922 if installed.
6. MODIFY VEHICLE EXHAUST
Due to the position of the Cross-Over Shock Mount, the existing
tail pipe section can not be re-installed without modifications.
IMPORTANT: Modifications to exhaust system should
be performed by a professional.
To modify the exhaust system, have a new tail pipe
formed to route between the Cross-Over Shock
Mount and vehicle chassis.
HINT: A heat shield
can be installed around tail pipe to minimize trans-
fer of exhaust heat to surrounding surfaces.
Cut existing tail pipe behind the catalytic converter
and connect to the new tail pipe using an appropri-
ate exhaust joint.
Replace any exhaust gaskets and install the modi-
fied tail pipe on vehicle. Check for leaks.
©2013 JKS Manufacturing, Inc & Aftermarketing, LLC
Revision Date 11/1/2013