Ag Leader GeoSteer OmniSTAR Demodulator Installation Manual User Manual
Page 6
6
OmniSTAR Demodulator Kit Installation Instructions
10.
Attach the OmniSTAR RF cable to the TNC connector on
the OmniSTAR demodulator as shown in photo.
Note: Connector only fits on one side of the OmniSTAR
demodulator despite the two ports looking similar. Do not
force connector, if connector does not engage, check to see
it is the proper port.
Note: Hand tighten only. Do not over tighten.
11.
Attach the GeoDock assembly to the GeoDock Mounting
Plate on top of the vehicle.
_______________________________________________
Note: The GeoSteer system must always be turned off
before connecting or disconnecting cables.
_______________________________________________
Note: If this is the initial GeoSteer install, refer to the
GeoSteer installation manual for proper installation
procedures.
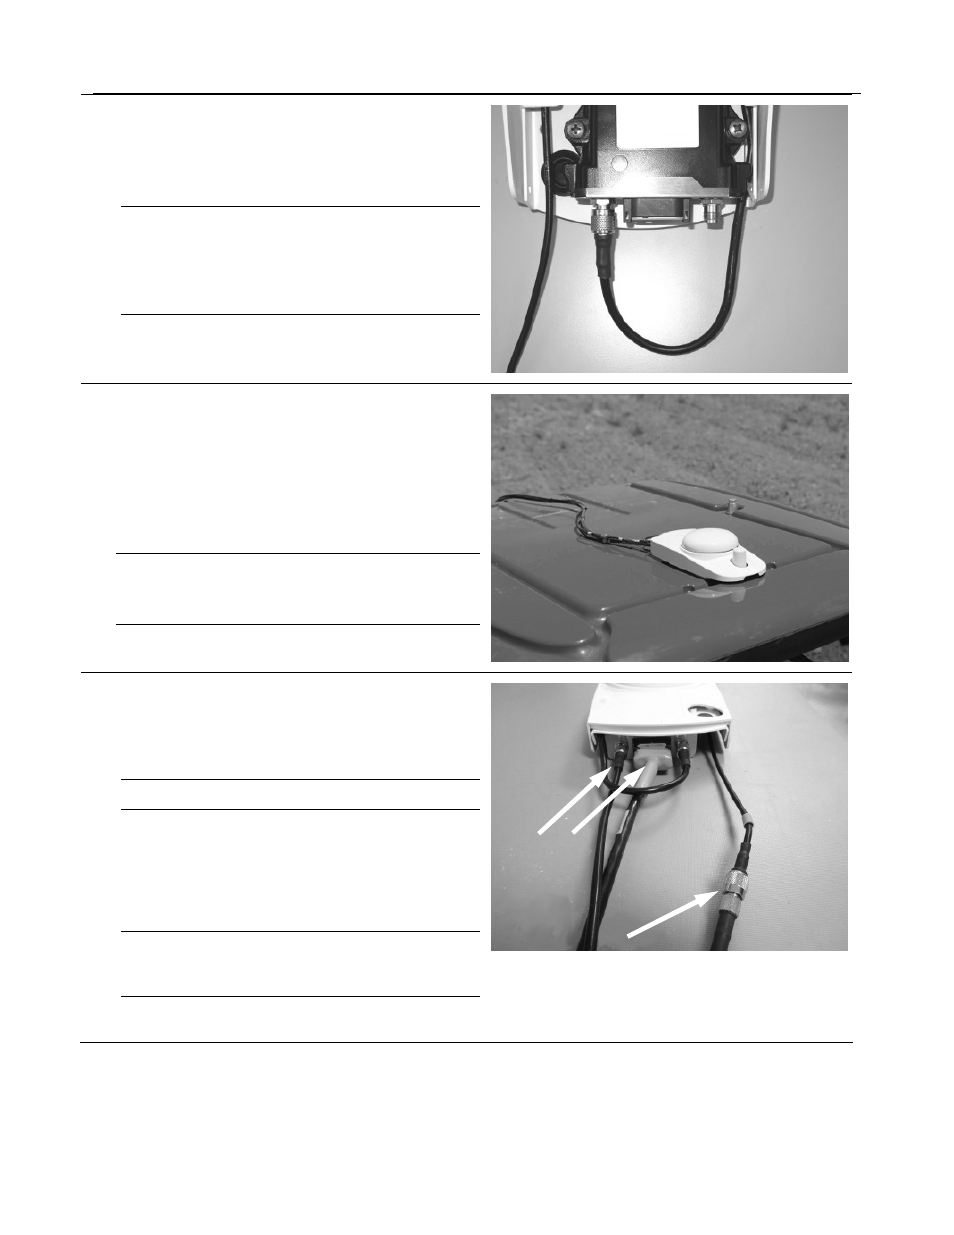
12.
Attach the 7M Coax GPS Cable (201-0516-01) to the rear
of the OmniSTAR Demodulator.
13.
Attach the 7M Cell Modem cable (201-0539-02) to the
GeoDock Cell Modem cable (201-0538-01)
Note: Hand tighten only. Do not overtighten.
14.
Attach the Power and Data Extension Cable (PN 201-0535-
01) to the rear of the OmniSTAR Demodulator. The
connectors have keys and will only engage in the correct
orientation. If the connector does not engage, check the
orientation. To avoid possible damage, never force the
connector.
Note: To disconnect the cable from the radio, press the two
side latches on the cable connector and pull away from the
radio.