Creating data retention reports – HP StoreAll Storage User Manual
Page 157
3.
Clean up the existing checksums.
4.
Start a new data validation scan on the entire file system to compute the checksums.
File corruption
If the checksums of the
is data (content) corruption.
To replace an inconsistent file, follow these steps:
1.
Obtain a good version of the file from a backup or a remote replication.
2.
If the file is retained, remove the retention period for the file, using the GUI or the
ibrix_reten_adm -c
command.
3.
Delete the file administratively using the GUI or the ibrix_reten_adm -d command.
4.
Copy/restore the good version of the file to the data-retained file system or directory. If you
recover the file using an NDMP backup application, the proper retention expiration period is
applied from the backup copy of the file. If you copy the file another way, you will need to
set the atime and read-only status.
Creating data retention reports
Three reports are available: data retention, utilization, and validation. The reports can show results
either for the entire file system or for individual tiers. To generate a tiered report, the file system
must include at least one tier.
You can display reports as PDFs, CSV (CLI only), or in HTML format (GUI only). The latest files in
each format are saved in /usr/local/ibrix/reports/output/
When you generate a report, the system creates a CSV file containing the data for the report. The
latest CSV file is also stored in /usr/local/ibrix/reports/output/
NOTE:
Older report files are not saved. If you need to keep report files, save them in another
location before you generate new reports.
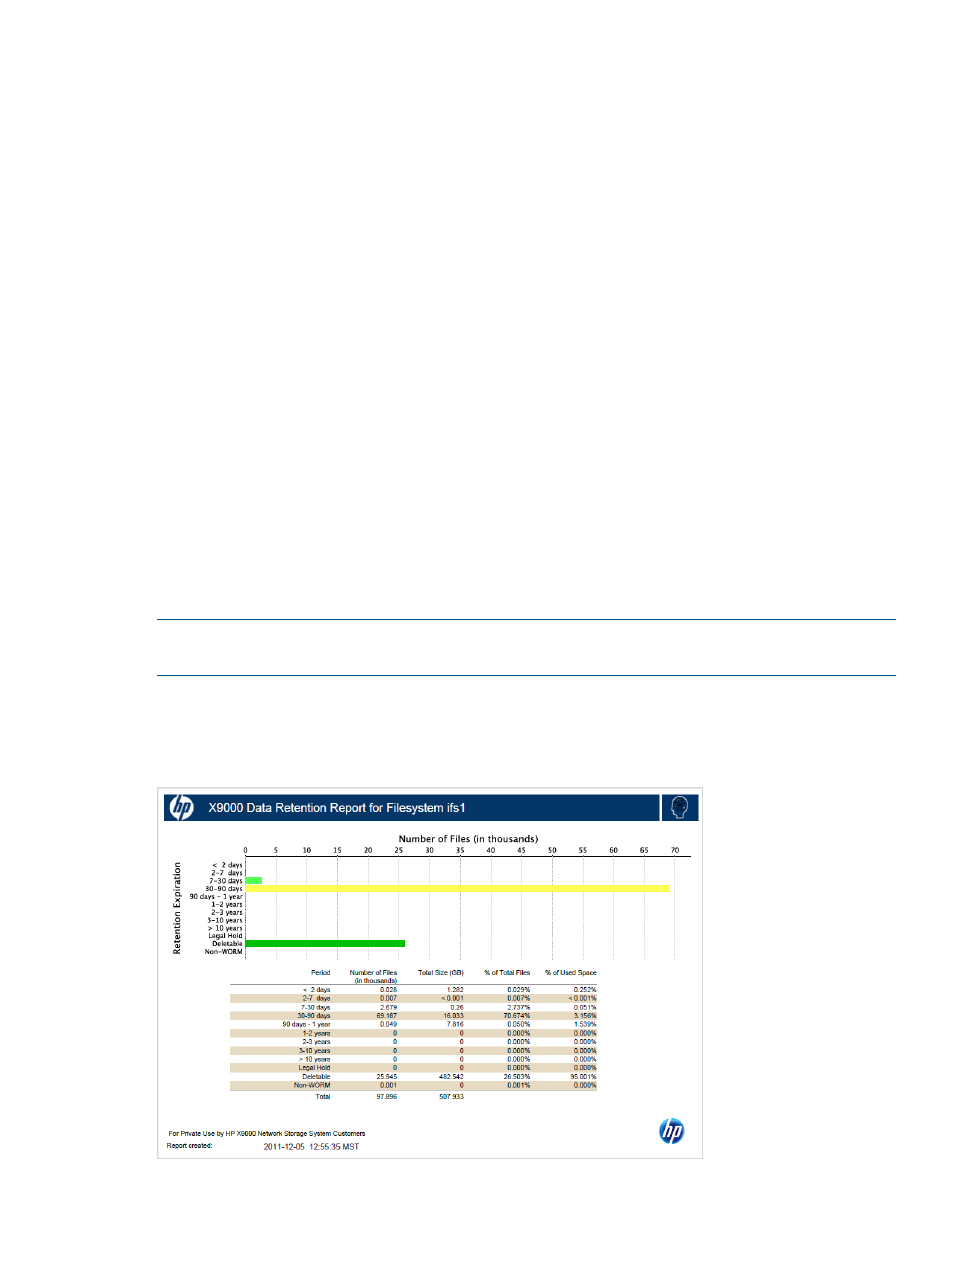
The data retention report lists ranges of retention periods and specifies the number of files in each
range. The Number of Files reported on the graph scales automatically and is reported as individual
files, thousands of files, or millions of files. The following example shows a data retention report
for an entire file system.
Creating data retention reports
157