Badger Meter M-Series M4000 User Manual
Page 26
26
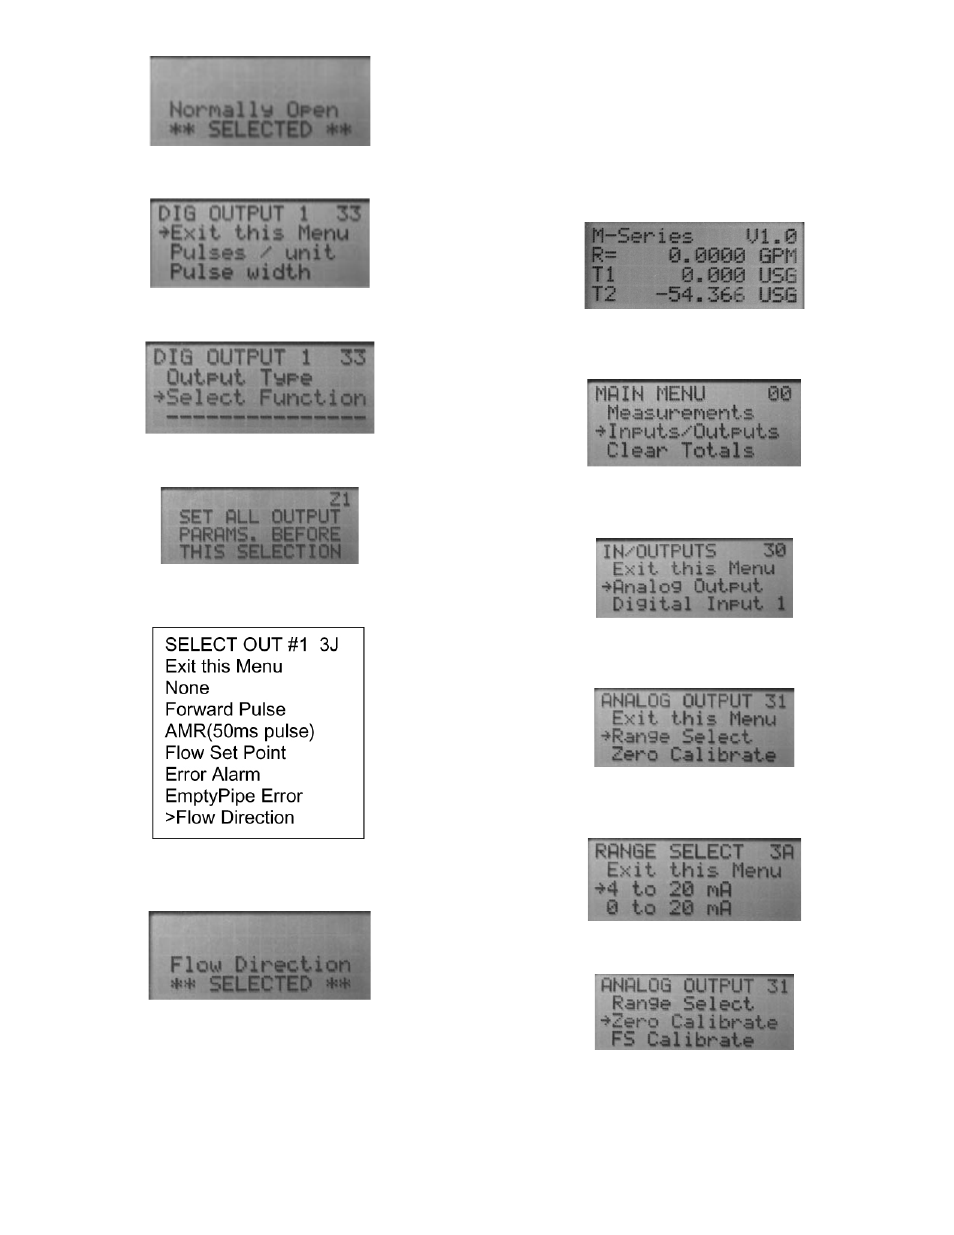
• The screen goes back to DIG OUTPUT 1 33.
4. Pres + six times, or - once to Select Function.
5.When Select Function is selected, screen Z1 appears for
two seconds.
6. It then switches to SELECT OUT #1 3J. Make a selection.
Press E.
7. This type of screen shows for two seconds and then
returns to DIG OUTPUT 1 33.
Whichever selection is made from screen SELECT OUT #1 3J,
the next screen always shows XXXXX ** SELECTED**.
The screen then returns to DIG OUTPUT 1 33 where you will
have to:
1.
Select
Functions
screen
2.
Screen
Z1
appears
3.
Select
another
screen.
Do this until all required select Out #1 35 are
programmed.
There are four Digital Outputs in this program. Perform the
same for all of them, if applicable. (Note that not all output
functions are available on all outputs.)
Analog Output
1. Press E once to move cursor to Main Menu.
2. In the MAIN MENU 00, press + three times to move the
cursor to Inputs/Outputs. Next, press E.
3. At IN/OUTPUTS 30 press + once to place the cursor at
Analog Output. Press E.
4. In ANALOG OUTPUT 31 press + once to move the
cursor to Range Select. Press E.
5. In RANGE SELECT 3A select a range with the + button
and then press E.
6. The screen returns to ANALOG OUTPUT 31. Press + twice
to move the cursor to Zero Calibrate and then press E.
Connect amp meter to mA analog output pins 5 and 6.
7. In ANALOG ZERO 3B make a selection of Decrease or
Increase based on what the amp meter is reading.