Calibration using the concentration option, Calibrating the conductivity sensor – In-Situ Con TROLL PRO Operators Manual (purchased after 10 May 2012) User Manual
Page 28
800-446-7488
28
www.in-situ.com
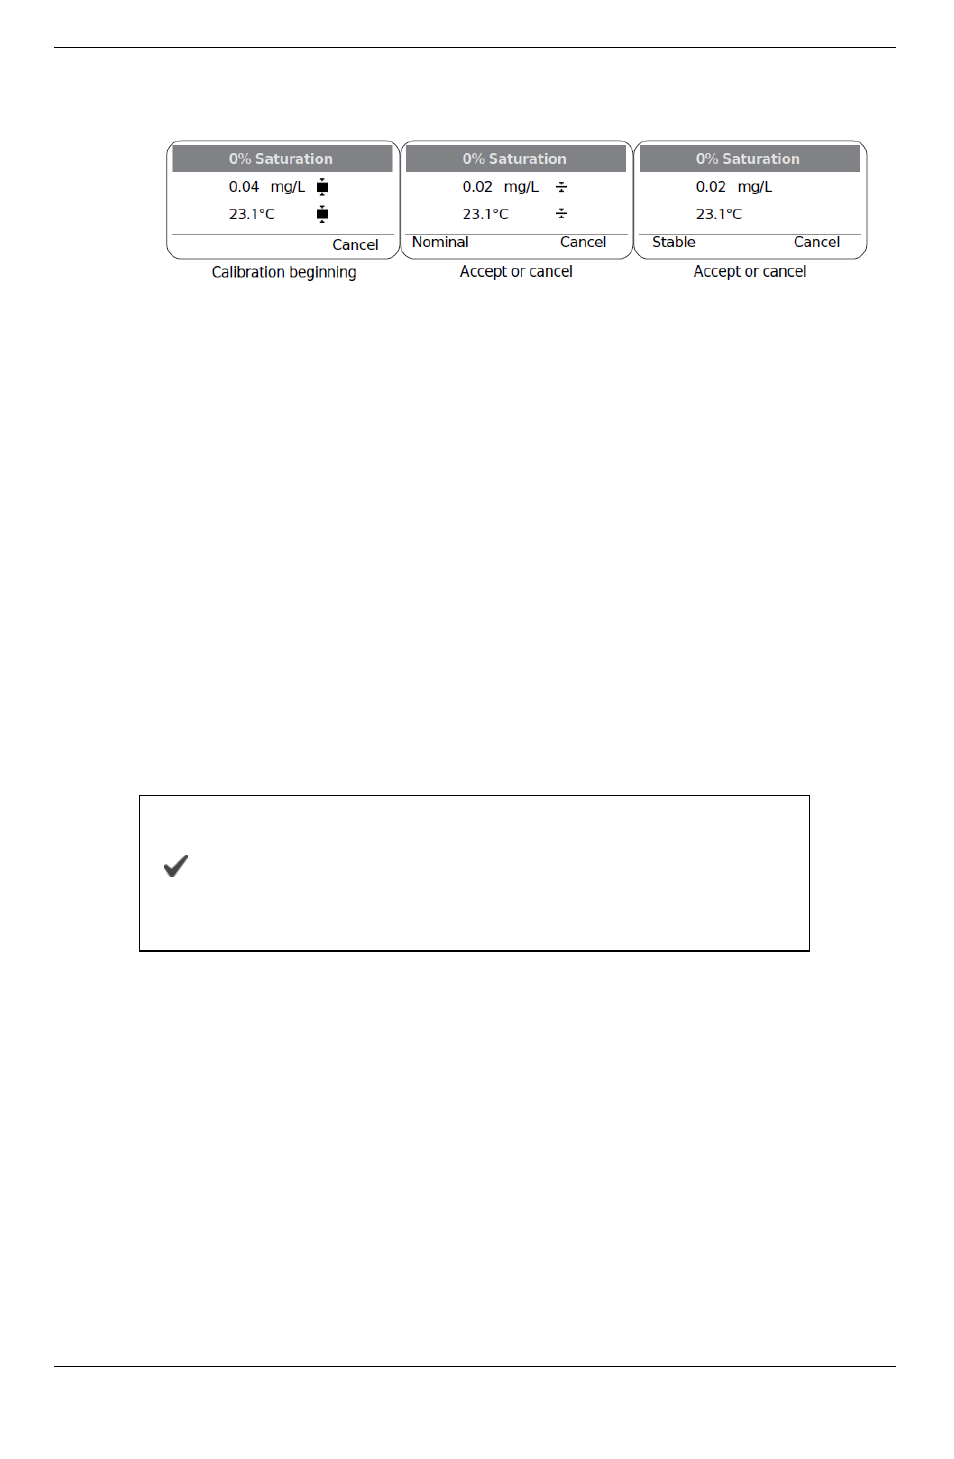
4. You will see the Calibration Beginning icon next to the % Sat value. When the
calibration is complete, choose Stable to accept the calibration or Cancel to return
to the pre-existing calibration.
Figure 5.5 Beginning the 2-point calibration; accepting or canceling the calibration
5. Once calibrated, remove the sensor, and thoroughly rinse to remove any excess
sodium sulfite.
Calibration using the Concentration Option
1. From the Con TROLL PRO main screen, select Menu, Calibrate, Aqua TROLL 400,
RDO, Concentration.
2. With the RDO sensor deployed in the water, take a measurement using your
method of choice.
3. Enter the value from your reference method as the “Standard Value” shown on the
Con TROLL PRO screen. Select Enter.
Calibrating the Conductivity Sensor
The Aqua TROLL 400 Instrument’s factory calibration with NIST-traceable standards
provides a high degree of linearity across the entire operating range of 5 to 100,000
μS/cm. The Aqua TROLL 400 is capable of meeting its published specifications without
requiring additional calibration by the user, as most commercially available standards
can introduce a larger potential measurement error than the instrument’s initial factory
calibration.
A user calibration is recommended only if you must conform to a
standard operating procedure or if the conductivity cell has
undergone physical change (e.g., deposits on conductivity cell
walls that cannot be removed; physical damage to conductivity
cell walls).
1. From the Con TROLL PRO main screen, select Menu, Calibrate, AquaTROLL 400,
Conductivity.
2. Select Calibrate. You are prompted to place the probe in the calibration standard.
Fill the calibration cup with approximately 150 mL of the desired calibration solution.
3. Place the instrument in the calibration standard and allow time for the temperature
to stabilize.
4. While keeping the instrument and calibration cup upright, gently tap the sides of the
cup against your hand, or the edge of a counter, to release air bubbles from the
sensor.
5. Press OK.
6. You will see the Calibration Beginning icon next to the μS/cm value. When the
calibration reaches stability, select Stable to accept the calibration or Cancel to
return to the pre-existing calibration.