Figure 36 gas/units entry – Detcon MCX-32-N4X User Manual
Page 38
Model MCX-32
Model MCX-32 Instruction Manual
Rev.2.3
Page 32 of 49
Reading
The Reading is read directly from the sensor or I/O Module, and cannot be changed.
Gas/Units
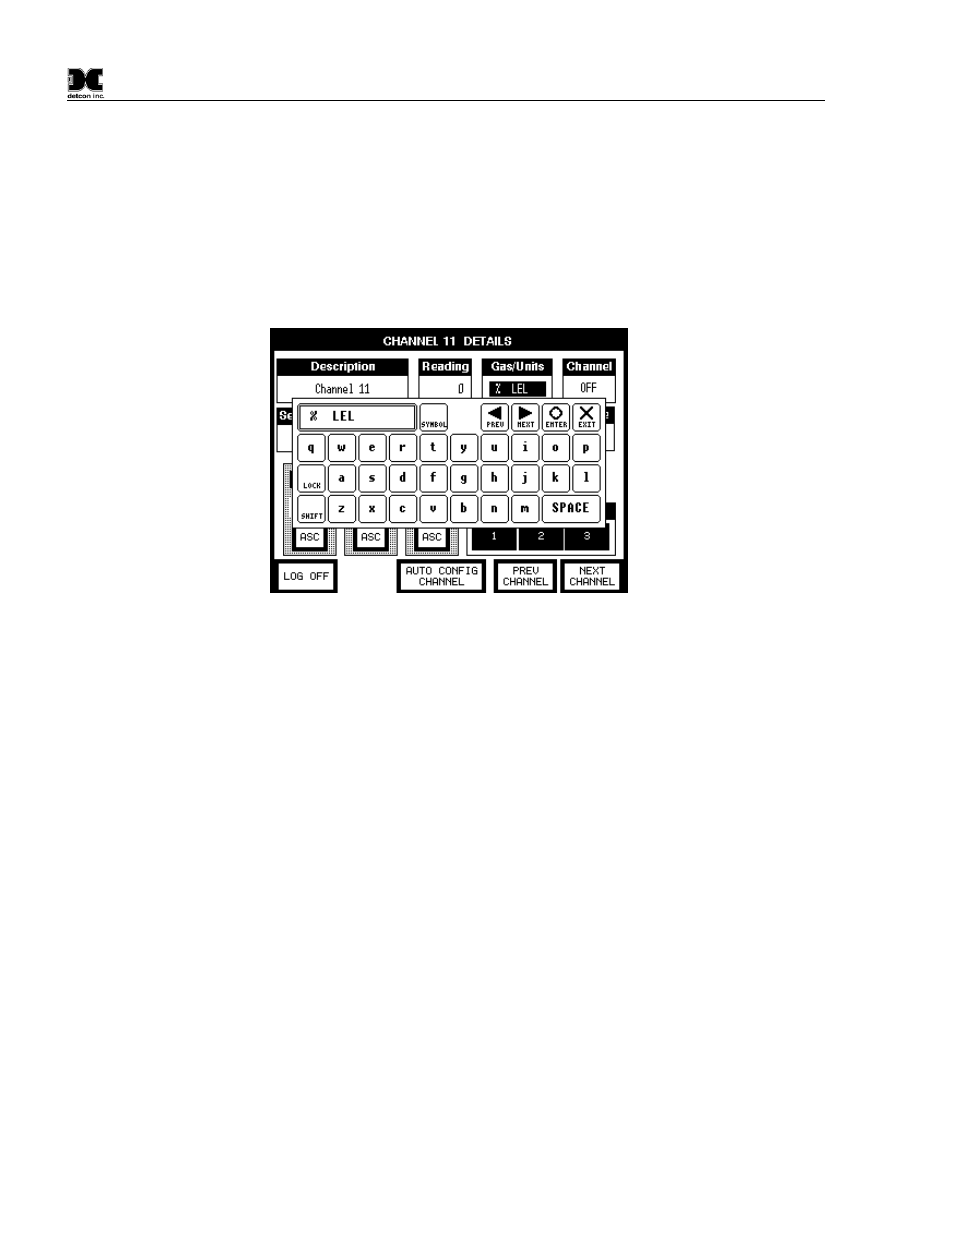
The Gas/Units field should be set accordingly for the sensor attached. For sensors that have been found during
an Auto Configure, this information should be correct. For other types of sensors, this information should be
set manually. To change the information, select the Gas/Units field on the screen. The controller will respond
with a screen input keyboard. Enter the correct units and gas type for the sensor connected, and press “enter”
to accept the value. This value is an alphanumeric label, and is used only for identification of the type of gas
being detected. This information should match the sensor that is connected to the channel.
Figure 36 Gas/Units Entry
Channel (ON/OFF)
The Channel field is used to turn the channel ‘ON’ or ‘OFF’. If the Channel field is ‘OFF’, the controller will
not attempt to communicate with a sensor or I/O Module connected to the channel. This is useful if the sensor
is not working properly and needs to be removed from being polled. Note that the channel is not actually
removed from the configuration, but is only disabled.
Turning the channel back ‘ON’ will restore the
configuration information that was previously stored.
Sensor Life
The Sensor Life field cannot be changed by the user. This field will display ‘N/A’ for sensors connected
through DA-4 or DI-4 modules. Detcon 100, 600D and 700 series sensors will update this field automatically
via Modbus™. (This field will contain information only if a 100, 600D or 700 series sensor is attached.)
Range
The Range cannot be changed if the sensor information was obtained during the Auto Configure System or the
Auto Config Channel was used to obtain sensor information. If the sensor is connected through a DA-4 I/O
Module, the range must be entered for proper operation. To enter the correct range, select the range field on
the screen. The controller will respond with a screen input keypad. Use this keypad to enter the correct range
for the sensor that is connected, and press “enter” to accept the value.