Seed Hawk 30 SERIES 2015 User Manual
Page 37
SEED HAWK
®
2015 30 SERIES OPERATOR’S MANUAL – DOMESTIC
32
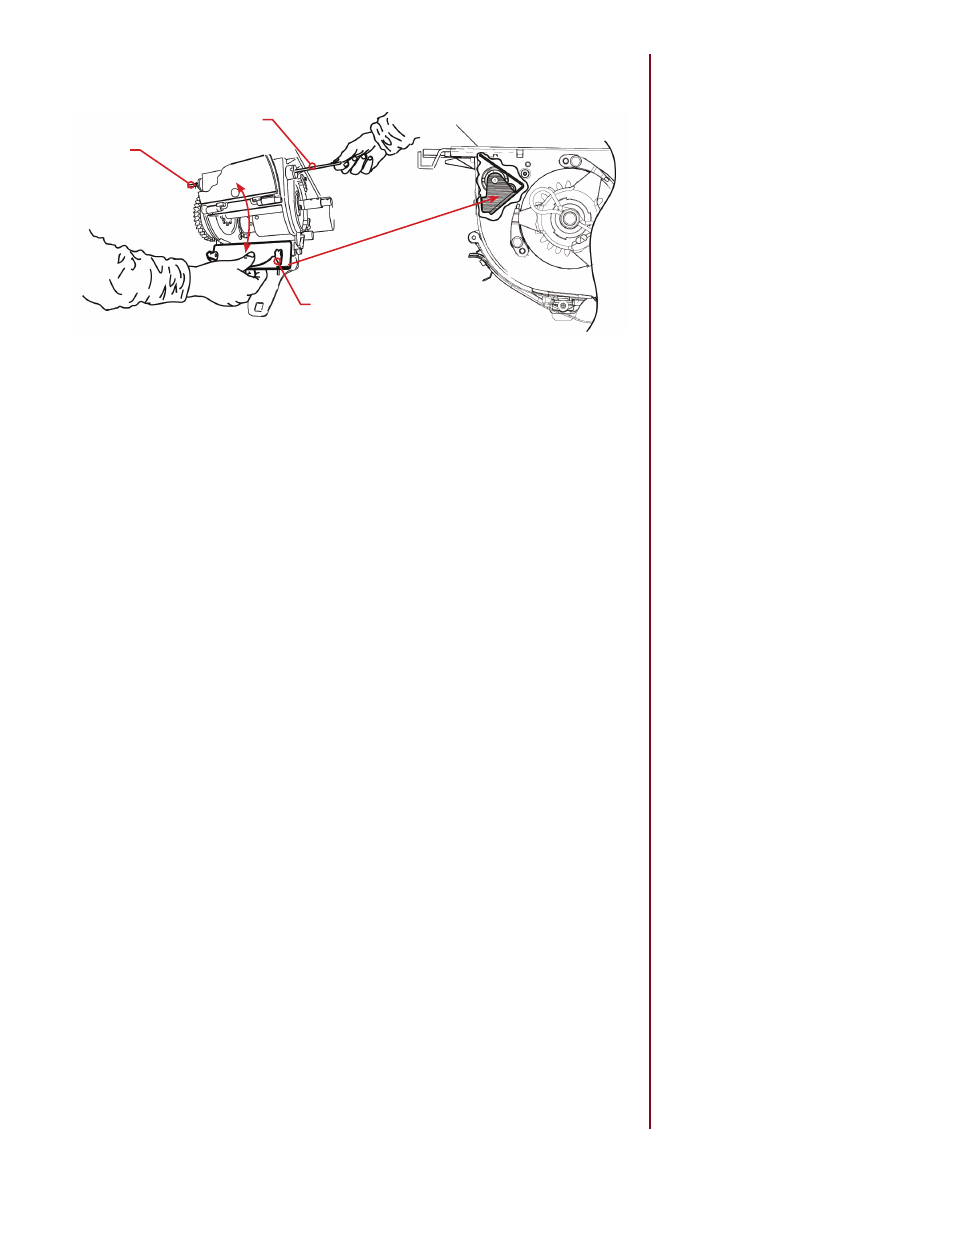
5. Pull out the latch clamp (D) and install or remove the seed control plate (E).
NOTE: When installing, the seed control plate (E), it is inserted with the
straight, thin side at the top and the locking hooks towards the bottom/rear.
Insert the plate upwards and towards the rear until it comes into contact with
the edge and the mounting holes are in the correct position for installing the
latch clamp (D).
6. Fit the latch clamp (D) and spring (C).
NOTE: The latch clamp must be fitted on the correct side so that the cover(A)
can be fitted.
7. Install the cover (A).
8. Remove the desired rotor. Refer to Section 4.9 on rotor replacement.
E
C
D
4. Grip the seed control plate (E).
3. Remove the spring (C) from the latch clamp (D).