LT Security LTN7616-HT (Hybrid) User Manual
Page 32
User Manual of Digital Video Recorder
31
3.
Click
to save the settings and click
to exit the interface.
Explanation of the buttons:
Get the latest status of the IP cameras.
Delete all the IP cameras.
Add all the detected IP cameras.
Configuring the customized protocols
Purpose:
To connect the network cameras which are not configured with the standard protocols, you can configure the
customized protocols for them.
Steps:
1.
Click
and then click
to enter the protocol management interface.
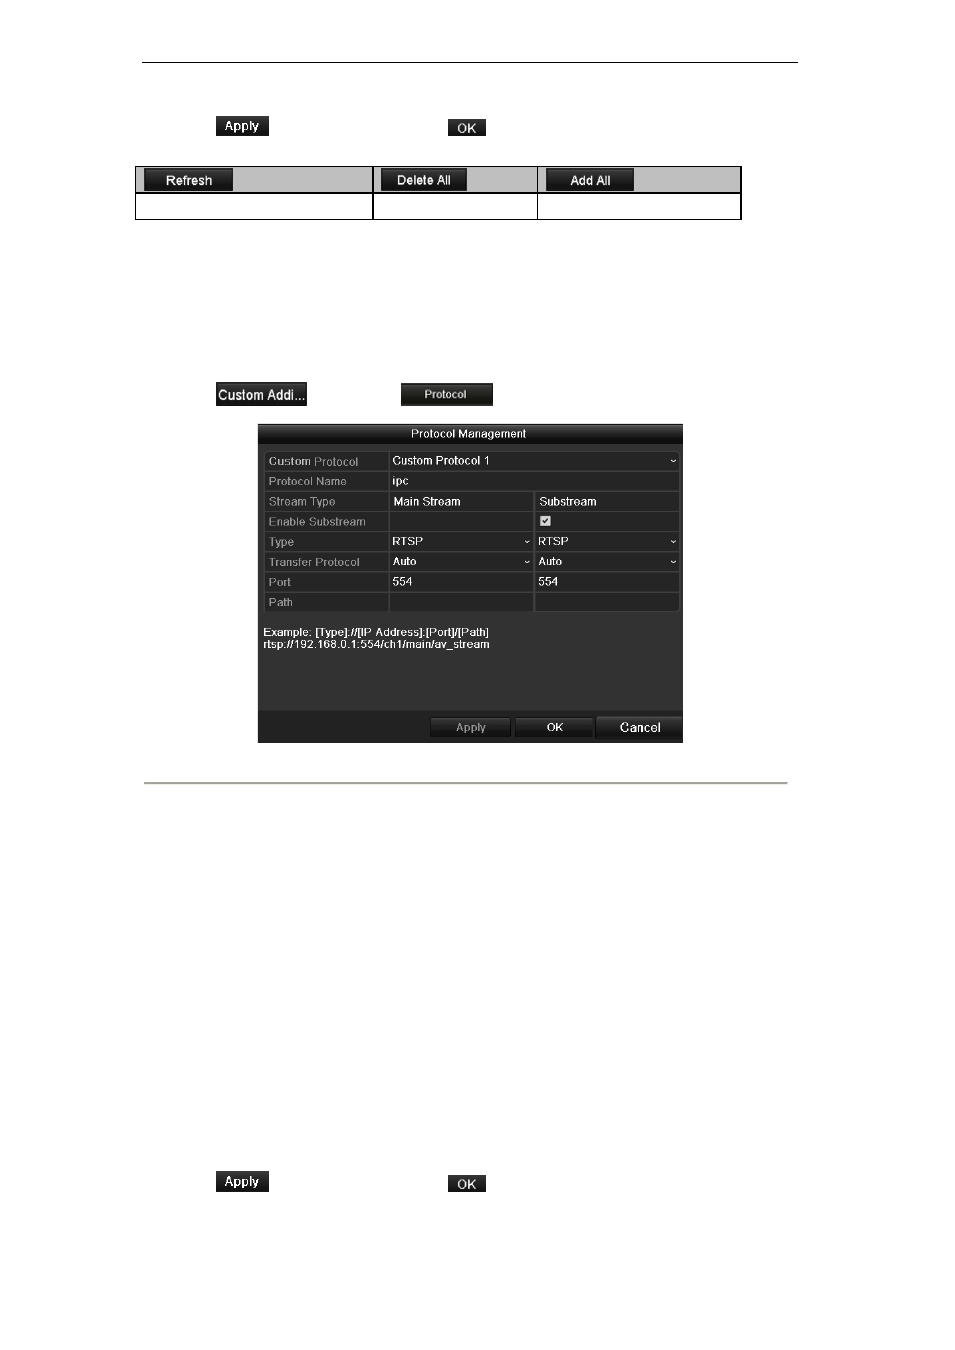
Figure 2. 19 Protocol Management Interface
2.
There are 16 customized protocols provided in the system. You can select a Custom Protocol and
configure its corresponding parameters.
Note:
Before customizing the protocol for the network camera, you have to contact the manufacturer of
the network camera to consult about the URL (uniform resource locator) for getting main stream and
sub-stream.
The format of the URL is: [Type]://[IP Address of the network camera]:[Port]/[Path].
Example: rtsp://192.168.1.55:554/ch1/main/av_stream.
Protocol Name: Edit the name for the custom protocol.
Enable Substream: If the network camera does not support sub-stream or the sub-stream is not needed,
leave the checkbox empty.
Type: The network camera adopting custom protocol must support getting stream through standard
RTSP.
Transfer Protocol: Select the transfer protocol for the custom protocol.
Port: Set the port No. for the custom protocol.
Path: Set the resource path for the custom protocol. E.g., ch1/main/av_stream.
3.
Click
to save the settings and click
to finish customizing the protocol.
4.
After successfully adding the custom protocols, you can see the protocol name listed in the dropdown list,