Adding an n_port to a port group, Deleting an n_port from a port group, Removing a port group – Brocade Access Gateway Administrator's Guide (Supporting Fabric OS v7.3.0) User Manual
Page 56
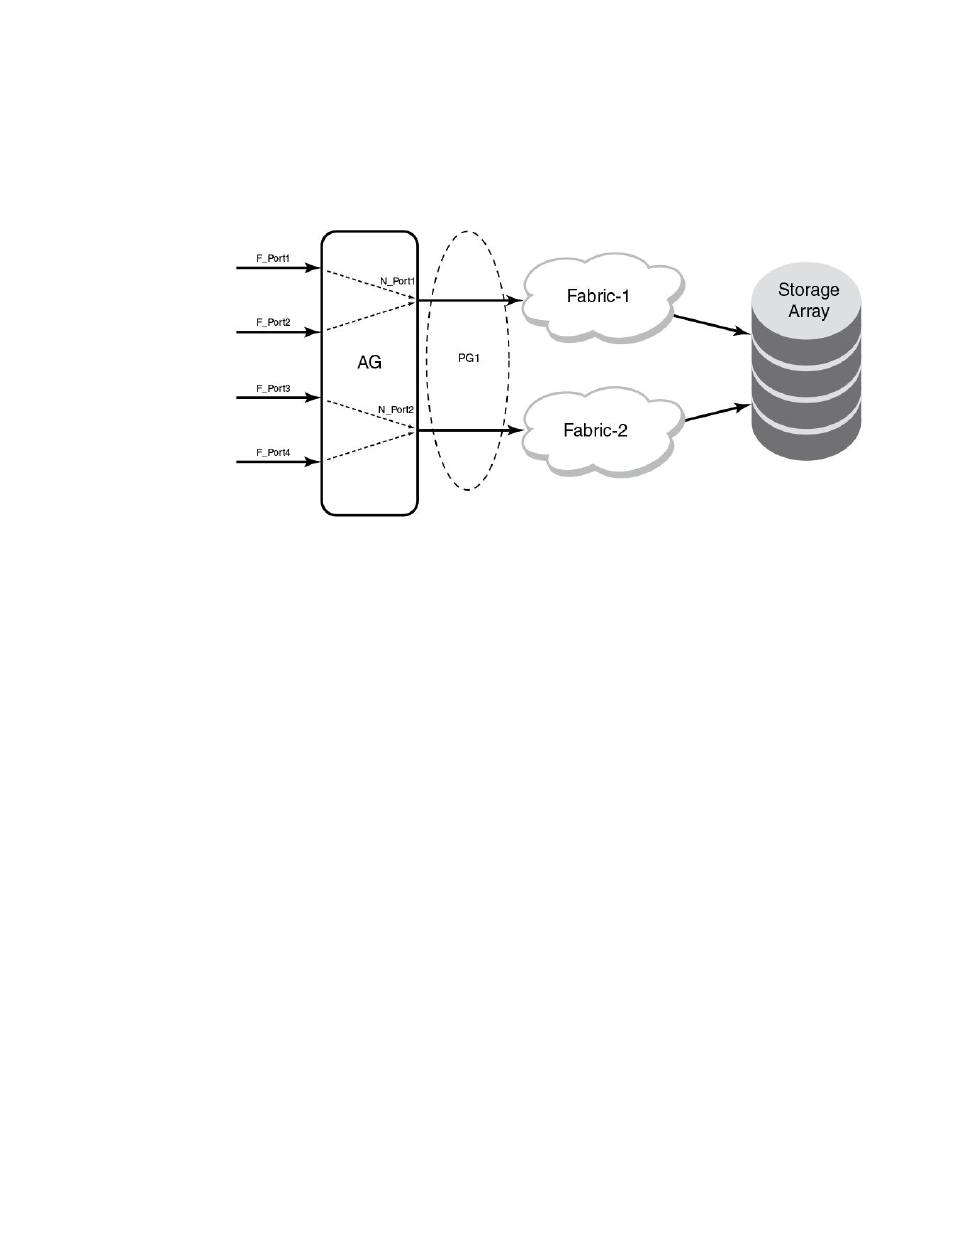
connected to the redundant fabric into a single port group. It is recommended to have paths fail over to
the redundant fabric when the primary fabric goes down.
FIGURE 10 Port group 1 (PG1) setup
Adding an N_Port to a port group
1.
Connect to the switch and log in using an account assigned to the admin role.
2.
Enter the ag --pgadd command with the appropriate options to add an N_Port to a specific port
group. In the following example, N_Port 14 is added to port group 3.
Note that if you add more than one N_Port, you must separate them with a semicolon.
switch:admin> ag --pgadd 3 14
N_Port[s] are added to the port group 3
Deleting an N_Port from a port group
Before deleting an N_Port, all F_Ports mapped to the N_Port should be remapped before the N_Port
is deleted from a port group.
1.
Connect to the switch and log in using an account assigned to the admin role.
2.
Enter the ag --pgdel command with the appropriate options to delete an N_Port from a specific
port group. In the following example, N_Port 13 is removed from port group 3.
switch:admin> ag --pgdel 3 13
N_Port[s] are deleted from port group 3
3.
Enter the ag --pgshow command to verify the N_Port was deleted from the specified port group.
Removing a port group
1.
Connect to the switch and log in using an account assigned to the admin role.
2.
Enter the ag --pgremove command with the appropriate options to remove a port group. In the
following example, port group 3 is removed.
switch:admin> ag --pgremove 3
Adding an N_Port to a port group
54
Access Gateway Administrator's Guide
53-1003126-01