Wing mower installation, Figure 14 figure 13, Figure 15 figure 16 – Alamo Interstater TS-100A User Manual
Page 49: Figure 17
© 2004 Alamo Group Inc.
Page 7 - 5
Interstater (NH TS-100A , 115A , 125A & 135A Asy. Manual) 06/04
Wing Mower Installation
Figure 14
Figure 13
LH Wing Shown
From Rear
LH Wing Shown
From Rear
Wire Harness to
Motor
Wire Harness to
Magnetic Swithc
Figure 15
Figure 16
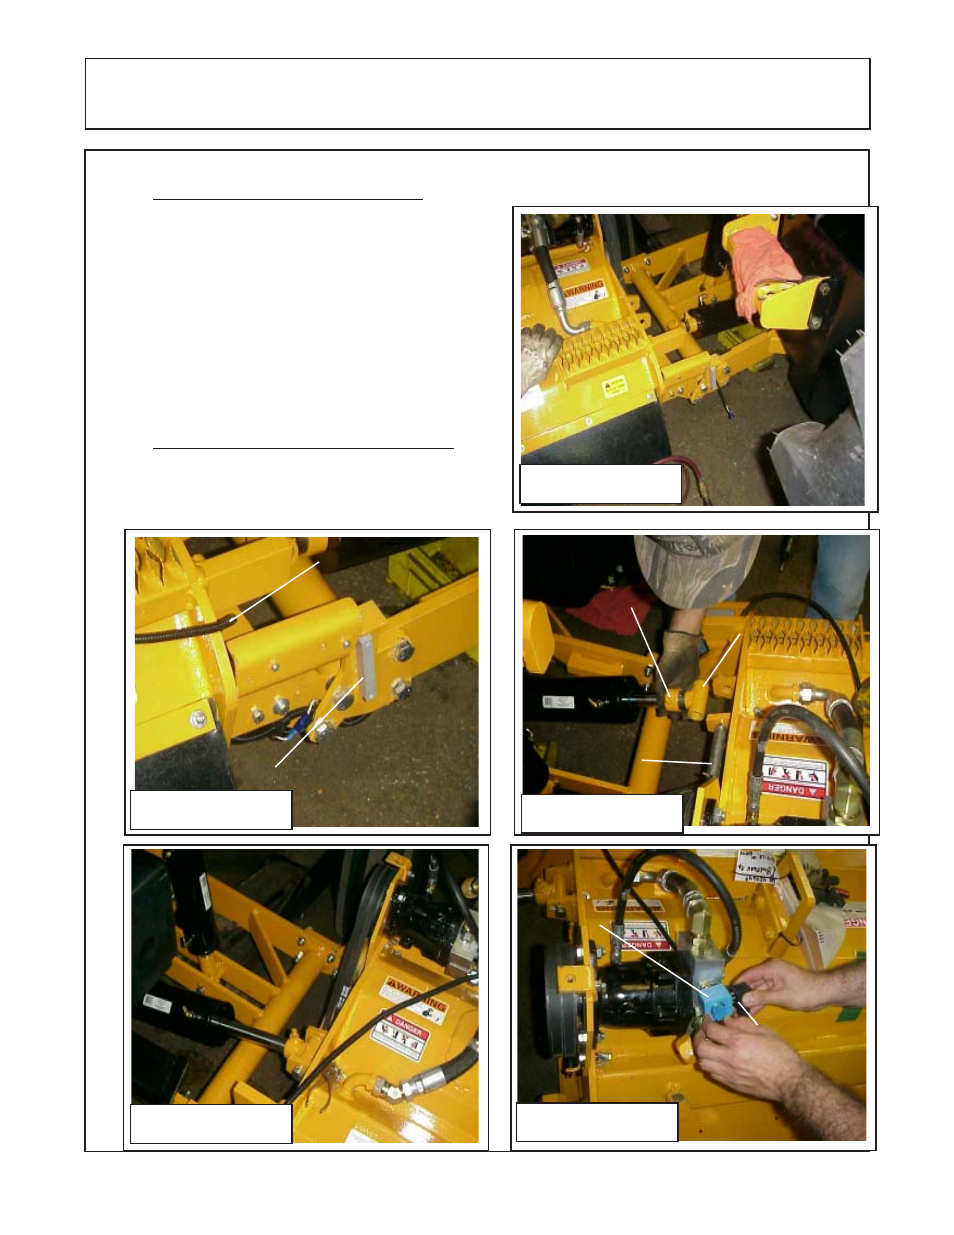
Wing Cut Off Switch: (continued)
10.
Connect Tilt Cylinder to Mower Deck. The Tilt
Cylinder connects to the mower head (See Figure 15
& 16). Note you will need to remove the belt guard to
connect this cylinder so you will have room for the
cylinder mounting pin to be installed (See Figure 16).
When connecting the cylinder the grease fitting on the
rod end must face up, the locking collar on the cylinder
must face up and be tightened on rod end. The RH
Wing and the LH Wing will mount the same. Install the
RH wing the same as the LH wing . Reinstall Belt
Guard.
11.
Install Wire Harness to Motor Solenoid. The
thumb nut on top of the solenoid will allow the solenoid
to be turned to different direction if needed. (See
Figure 17 & 21)
Cylinder Pin
Cylinder Rod
Clevis with grease
fitting up
Clevis Locking
Collar
LH Wing Shown From Front
RH Wing Shown From Rear
Figure 17
Soleniod
Wire Harness