Installation is now complete, Important, Step twelve step thirteen – WEATHER GUARD 1200 User Manual
Page 7
Page 7 of 8
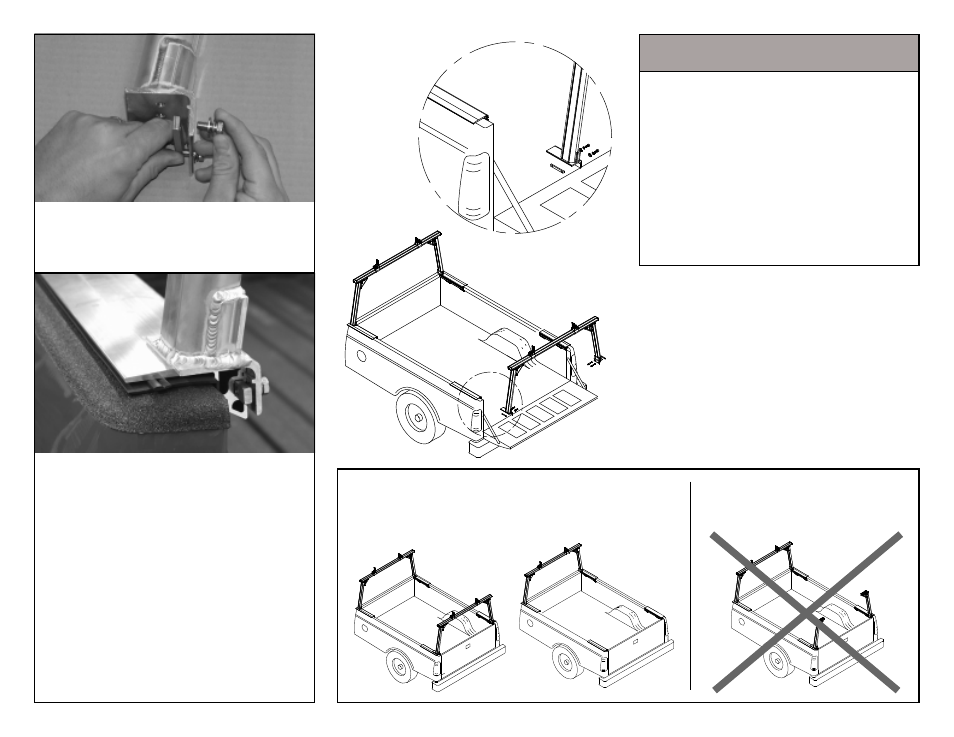
With the tailgate open, slide the rear cross
member assembly, from Step Six, into the
mounting rail channels with the logo facing
towards the rear. The driver side and pas-
senger side need to slide into the mount-
ing rail at the same time in order to avoid
binding. Legs can be placed at any loca-
tion along the mounting rail. Using a
torque wrench, tighten the four 5/16" hex
head bolts to 15 foot pounds.
Disassemble the mounting bar, Part L, from
the rear assembly hardware kit and reas-
semble on the rear leg assembly, from Step
Six. Repeat process for other rear leg.
STEP
TWELVE
STEP
THIRTEEN
PART L
NOTE: Due to the taper of some truck
beds, it may be necessary to shorten the
distance between the legs as you slide the
assembly towards the front of the vehicle.
Before operating vehicle check to en-
sure the 3/8" bolts in the clamp as-
sembly, Part J, are set to a torque
rating of 10 foot pounds and all the
5/16" fasteners are set to a torque rat-
ing of 15 foot pounds.
At the end of the first week of use
check all fasteners for proper tight-
ness and then every three months
there after.
IMPORTANT!
ONLY OPERATE VEHICLE WITH OR WITHOUT
ENTIRE REAR CROSS MEMBER ASSEMBLY.
DO NOT OPERATE VEHICLE
WITH OUT THE REAR
CROSS MEMBER
Installation is
now complete.