Important, Step seven step eight, Installation is now complete – WEATHER GUARD 1210 User Manual
Page 6
Page 6 of 6
STEP
SEVEN
STEP EIGHT
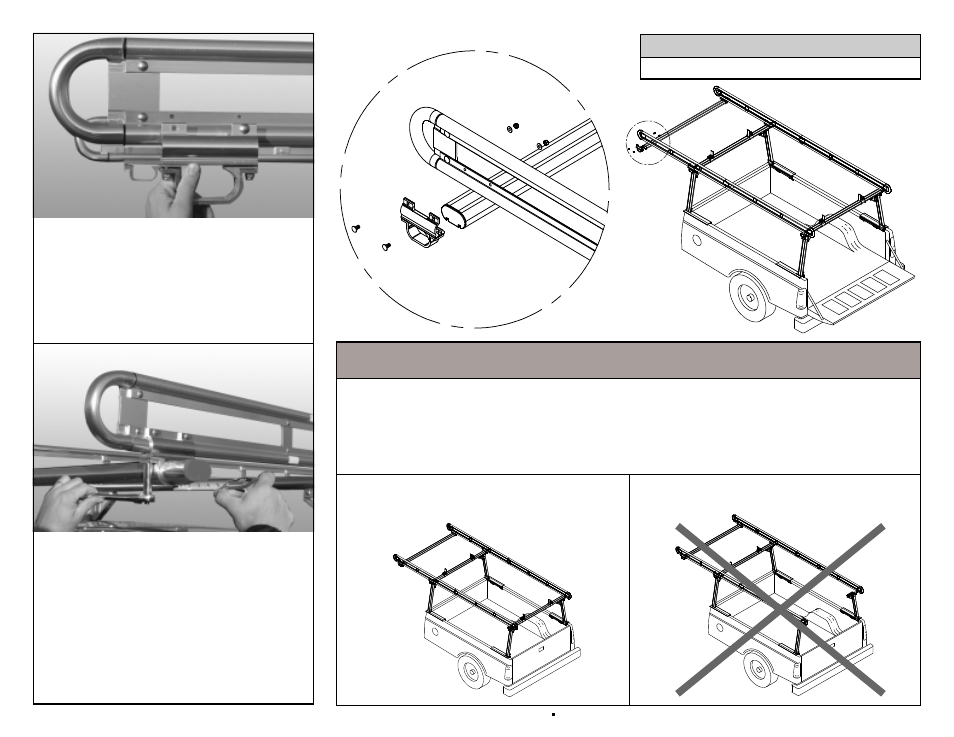
Insert the front cross member, Part X, into
the front rail mounting clamps, Part W, in-
stalled in Step Seven. Adjust cross mem-
ber to allow equal distance on both sides.
Tighten the mounting clamps to the cross
member using the 5/16-18 hardware pre-
installed on the mounting clamp to 15 foot
pounds of torque.
Model 1205 owners please read note
on bottom left hand corner of page 2.
Using the predrilled holes on the drivers
side rail install the universal front side rail
mounting clamp, Part W, using the 1/4-20
X 3/4" carriage bolts, 1/4" washers, and
1/4-20 stop nuts, from the rail mounting
hardware kit. Repeat the process for the
passenger side rail.
Before operating vehicle check to ensure the 5/16" fasteners are set to a torque
rating of 15 foot pounds. 1/4" fasteners should be snug. DO NOT OVERTIGHTEN
1/4" FASTENERS.
At the end of the first week of use check all fasteners for proper tightness and then
every three months there after.
IMPORTANT!
ONLY OPERATE VEHICLE WITH
REAR CROSS MEMBER IN PLACE
DO NOT OPERATE VEHICLE WITH
REAR CROSS MEMBER REMOVED
Installation is
now complete.
1/4-20 X 3/4"
Carriage Bolts
1/4-20 Stop Nuts
1/4" Flat Washers
Do not overtighten 1/4" fasteners.
IMPORTANT!
PART W
PART X