Setting application torque – Warner Electric Dairy Cap Chuck User Manual
Page 2
2 Warner Electric • 800-825-9050
P-2021
Setting Application Torque
1. Determine initial clutch setting from torque chart
below.
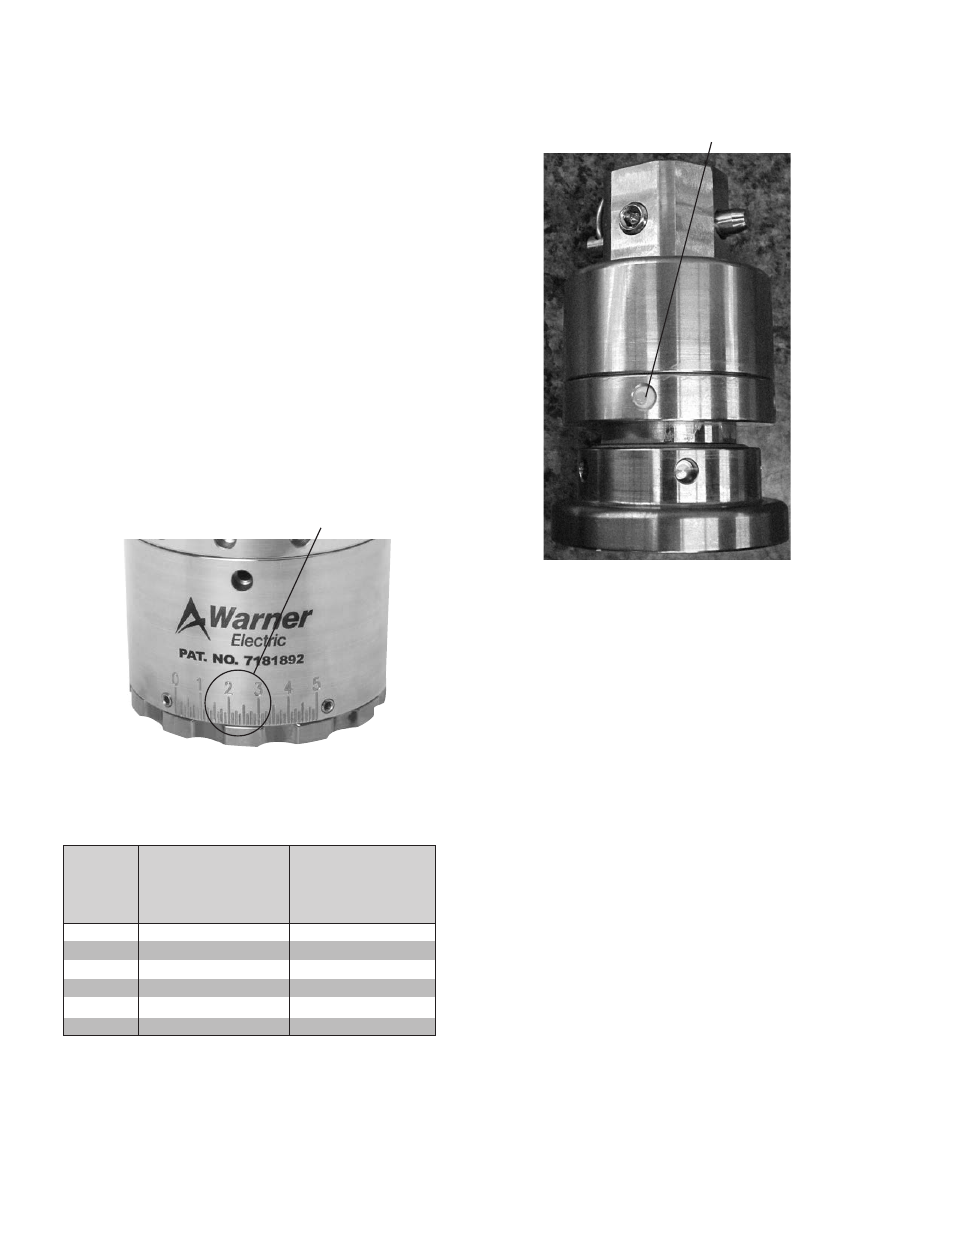
2. Loosen the torque adjustment screws. Rotate the
adjustment ring using the face spanner wrench to
the desired setting and then retighten the torque
adjustment screws. Do not use the set screw in
the slot on the backside of the housing for torque
adjustment. Tighten set screws to 8-10 lb-in.
Over tightening is not necessary and will strip the
screws or possibly damage the housing body.
3. For optimum results, check setting with a torque
wrench and FIX-0115* or FIX-0138.
*For use with DBJ closure
Application
Torque Setting
0.00
3.00
11.00
1.00
4.00
12.00
2.00
8.00
17.00
3.00
13.00
22.00
4.00
16.00
26.00
5.00
18.00
28.00
Application Torque Setting Charts
Clutch
Setting
Application Torque
Standard Torque
Units (lb-in)
Application Torque
High Torque Units
(lb-in)
Figure 1
Recommended Maintenance
For CHF38-035 Chuck
Grease Port
Disassemble, clean, and replace all wearing
parts in the headset every 7000 hours of
machine run time.
- See rebuild instructions for detailed information on
disassembly and assembly of Warner headsets.
- Dependent upon machine speed and washdown
procedure, some environments may require more
frequent rebuilds.
- CHF38-035 chucks cannot be submerged in
water. Proper cleaning procedures for the chucks
include wipe down operations or foaming. If
necessary chucks can be taken apart, cleaned
and rebuilt.
- Chucks can be greased if needed using lubrication
hole in chuck and needle fitting on grease gun.
Do not over grease as this will cause the chucks to
stick.
Note: CHF38-037 and later model chucks may be
submerged in water or COP/CIP cleaners. No
re-greasing is required.
Figure 2