Operation and service procedures, Slide in models) – Amana RSS User Manual
Page 28
OPERATION AND SERVICE PROCEDURES
(SLIDE IN MODELS)
27
RC231002 Rev. 3
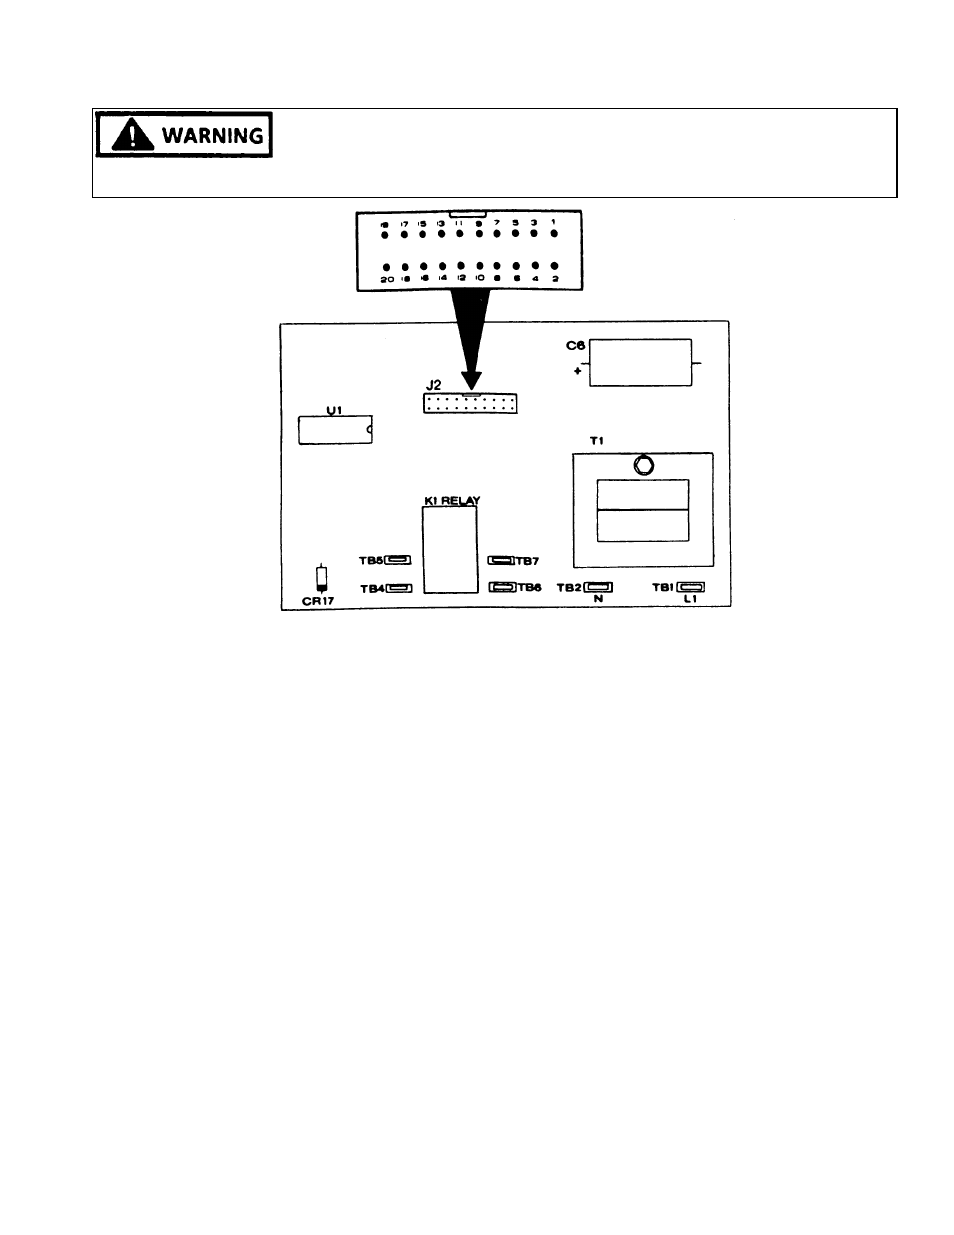
TO AVOID THE RISK OF ELECTRIC SHOCK, PERSONAL INJURY OR DEATH DISCONNECT POWER
BEFORE SERVICING, UNLESS TESTING REQUIRES IT.
along with the oven indicator in the center of the
display and "AUTO" on the left of the display.
When the stop time is reached, the TB4 - TB5 contact
should open (infinite ohms), the oven indicator in the
center of the display turns off, and an alarm will sound
approximately ten (10) seconds. "AUTO" will con-
tinue to flash ON and OFF to designate that the Clock/
Timer was programmed for a timing function. Press
the "CANCEL/CLOCK" button to turn off the flashing
"AUTO" display.
7.
Connnect the ohmmeter leads to terminals TB6 and
TB7 and repeat Steps 4 - 6 to test the other K1 relay
contact.
CLOCK P.C. BOARD VOLTAGE TESTS
Extreme caution must be taken when performing any live
voltage tests to avoid the possibility of electrical shock or
damage to the range components and/or testing equip-
ment.
1.
Shut off power to the range and disconnect the wire
leads from the P.C. board terminals L1 (TB1) and N
(TB2) to check the input voltage. Using a voltmeter
Figure 57 - Clock/Timer P.C. Board
5.
Set the Cook/Clean time for one (1) minute by press-
ing the "COOK/CLEAN TIME" button ("0:00" will be
displayed) and then pressing the "UP" button one
time ("0:01" should be displayed). After a short delay
the TB4 - TB5 contact should close (zero ohms),
"AUTO" and the oven indicator symbol should appear
on the left and center of the display, and the Time-of-
Day will appear on the digital display. When the one
(1) minute Cook/Clean time elapses, the TB4 - TB5
contact should open (infinite ohms), an alarm will
sound for approximately ten (10) seconds and the
oven indicator symbol in the center of the display will
turn off. "AUTO" will continue to blink ON and OFF
to indicate that the Clock/Timer was programmed for
a timed operation. Press the "CANCEL/CLOCK"
button to turn off the blinking "AUTO" display.
6.
Press the "STOP TIME" button and enter the stop
time for two (2) minutes past the time of day. EX-
AMPLE: Set the Time-of-Day to 12:00.
Press the "STOP TIME" button (the display will
continue to show the Time-of-Day), then press the
"UP" button until "12:02" is displayed.
After a short delay, contact TB4 - TB5 should close
(continuity) and the display will show the Time-of-Day