For mounting on a stud wall or concrete wall, Step 3: mount the arm assembly – Staub Electronics SM-CS-ART2-XL STRONG - CONTRACTOR SERIES ARTICULATING MOUNT FOR 47 - 90 FLAT PANEL TVS User Manual
Page 4
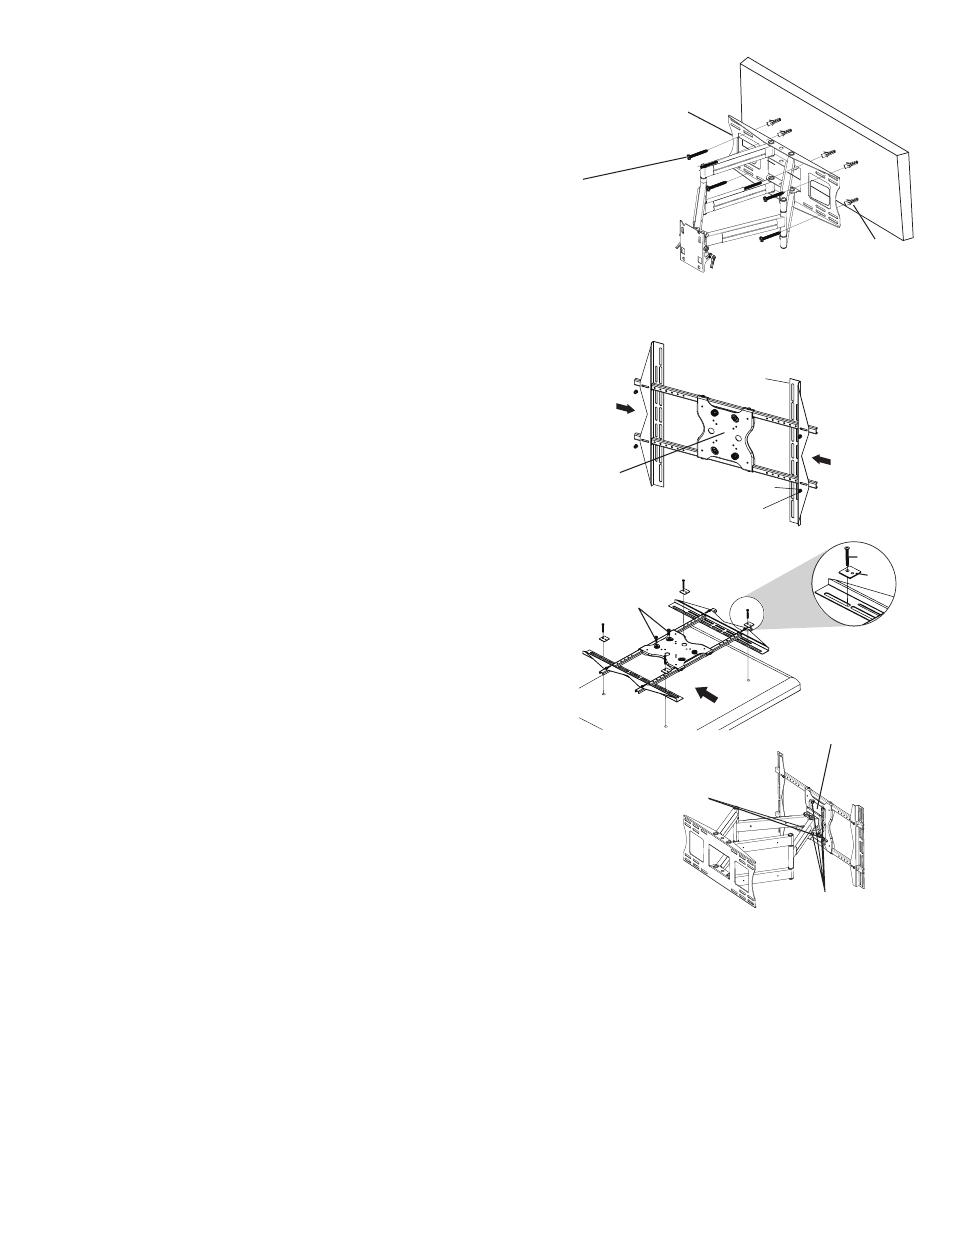
Step 3: Mount the Arm Assembly
For Mounting on a Stud Wall or Concrete Wall
Insert flange bolts through the wall plate into the studs or the wall
anchors. When Installing on concrete, 6 bolts are needed. Insert four
through top set of holes; two on the far holes, and two near the center.
Insert the remaining two bolts on the bottom set of holes.
Step 4 : Mounting the Assembled Adapter
Plate to Screen
Modify the Assembled Adapter Plate
Slide the Adapter Brackets onto Assembled Adapter Plate
rods. Place the assembled Adapter Plate on the back of the
display with one Adapter Bracket aligned with a set of vertical
mounting holes. Then, slide the other Adapter Bracket in or
out until it aligns with the second set of vertical mounting
holes. The Adapter Plate should be horizontally centered on the
back of the flat panel display.
Use four M6x12 screws and four metal washers and tighten
Adapter Brackets to Adapter Plate rods with a Phillips Head Screw
Driver.
NOTE: There are eight positions for flexibility. Move the
Adapter Brackets to desired location. Adapter Brackets can
be flipped around (if required).
Attach the Adapter Brackets using four mounting screws and
four square washers (size will depend on thread pattern on flat
panel being installed). Once aligned, tighten all screws down
with a Phillips Head Screw Driver.
Insert two M8 Hex head screws on the top of the Adapter Plate
with the M6 Allen Wrench.
DO NOT IMMEDIATELY TIGHTEN
DOWN!
M8 Hex head
screws w/washers
Back of
Display
Mounting
Screw
Square
Washer
Adapter
Plate
Adapter
Bracket
Metal Washer
(6 x 13 x 1.2)
M6 x 12
Screw
PG 3
Mounting
Head
Tilt Levers
M8 Hex head
screws w/washers
wall plate
CONCRE
TE W
ALL
wall anchor
flange bolt