Pg 2 of 3 – Reese 59773 ROOF RACK ACCESSORY User Manual
Page 2
PART No:
CARRYING CAPACITY:
Pg 2 of 3
Printed in China
Step 3: Installing Cross Bars to the vehicle with Track Mounting System. (Continued)
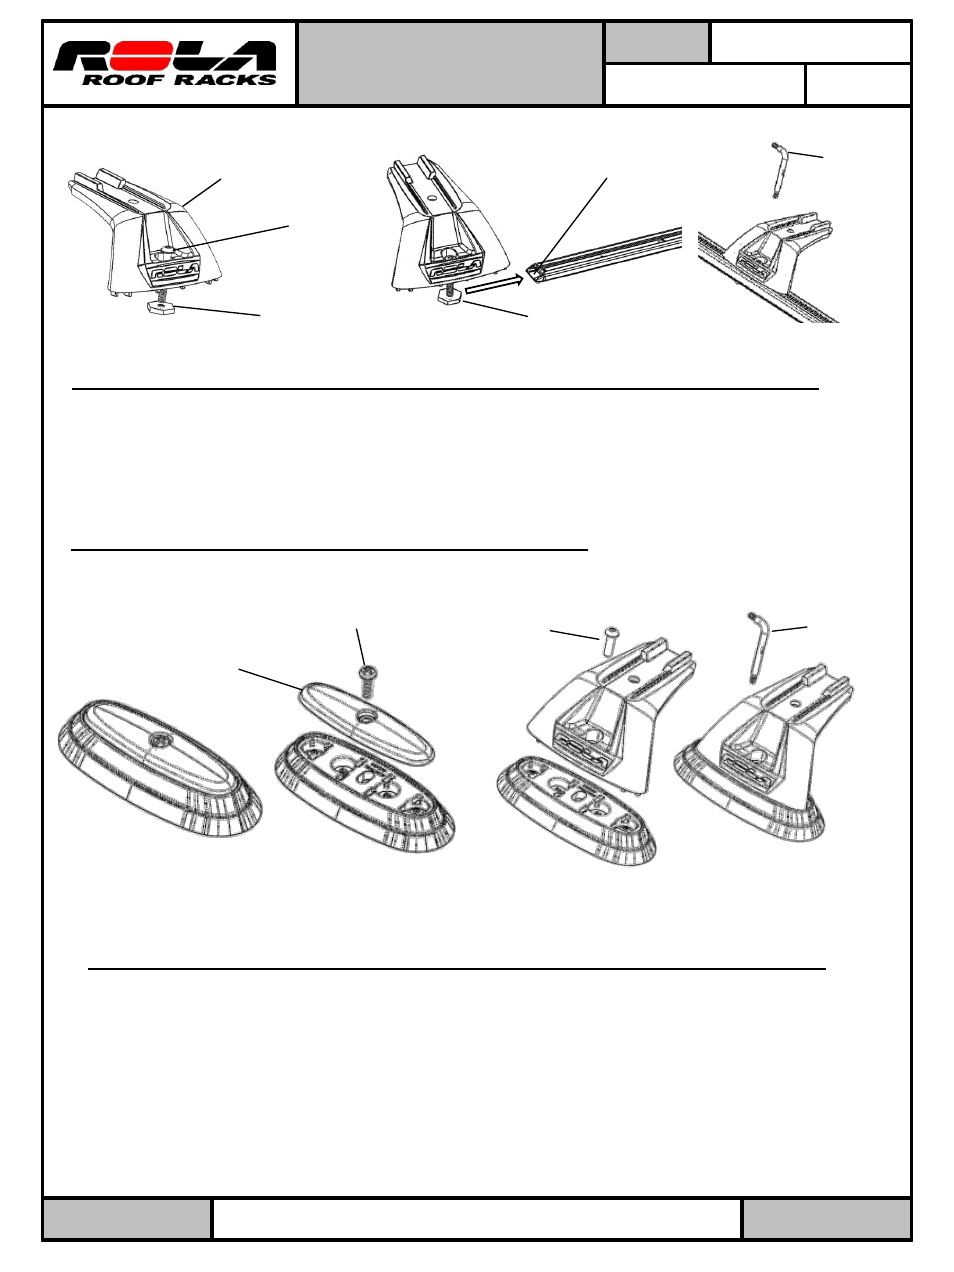
A. Place an End Support and the M6 Hex Nut Brass into the open end of the Track (Fig 4.)
Ensure that the Brass Nut is engaged in the channel. Position it along the rail with the
logo facing out. Turn the bolt approx 2-3 turns with the L Wrench security key (Fig 5).
Do not tighten yet, Repeat for the other 3 End Supports.
B. Go to step 6 to continue installing cross bar.
M6x16 Bolt
M6 Hex Nut
Brass
End Support
Fig. 3
Open end of Track
Fig. 4
Fitting Instructions
APE (Anchor Point Extended)
Cross Bar Kits for Track & Direct
Mounting Systems
59772, 59773,
59774
Fig. 5
L Wrench-
security key
Step 5: Installing Cross Bars to the vehicle with Direct Mounting System. (Fig. 6)
A. Using a Philips head screw driver remove the top screw and cover from mounting
block. Covers will not be replaced while the cross bars are on the vehicle. Store
the Covers and Bolts for later replacement when cross bars are removed. (Fig. 7)
B. Place End Support on mounting block with the logo facing out. Install the M6x24
bolt through End Support and turn the bolt approx 2-3 turns with the L wrench
security key. (Fig. 8-9) Do not tighten yet, repeat for other 3 End Supports.
C. Go to step 6 to continue installing cross bar.
M6- Bolt
Philips head
Cover
M6x24 Bolt
L wrench-
security key
Fig. 6
Fig. 7
Fig. 8
Fig. 9
59772-3-4N REV 4-24-13
Step 4: Installing Cross Bars on a Direct Mounting System.
A.
Locate hardware bag labeled “Direct Mount Hardware”.
75Kgs/
165 Lbs
To slide into position
do not thread nut past
end of bolt.