Part i: conservation of angular momentum, Rotating platform, A" base – PASCO ME-8950A COMPLETE ROTATIONAL SYSTEM User Manual
Page 30: Hanging mass, 300g mass, Stop screws (2), Center post, String
Complete Rotational System
012-05293F
26
Part I: Conservation of Angular Momentum
Setup
1. Level the apparatus using the square on the track as shown in the leveling instructions in the
Assembly Section.
2. Slide a thumb screw and square nut into the T-slot on the top of the track and tighten it down at
about the 5 cm mark. This will act as a stop for the sliding square mass. See Figure 4.2.
3. With the side of the square mass that has the hole oriented toward the center post, slide the square
mass onto the track by inserting its square nut into the T-slot, but do not tighten the thumb screw;
the square mass should be free to slide in the T-slot.
4. Slide a second thumb screw and square nut into the T-slot and tighten it down at about the 20 cm
mark. Now the square mass is free to slide between the two limiting stops.
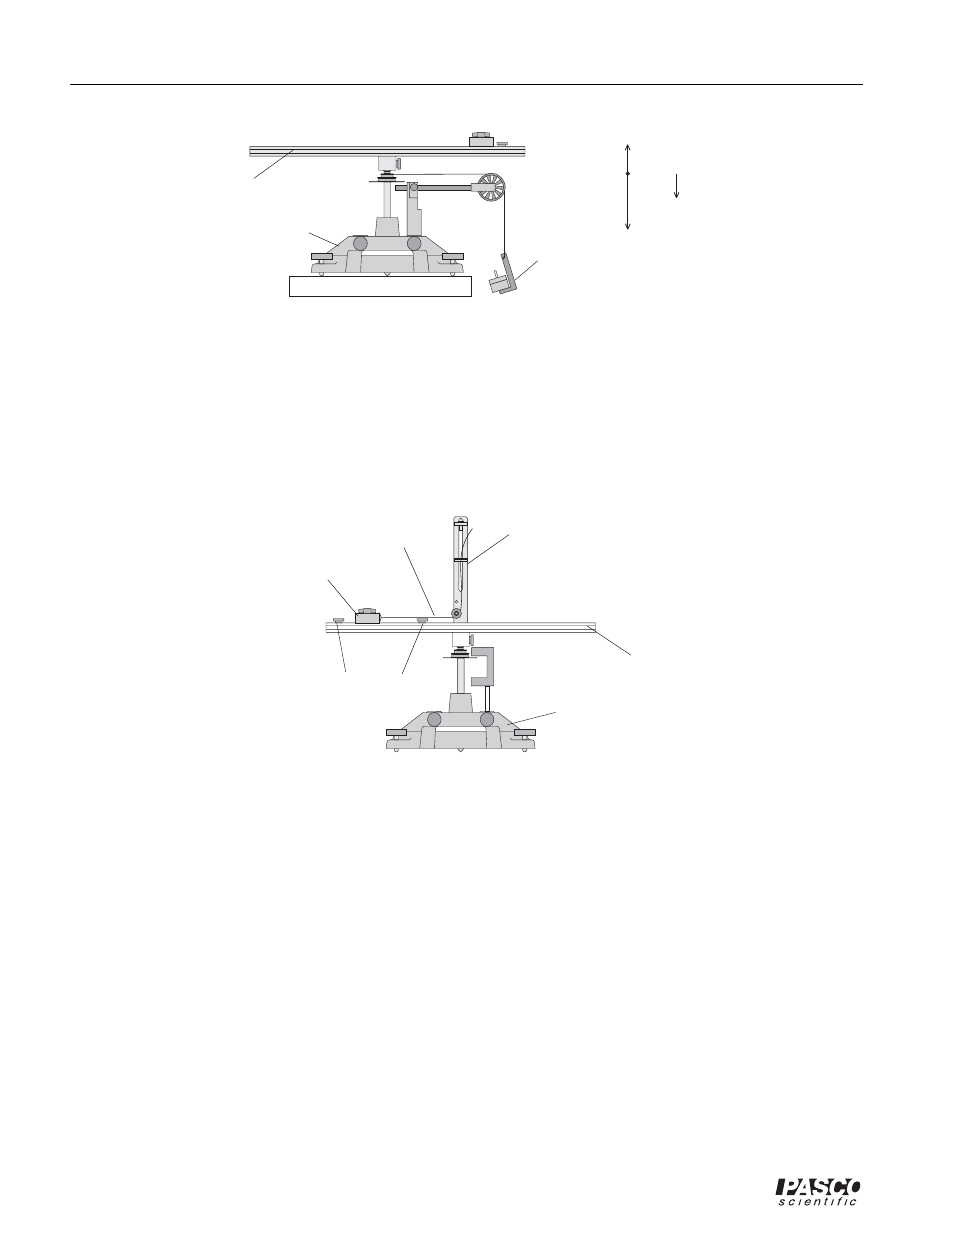
5. Move the pulley on the center post to its lower position. Remove the spring bracket from the cen-
ter post and set it aside.
6. Attach a string to the hole in the square mass and thread it around the pulley on the center post
and pass it through the indicator bracket.
7. Mount the Photogate on the rod on the base and position it so it straddles the holes in the pulley
on the center rotating shaft.
8. Start the DataStudio program. Connect the Photogate to a PASCO interface and connect the inter-
face to a computer (if needed).
mg
T
rotating
platform
"A" base
hanging
mass
a
Figure 4.1: Rotational Apparatus and Free-Body Diagram
300g mass
stop screws (2)
"A" base
center post
rotating
platform
string
Figure 4.2: Set-up for conservation of angular momentum