PASCO WA-9611_13 SONOMETER User Manual
Page 11
7
012-03489E
Sonometer
➂
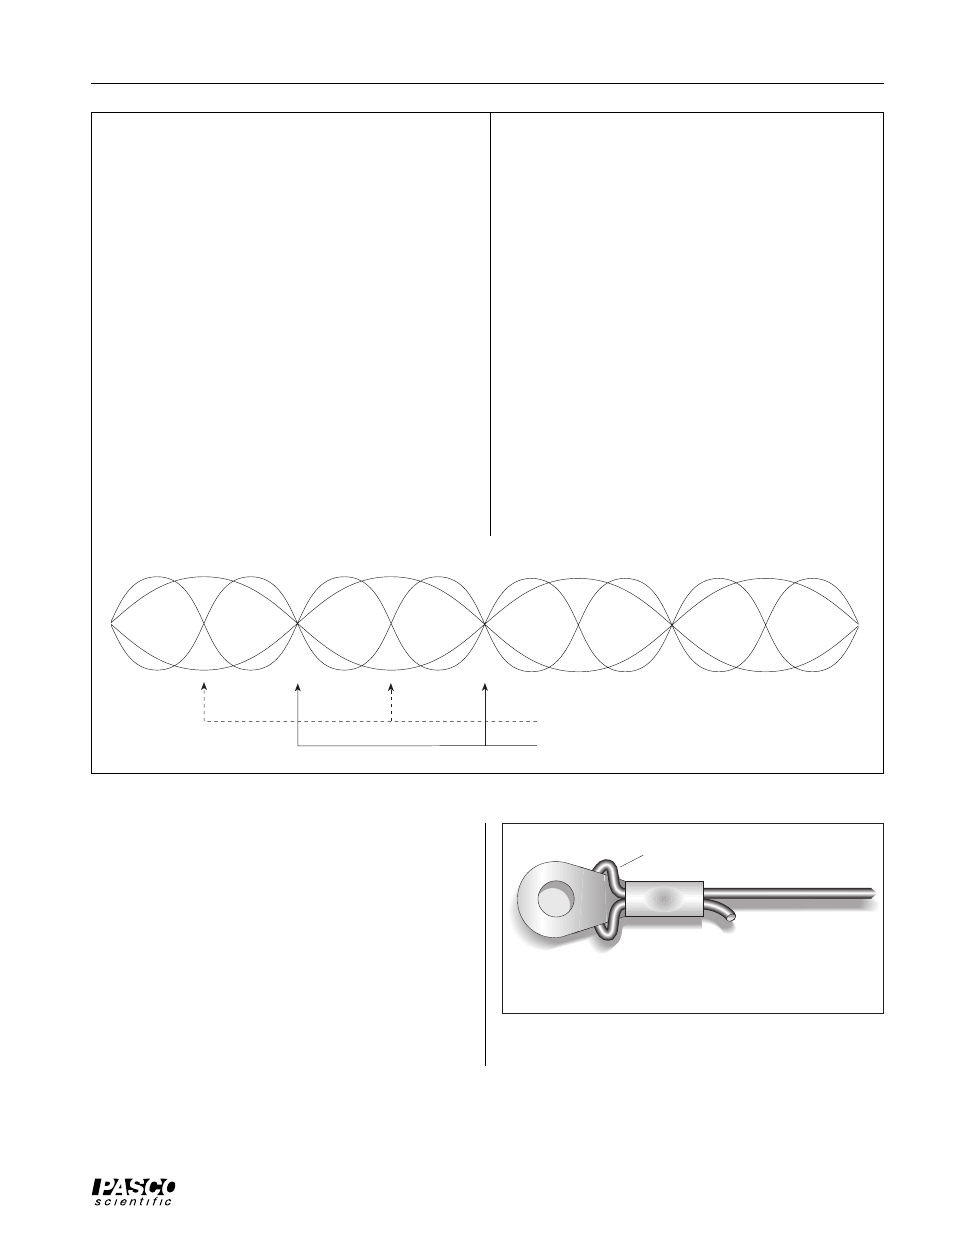
You will occasionally see higher and lower fre-
quencies superimposed on the primary waveform. It
is possible for multiple standing waves to form. For
example, the wire may vibrate at the driver frequency
and twice the driver frequency at the same time, thus
causing two sets of “nodes” (see figure below).
At the points where only one wave has a node, in-
stead of complete extinction you will see the wave-
form change from a combined wave to a single
wave of the lower frequency. Complete extinction
will occur only at the nodal points for both waves.
This does somewhat complicate things; if you wish
to avoid this problem, you may do so by using
higher frequencies whenever possible. (Since
higher frequencies damp faster, the doubled-fre-
quency standing wave will not have a significant
amplitude—compared to the normal wave—at high
frequencies.) A full analysis of this effect would
make an excellent experiment for sophomore- or
junior-level physics or engineering students.
➤NOTES:
➀
The frequency observed on the wire may not be
the frequency of the driver. Usually it is twice the
driver frequency, since the driver electromagnet
exerts a force on the wire twice during each cycle.
It is theoretically possible for the wire to form
standing waves at the driver frequency, and at any
even integer multiple of the driver frequency; al-
though the highest multiple observed on this equip-
ment so far has been six.
➁
If the detector is placed too close to the driver, it
will pick up some interference. You can check for
this interference by observing the waveform from
the detector on an oscilloscope; when they are too
close, the trace will change shape. For best results,
keep the detector at least 10 cm from the driver.
Replacing Sonometer Strings
You can use standard steel or electric guitar strings to
replace lost or broken strings. However, you will need to
attach a spade lug to the end of the wire to mount it on the
Sonometer. To ensure that the connection between the
wire and the lug is secure, wrap the wire around the spade
lug, then crimp and/or solder the wire into the lug
(see Figure 7).
Wrap wire around lug, then
crimp and/or solder.
Figure 7 Adapting Guitar Strings for the
Sonometer
Standard steel or
electric guitar string
Spade lug
Nodes for higher frequency, but not lower.
Nodes for both frequencies.