Repair sl – Diamond Products SL User Manual
Page 30
Closing the lock
1)
Twist rope according to instruction
(see application guide supplied with
the rope)
2)
Connect the two pressed on lock
parts with the bolt supplied with the
lock kit, by a few hammer strokes.
Opening the lock
1)
Drive out bolt by a few hammer stro-
kes.
2)
The rope can be reconnected using
a new replacement bolt which is
supplied with the lock kit resp. can
be ordered separately.
7.3
Connecting the rope by repair
sleeve
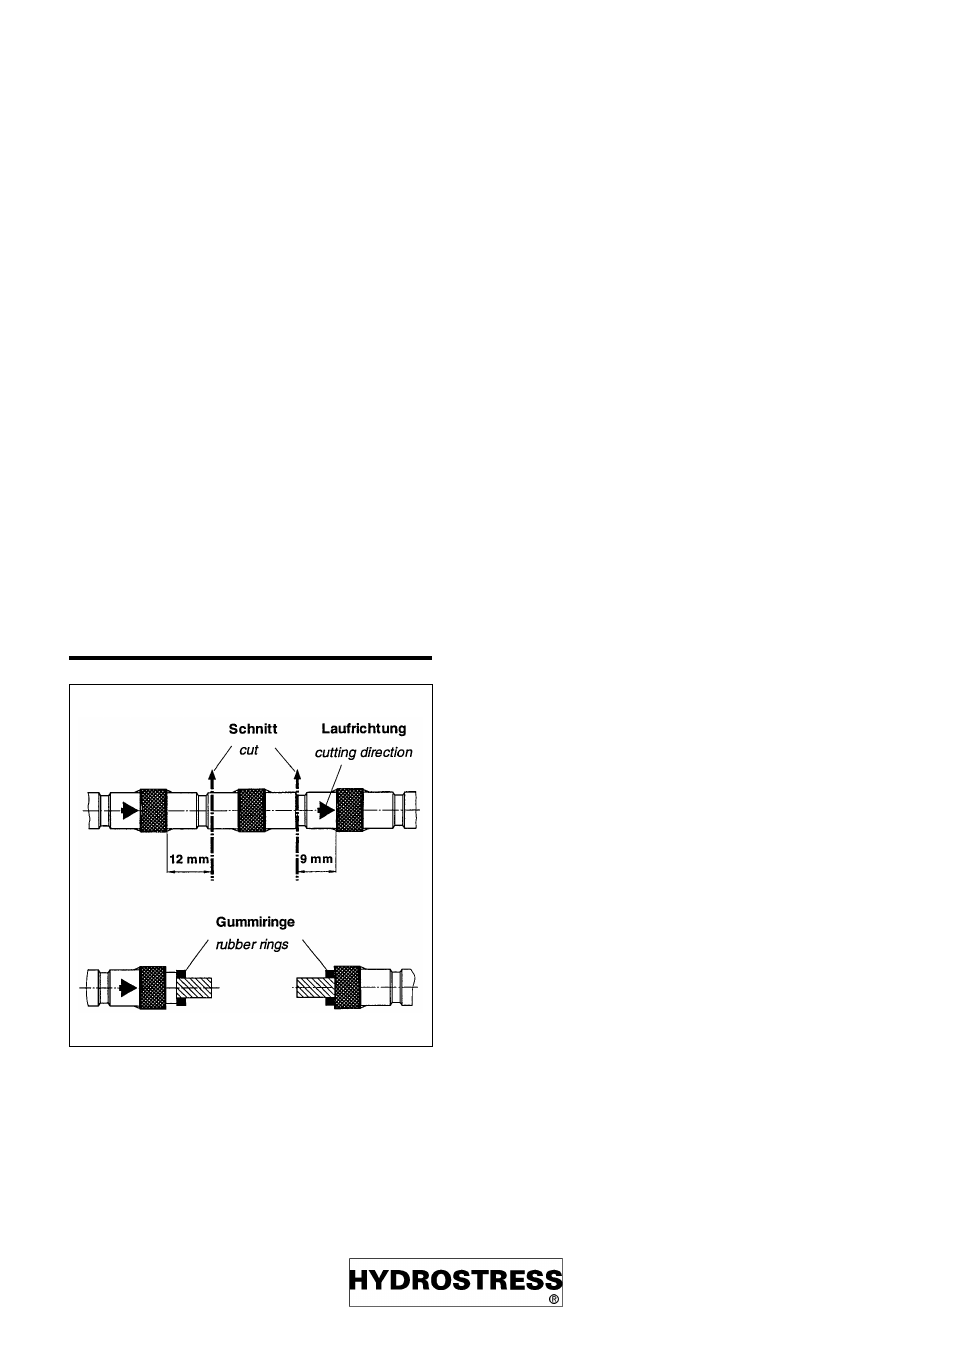
Pressing on of lock
1)
Cut rope at both ends according to
drawing at 12 mm resp. 9 mm di-
stance from bead (Attention: take
care to make a straight cut). Never
mount the locks directly behind the
rope beads as rigid portions will lead
to untimely rope rupturing.
2)
Remove rubber sleeving with rein-
forcement spring by pulling off with
pliers.
3)
Slide the rubber rings supplied with
the lock kit onto the blank rope ends
(important for maintaining flexibility
of the rope within the lock range)
4)
Slide joint lock part onto the rope
end (blank portion of rope must ex-
tend to the bore dead end) and take
care that the threaded stud points al-
ways to the forward running directi-
on. (pay attention to the direction
arrow on the rope)
5)
Press lock part with TYROLIT-Origi-
nal pressing tongs and pressing in-
lay. The pressed
The range available for pressing is separated by
a ring groove from the threaded portion on the
lock
6)
Side the 2. lock part onto the other
rope end ( similar to pts.3 + 4) and
press as under (Pt. 5).
Fig.seilrep.tif
Repair
SL
page 30
sl9806e