Example - action and toolbar button – CTI Products TurboVUi Dispatch Client Software User Manual
Page 24
TurboVUi Dispatch
Software Installation and Configuration Guide
24
Example - Action and Toolbar Button
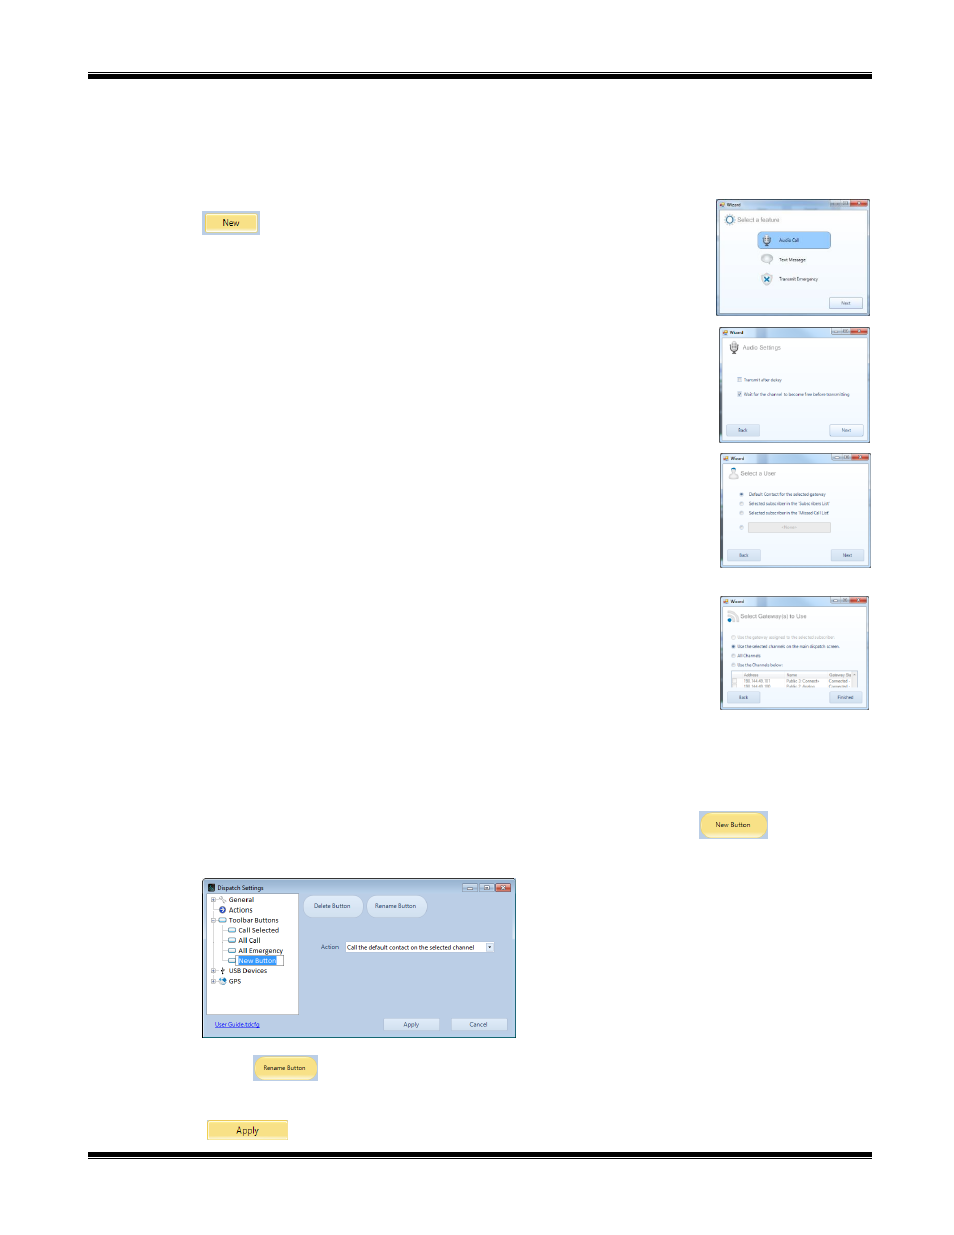
Add a Call Selected button to the Toolbar on the Main Window
1. Use the following steps to add an
Action
to make an Audio Call to the Selected Talk Groups.
a. From the Actions folder in the
Dispatch Settings
window, click the
button to display the Wizard’s
Select a feature
window.
b. Choose the
Audio Call
button in the above window, and then click the
Next
button to display the Wizard’s
Audio Settings
window. If the call should
interrupt any on-going channel activity, uncheck “Wait for the channel to
become free . . .”.
c. Click the
Next
button to display the Wizard’s
Select a User
window. To
contact the Default Contact(s) for the radio connected to this IP Gateway,
choose “Default Contact for the selected gateway”.
d. Click the
Next
button to display the Wizard’s
Select
Gateway’s to Use
window. To key up all of the “Selected Channels” on the Main Dispatch
window, choose “Use the selected channels on the main dispatch screen”.
e. Click the
Finished
button to return to the
Actions
folder of the
Dispatch
Settings
window.
f.
Right-click on the newly created Action to rename it “Audio Call to Selected Talk Groups” as shown
above.
2. Use the following steps to add a
Toolbar Button
to the
Main Window
to activate the Action created in Step 1.
a. From the Toolbar Buttons folder in the
Dispatch Settings
window, click the
button to
display the following window.
b. Use the
button to rename the new Toolbar Button.
c. Rename the button as it should appear on the
Toolbar
of the
Main Window
.
3.
Click the
button to save all Dispatch Settings.