Hip & ridge detail headwall detail – ATAS Granutile Panel User Manual
Page 3
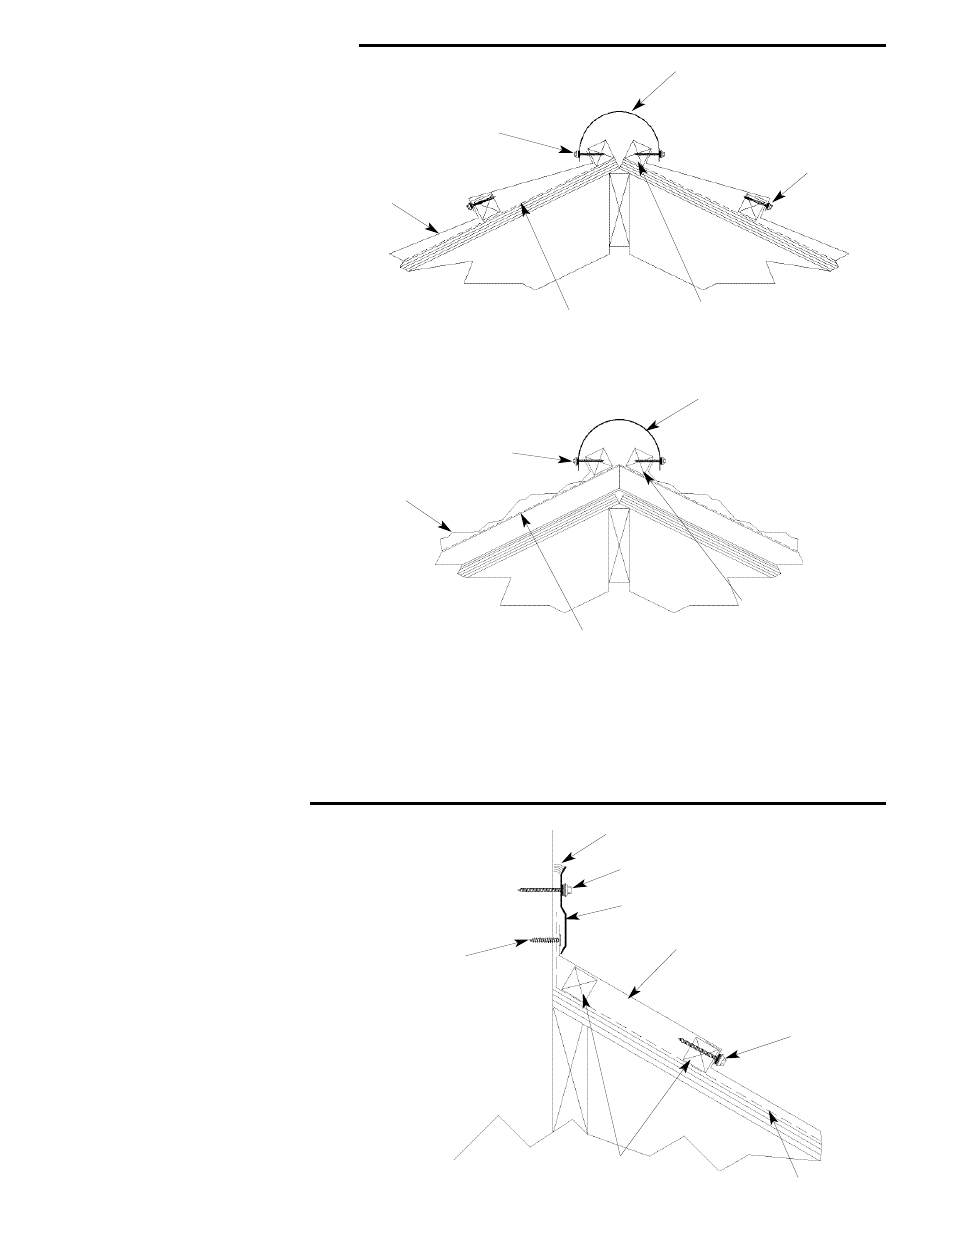
Hip & Ridge Detail
Headwall Detail
AT THE RIDGE
1. After installing all the wood battens up the
roof, measure the distance between the last
two rows. Cut panel to size leaving 1” to
bend up agaist the batten at the ridge. Fasten
panel to wood batten.
2. Place ridge cap in place and face fasten in
to wood batten.
AT THE HIP
1. Run wood battens on each side of the hip.
2. Measure and cut each panel to size + 1”.
Bend the panel up 1” to fit and fasten to wood
batten.
3. Place cap at hip and fasten to wood batten.
HIP and RIDGE CONNECTION
Due to the fact that angles will vary with each
roof geometry, this is a field operation.
Cut the left and right hip flashing caps to fit
into each other and into the ridge.
Fit the ridge flashing cap over the hips and
fasten into the sides. Fasten the end cap to
close the ridge.
1. Extend 4” of the ATA Guard* above the roof and
tack to the wall.
2. Install a wood battenat the headwall.
3. Measure height of last panel row, bend panel up,
cut 1” above bend, fasten panel in the front face and
into the wall.
4. Face fasten top of Zee Bar flush to the wall. Be
sure the lower portion of the Zee Bar covers the
panel fastener in the wall.
5. Place sealant at the top of the Zee Bar as shown.
HGA310 Barrel
Flashing Cap
SWA9XX
2” Wood
Screws
2” x 2”
Wood
Batten
ATA Guard
SWR9XX
2” Wood
Screw
HGT144
Granutile
Panel
HGA310 Barrel
Flashing Cap
2” x 2”
Wood
Batten
ATA Guard
SWR9XX
2” Wood
Screw
HGT144
Granutile
Panel
Appropriate Sealant
SWR9XX Wood Screw - 2”
HGA412 Z Bar
HGT144
Granutile
Panel
SWR9XX
2” Wood
Screw
ATA Guard
2” x 2”
Wood Batten
#12 x 1”
Wafer Head
Screw