ATAS Techo Tile User Manual
Page 3
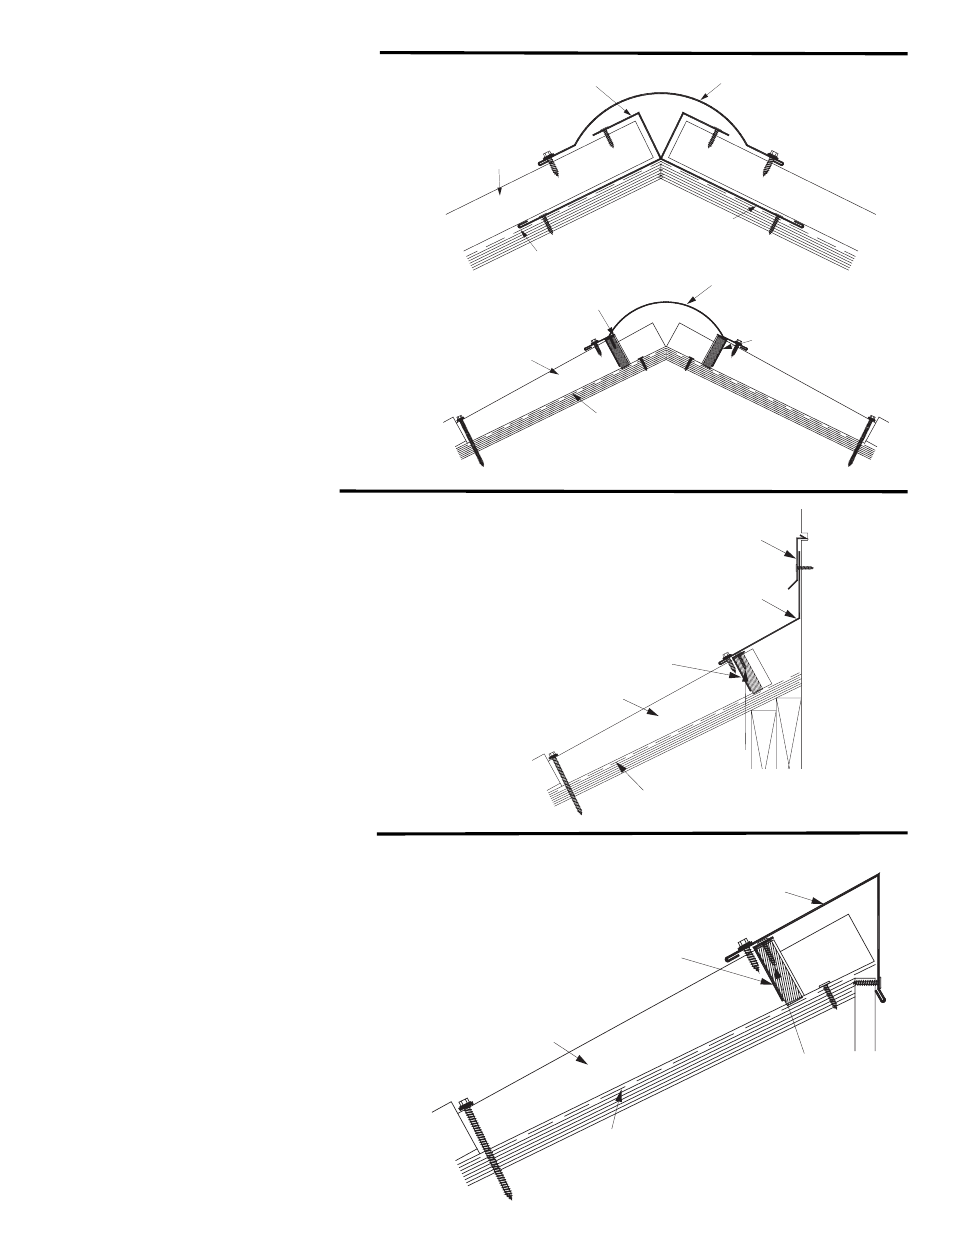
Hip & Ridge Detail
Headwall Detail
Shed Ridge Detail
Hip and ridge applications are handled in the same manner
.
1. Install panels to meet the Hip/Ridge.
2. Fasten top closure angle and neoprene closure
(optional) to panel using #12 x 1” pancake screw.
3. Apply butyl tape to top of closure angle, set
ridge/hip cap in place, fasten with stitch screw.
4. Prior to installing the last ridge cap, cut it to size and
fasten the end plug to the ridge cap before installing.
At the Hip: place a hip base over the hip, fasten with clip
(HPC903). Install the panel to the center of the hip base. Install
closure angle, put sealant at the edge of the panel. Install hip cap.
Note: Do not cut any metal over an installed metal roof. Do not
use an abrasive saw for cutting metal. When cutting the panels on
the hips use a nibbler or a Tenryu steel - pro blade for
ferrous metals or equal. To prevent metal particles from falling on
the panel, turn it upside down when cutting. Remove all chips and
dust immediately from roof panels.
Install appropriate underlayment to the edge.
1. Depending on the wall treatment, cut a reglet
in the wall.
2. Install panel to headwall.
3. Fasten top closure angle and neoprene closure
(optional) on the panel.
4. Install headwall trim over the panel while insuring that
the perpendicular section is flush to the wall.
1. Install panel to edge of roof.
2. Fasten top closure angle and Neoprene Closure
(optional) to the panel, max. 5” from roof edge.
3. Put high quality sealant along curve of panel
and on top of closure angle.
4. Fasten with appropriate fasteners.
ATA-Guard
Techo Tile Panel
Top Angle Closure
Appropriate
Anchor Screws
Headwall Trim
Counterflashing
ATA-Guard
Techo Tile Panel
Hip Closure
Hip Cap
Hip Base
ATA-Guard
Techo Tile Panel
Top Neoprene Closure
Ridge Cap
Top Angle Closure
ATA-Guard
Techo Tile Panel
Top Angle Closure
Shed Ridge Cap
Appropriate
Fastener