Final installation, Using learn mode (available on, Pvt rgb d plus only) – Extron Electronics PVT Series User Guide User Manual
Page 20: Extron pvt rgb d plus (edid)
Using Learn mode (available on PVT RGB D Plus only)
1.
Disconnect any sources from the front panel and remove the
wallplate from the wall.
2.
On the rear panel, set all the DIP switches to off (down).
3.
Temporarily connect the main display device (the projector) to
the “Monitor Out” port.
4.
On the front panel, the learn LED is lit solid green. Press and
release the Learn button.
5.
The LED flashes red when in “learning” mode, then returns to
solid green when complete.
6.
Re-install the wallplate and reconnect the source device. Connect a local display device
to the “Monitor Out” port as needed.
7.
Reconnect the projector to the PoleVault switcher. Restart the source and display devices
Final installation
After testing and making any adjustments, do the following:
1.
Turn off the power supply to the PoleVault switcher.
NOTE: The power to the transmitter is supplied by the PoleVault switcher.
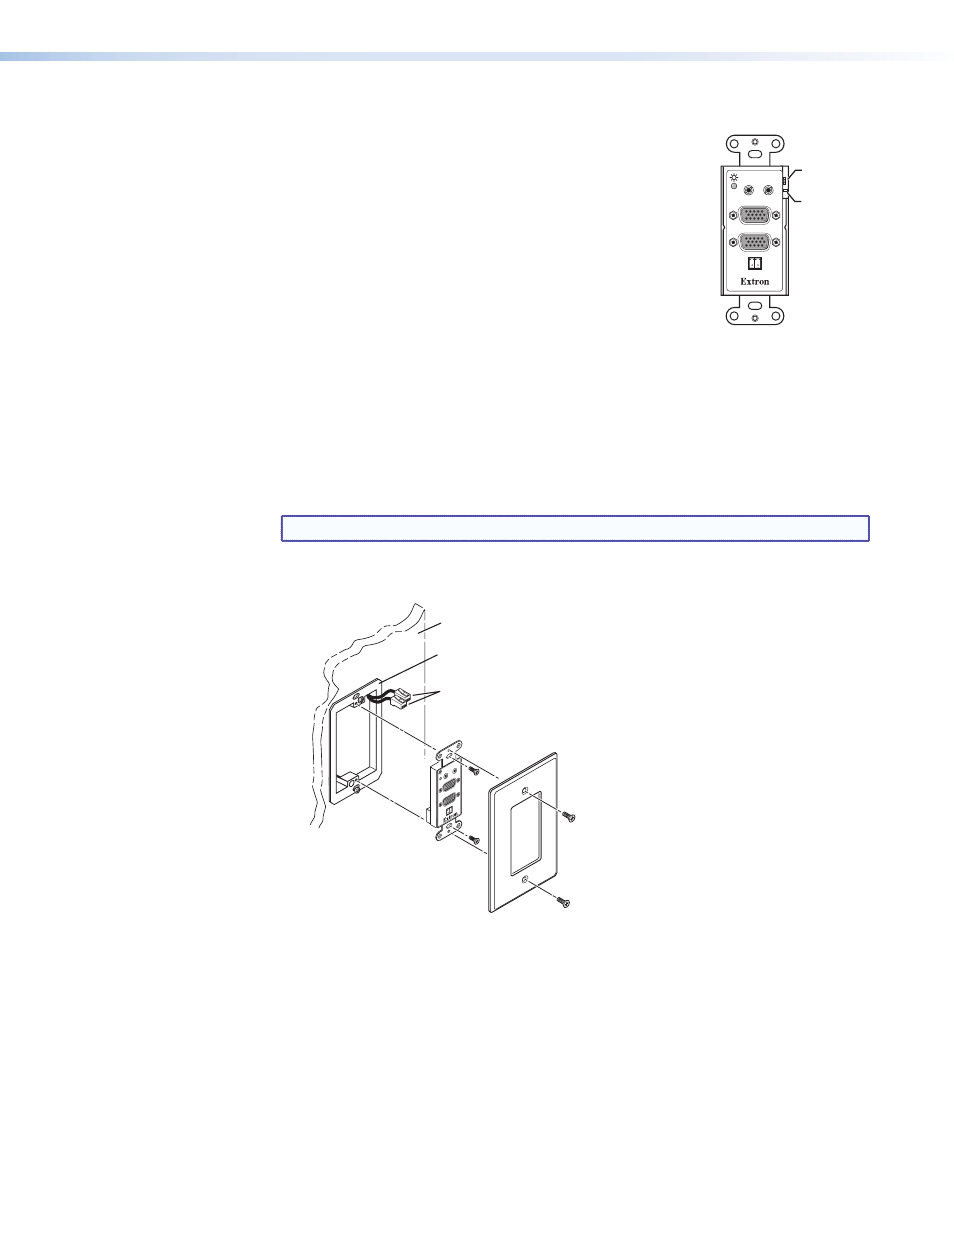
2.
Mount the transmitter into the box or mud ring, and attach the supplied Decora
faceplate to the transmitter, as shown below.
COMPUTER IN
AUDI
O
MONITOR OUT
IR
OU
T
S G
IN OUT
Decora
Faceplate
Extron
PVT RGB D Plus (EDID)
Wall
Wall Mounting
Bracket (mud ring)
RGB output cables
Figure 16.
Mounting the PVT RGB D Plus (EDID)
3.
Reconnect the cables and turn on the power supply to the switcher This powers up the
wall plates.
COMPUTER IN
AUDIO
IN
OUT
MONITOR OUT
IR OUT
S G
EDID Learn
Status LED
EDID Learn
Button
PVT Series • Connections and Settings
14