Installing the pvt cv and pvt rgb decora models, To install into a mud-ring, To install into a wall box – Extron Electronics PVT Series User Guide User Manual
Page 12: Installing the pvt cv and pvt rgb decora, Models
Installing the PVT CV and PVT RGB Decora models
The PVT CV and PVT RGB Decora models can be installed into a wall using either the
supplied mud ring or a UL approved one-gang electrical wall box, and finished with a Decora
wall plate cover (supplied).
The installation must conform to national and local electrical codes and to the wall plate size
requirements.
The following Underwriters Laboratories (UL) requirements pertain to the installation of the
PVT input wallplates into a wall or furniture.
1.
These units are not to be connected to a centralized DC power source or used beyond
their rated voltage range.
2.
These units must be installed in UL listed junction boxes.
3.
These units must be installed with conduit in accordance with National Electrical and
Buildong Codes
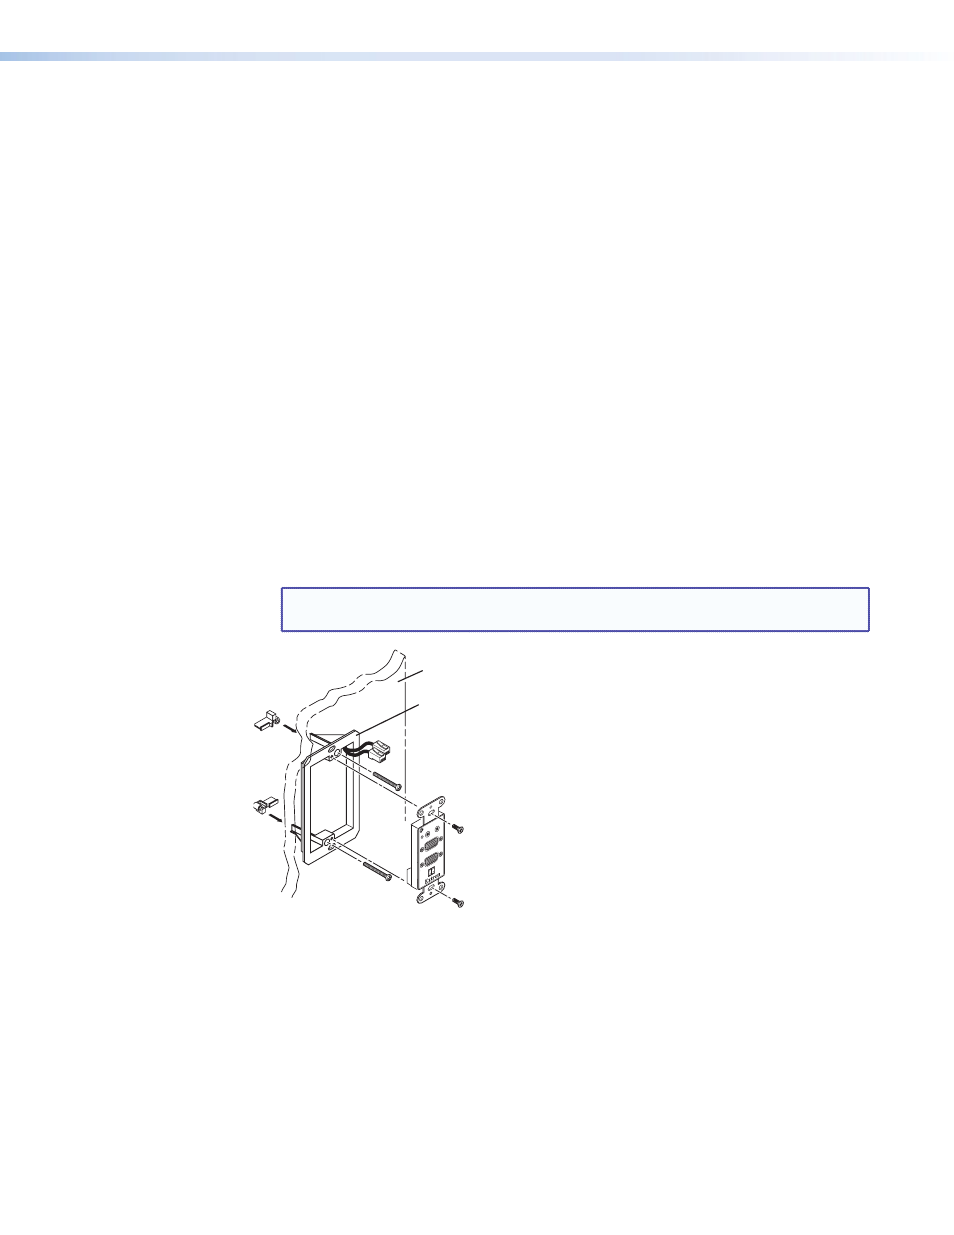
To Install into a Mud-ring
1.
Using the mud ring as a guide, mark the edges and cut out the material within the
marked area.
2.
Insert the mud ring into the opening, rotate the arms, and secure with the supplied
screws.
3.
Run the CAT 5 cables from the PoleVault switcher location, going behind the wall and to
the PVT location, then thread the cables through the mud ring.
NOTE: Two cables (A and B) are needed for RGB signals.
One cable is used with CV models.
COMPUTER IN
AUDI
O
MONITOR OU
T
IR OUT
S
G
IN OU
T
Extron
PVT RGB D Plus
Wall
Wall Mounting
Bracket (mud ring)
Figure 7.
Installing the mud ring
4.
Connect the switcher cables to the rear of the PVT wall plate. See “
”, page 11, for connector wiring details.
5.
”, page 9, for connector details),
restore the power supply, and test the wall plate. Make any cabling adjustments before
final installation, as the cables will be inaccessible afterwards.
PVT Series • Installation
6