Extron Electronics RGB 300 User Manual
Page 18
Chapter 5 • Using RGB 300 Windows® Software
Chapter 5 • Using RGB 300 Windows® Software
Extron RGB 300 Universal Interface • User’s Manual
Extron RGB 300 Universal Interface • User’s Manual
The software provided by Extron runs under Windows® for
controlling the RGB 300 through the RS-232 port. This
software uses a control panel in a Window, with easy-to-
operate controls. This panel may be used to do any of the
Front Panel operations, as well as load, change, store and
restore video format information in the memory blocks. See
picture on next page.
Installing the RGB 300 Software
To install the windows driver software, do the following:
1. Start Windows®
2. Insert the RGB 300 disk into a floppy drive.
3. From the File menu in the program manager select Run
4. Type the letter of the disk drive and SETUP, for example:
A:\SETUP
5. Follow the on-screen prompts.
____ This Setup loads a file called vbrun300.dll. If another
Windows® application uses this file, a message may appear
concerning a conflict, and the RGB 300 software will not load.
If this occurs, use Windows File Manager to go to the
\windows\system\vbrun300.dll file and rename it. (for example,
vbrun300.sav) Start the Setup procedure again - it should work
this time. With both vbrun300 files loaded, check the version
dates. You may want the file with the later date. This requires
renaming the files again.
6. The software will create a new program group called
RGB 300, containing the RGB 300 icon.
Starting the Software
To start the software, double-click (or click & Enter) on the
RGB 300 icon. When the program loads, all the controls will
be inactive until a Comm port is selected. Click on Comm
from the menu bar, and then click on Comm1 or Comm2,
depending on which Comm port is connected to the RGB 300.
Once the Comm port is selected, the File and Utilities
functions become active in the menu bar. The software
uploads all the current RGB 300 settings and displays them in
the control panel Window, and the controls become active.
See picture of control window on next page.
____ If the RGB 300 front panel is being used, it is in Menu Mode,
and is “busy” to the Windows® software. When it is in the 3-
menu default mode, it is “ready”, and the Remote Mode
indicator will appear in the control window.
5-1
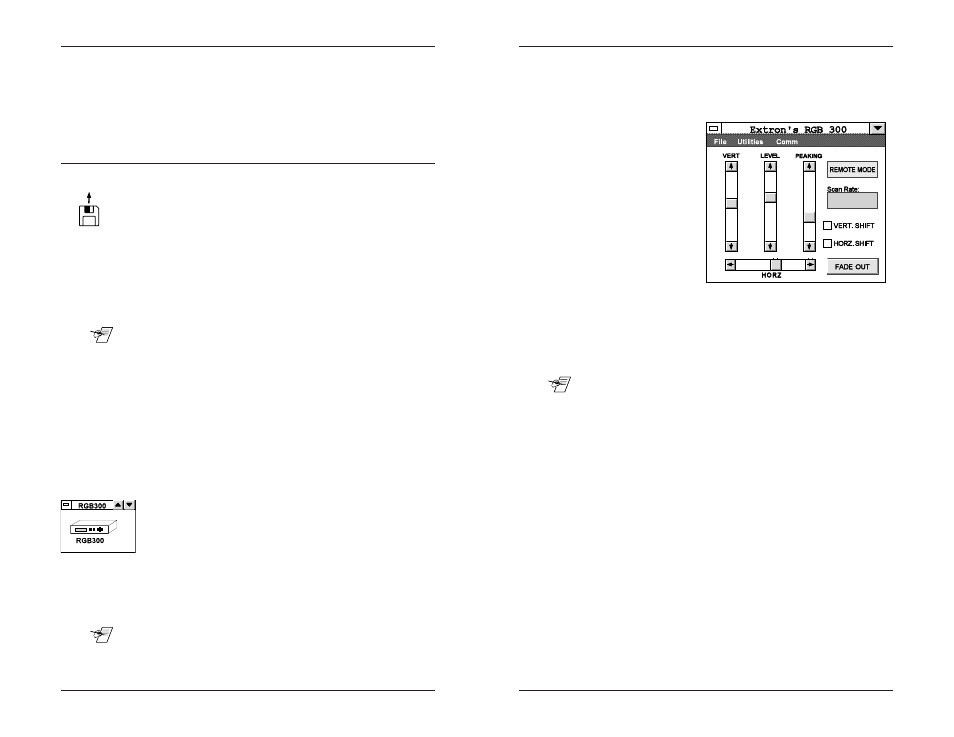
Using the RGB 300 Control Panel Window
The RGB 300 window is a control panel, with the controls and
displays clearly marked. (See picture.) Four controls use
sliding scroll bars to show where the control is currently set,
and allow the user to adjust the settings.
Observe the data
monitor/projector
screen while making
adjustments, using
the mouse. The
controls operate like
standard Windows
scroll bars, can be
used three ways:
· Click on arrow at end
of bar.
Click and hold the
arrow button to
continue scrolling.
· Click in space between button and arrow at end of bar.
This will scroll 10 steps at a time instead of one.
· Click and drag the button in either direction to the new position.
The selected button blinks.
____ Although the button moves fast, there is a delay on the
monitor, or projector screen because the RGB 300 is not
updated until the mouse button is released and the adjustment
is complete.
Remote/Local Mode
This window displays either Local Mode or Remote Mode. In
remote mode, the Host can access the RGB 300; in local
mode, the Host cannot access it because the front panel is
being used.
Scan Rate Display
This window displays the current horizontal and vertical scan
rates.
Horizontal and Vertical Shift
These controls allow the corresponding shift controls to be
used. If the box is selected, the scroll bar control (described
above) will have no effect. This is like the Centering Options
menus shown in the flowchart on page 4-1.
5-2