Extron Electronics RGB 300 User Manual
Page 11
Chapter 3 • RGB 300 Front Panel Procedures
Chapter 3 • RGB 300 Front Panel Procedures
Extron RGB 300 Universal Interface • User’s Manual
Extron RGB 300 Universal Interface • User’s Manual
____ This chapter give procedures for setting up the RGB 300. For
the over-all picture, as well as details about each menu, see
Chapter 4.
Auto-Select Function
The Auto-Select function takes place on power up, as well as
any time the input scan rate changes. Auto-Select searches
all the saved memory blocks for a scan rate match. When a
match is found, all the settings from that memory block are
automatically loaded. If the input scan rate is within ± 5% of a
configuration stored in a memory block, is considered to be a
“match”. If no match is found then no changes in the settings
take place. (It keeps the last configuration.)
In most installations, the Auto-Select feature takes care of the
setup. If changes in settings are necessary, use the
procedure and descriptions that follow. If the installation uses
a PC with Windows
, see Chapter 5 to install and use this
software.
The Three Default Menus
____ These three menus are also described in Chapter 2,
Installation Check. Refer to that section if the displays are
suspected to be incorrect.
When the RGB 300 is not in menu mode, it is considered to
be in the default mode. In this mode the LCD displays 3
default menus for about 2 seconds each.
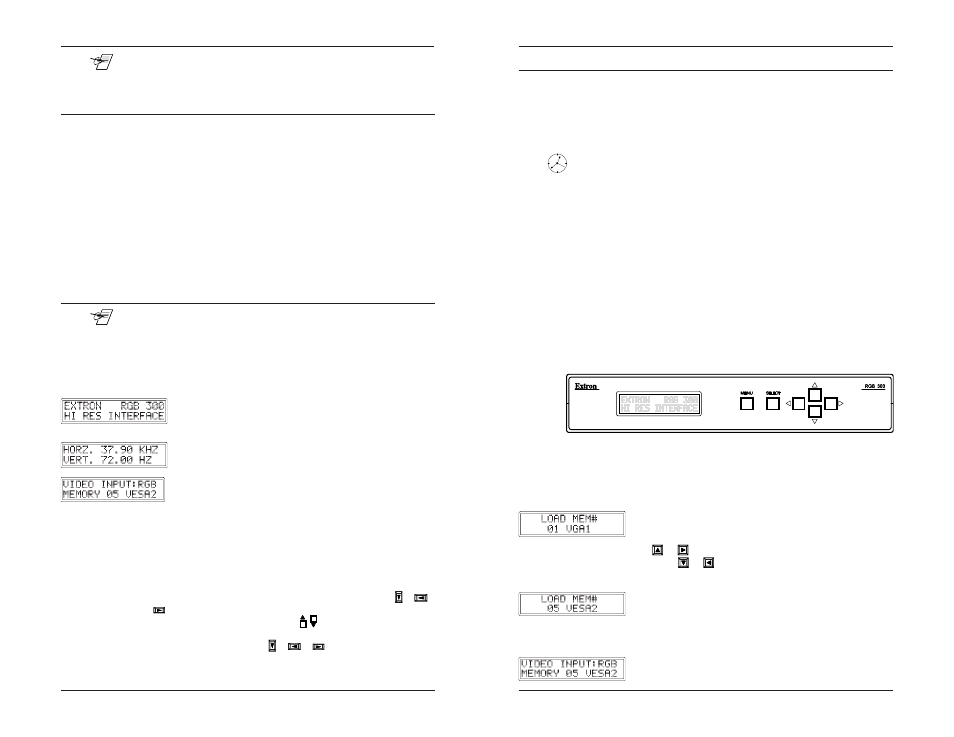
The first menu is the ID screen, and is factory
programmed as shown here. To change this menu, see
Editing the ID screen, in Chapter 4.
The second menu displays the scan rate detected from
the video input. See example here.
The third menu shows that RGB input signals are
present, and which memory block and video format is
being used.
This 3-menu default cycle can be broken by pressing either
Select, or Menu keys. The RGB 300 will go from “default”
mode to “menu” mode. If using the Windows RGB 300
software, the unit is “busy” to the software when it is in “menu”
mode.
To stop on any one of the three default menus, press +
+
+ and Select simultaneously, when the desired menu
appears. When stopped, use the
keys to step through the
three menus manually. This action does not affect other
RGB 300 functions. Press +
+
and Select again to
return to the 3-menu cycle.
3-1
Front Panel Operation
The RGB 300 “controls” are accessed through the Front
Panel. Use the LCD display, together with front panel keys to
view, or make changes to the current settings. Observe the
monitor or projector screen while making adjustments. The
menu flow chart on page 3-5 may be used as a guide, while
stepping through the menus.
_____ When using the panel, a pause of 20 seconds causes the
RGB 300 to return to the 3-menu default cycle.
The Front Panel may be used to customize the installation in
the following ways:
1. Select and load a preset memory block. (Table on page 3-4.)
2. Make adjustments and save the changes by overwriting the
current memory block. (Procedure in this chapter.)
3. Make adjustments and save them in a new memory block,
with a new name. (Procedure in this chapter.)
4. Make temporary adjustments that will go away when power
is removed. (See Chapter 4.)
5. Make adjustments that remain in local storage when power
is removed. (See Chapter 4.)
Example steps follow. Each menu is described in Chapter 4.
Load a Configured Memory Block
See Memory Block table, page 3-4, for the configuration
choices.
1. From the 3-menu default cycle, press Select to view
the first memory block.
2. Use the
or
cursor keys to step through the preset
blocks; press
or
to backup. Empty blocks will not
display.
3. When the desired memory block appears, press
Select to load it. (For this example, block #5.)
4. Observe that the RGB 300 goes back to the 3-menu cycle,
this time displaying the new memory block
5. Check for correct Data Monitor/Projector operation.
3-2