B-3 dds 100 reference information – Extron Electronics DDS 100 User Manual
Page 47
B-3
DDS 100 Reference Information
1. Remove the cover of the DDS 100. See “Internal access” on he
previous page.
Make sure you are electrically grounded before touching IC
chips. Electrostatic discharge (ESD) can damage IC chips,
even if you cannot feel, see, or hear the discharge.
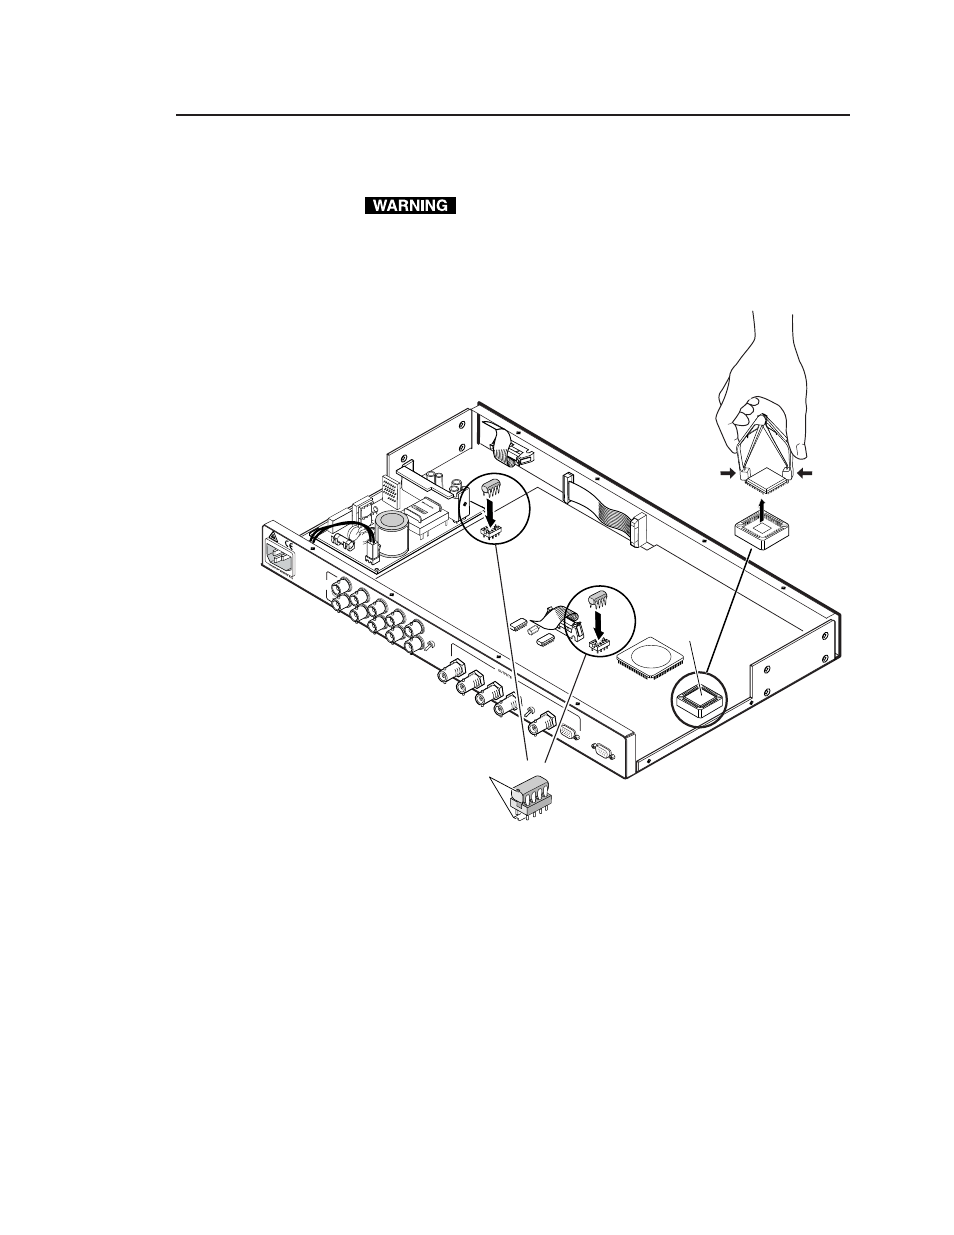
2. Locate the ICs to be replaced (see figure 13). The update kit will list
the specific ICs.
Figure 13 — Locating and replacing ICs
3. Remove the existing chip and set it aside.
To remove IC U41, use the PLCC (plastic leadless chip carrier) IC
puller to remove the old IC. Align the hooks on the puller with
the slots provided in opposite corners of chip socket U41. Insert
the hooks, squeeze gently, and pull the IC straight out of the
socket.
To remove IC U69 or U70, use a standard IC removal tool.
4. Install the new chip.
To install IC U41, locate the angled corner of the new chip.
Orient the corner to match the angled corner of the socket, and
press the IC into place.
To install IC U69 or U70, locate a notch or a printed dot on top of
the IC. Align the notch or dot with the notch on the socket or
circuit board. Align the IC pins with the holes in the socket, and
gently press the IC into the socket.
R
G
B
H/H
V
V
U41
Align Notches
U70
U69