6 mounting the aim-pro to a weapon – Armasight ANKI000049 AIM PRO-L Advanced Integrated Mount User Manual
Page 25
25
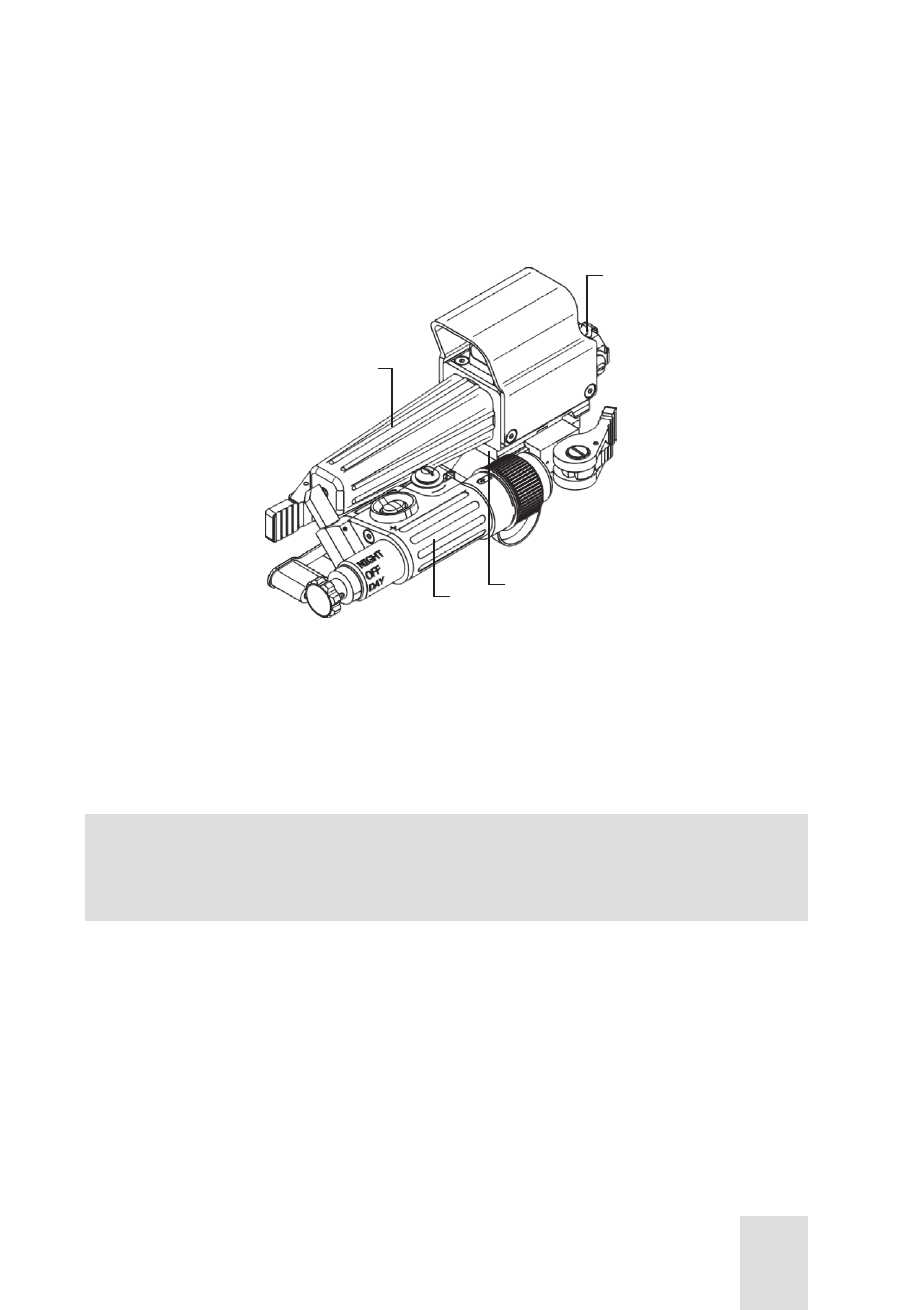
3.1.5 MOUNTING AN OPTIONAL RED DOT SYSTEM TO THE
AIM-PRO
Install the Red Dot System on the AIM-PRO as follows:
1. Mount the Red Dot System (A, Figure 3-8) to the AIM-PRO (B) using the rail
(C). The mounting procedure is identical to that of mounting a 3X Magni-
fier, as shown in Part 3.1.4.
A
C
B
D
FIGURE 3-8. AIM-PRO ASSEMBLED WITH AN OPTIONAL RED DOT SYSTEM
2. After mounting the AIM-PRO connected with the Red Dot System to a
weapon, adjust the Red Dot System boresight using the windage and el-
evation adjustment screws (D).
3.1.6 MOUNTING THE AIM-PRO TO A WEAPON
NOTE:
Remember to zero your weapon prior to installing the AIM-PRO or ad-
justing the boresight.
Mount the AIM-PRO to a weapon as follows (refer to Figure 3-9):
1. Unlock the clamping device beneath the mount by pushing the lever
holder (A) down and turning the lever (B) towards the arrow (back-
wards).
2. Install the AIM-PRO on the weapon using a Picatinny/ Weaver rail. The
stop (C) must be inserted into one of transverse slots of the weapon rail.
3. Secure the AIM-PRO to the weapon rail by turning the lever (B) into the
locked position, as shown in Figure 3-9. The clamping device must firmly
hold the weapon rail. If necessary, adjust the clamping device as seen in
Part 3.1.6 (Clamping Device Adjustment).