4 mounting an optional 3x magnifier to the aim-pro – Armasight ANKI000049 AIM PRO-L Advanced Integrated Mount User Manual
Page 24
24
4. Mount the NVM on the AIM-PRO with the bracket rail (C), as per Part 3.1.3-
A.
Figure 3-6 shows the fully-assembled AIM-PRO connected to the PVS-14
analog Night Vision Monocular.
3.1.4 MOUNTING AN OPTIONAL 3X MAGNIFIER TO THE
AIM-PRO
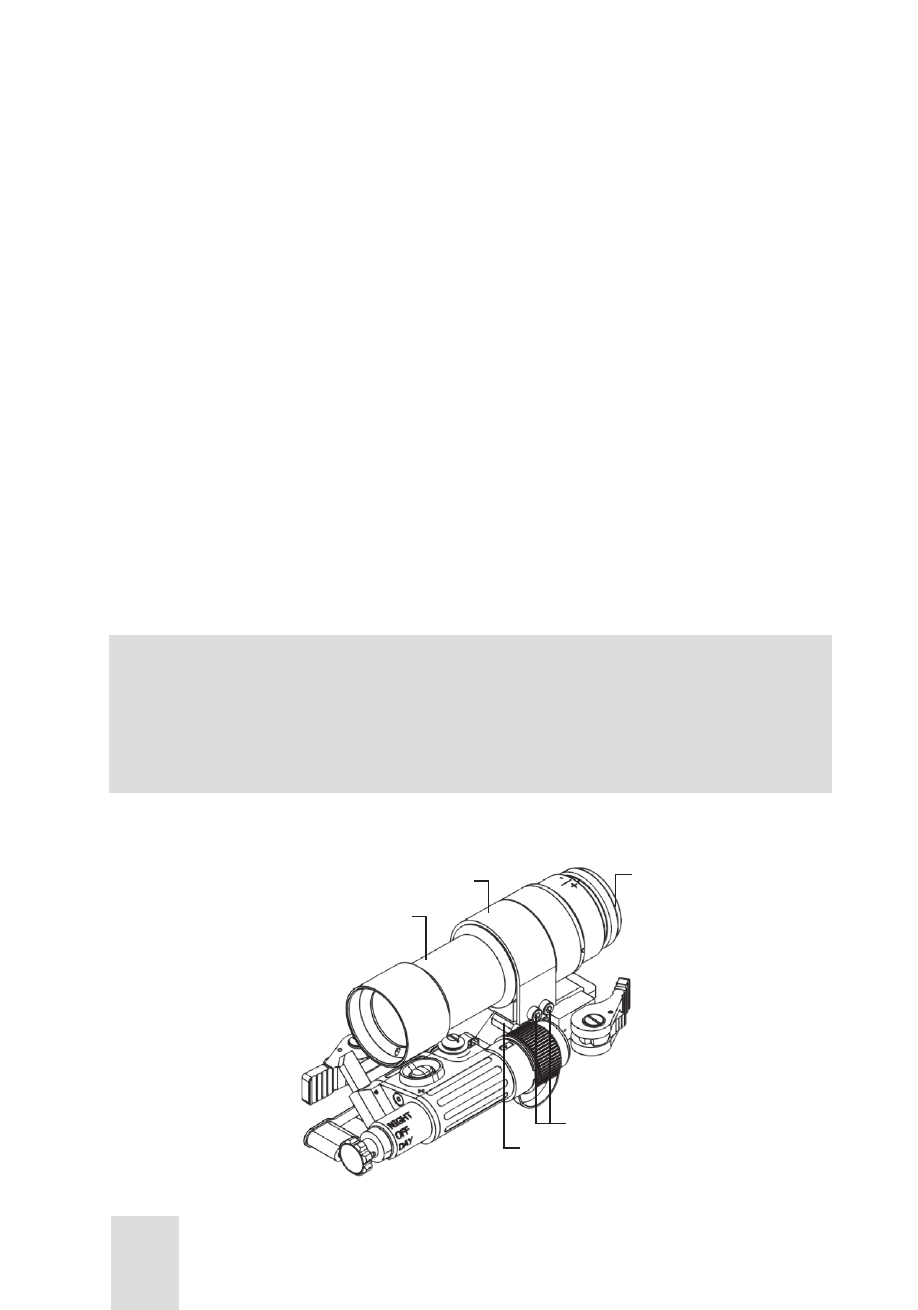
The optional 3X Magnifier (A, Figure 3-7) is delivered fully-assembled with a
dedicated mount (B), to be installed on the AIM-PRO.
Install the 3X Magnifier on the AIM-PRO as follows:
1. Mount the 3X Magnifier (A) to the AIM-PRO using the rail (D). The mount-
ing procedure is identical to that of mounting an NVM, as shown in Part
3.1.3.1. The position of the AIM-PRO collimator does not matter.
2. After mounting the AIM-PRO connected with the 3X Magnifier to a weap-
on, adjust the 3X Magnifier eyepiece using the diopter ring (C, Figure 3-7).
Bring the 3X Magnifier image into sharp focus by rotating the eyepiece
diopter ring. Directions of diopter adjustment are designated with (+/-)
signs on the body of the 3X Magnifier. Adjustment range is covered in
approximately 1 turn of the ring.
NOTE:
The 3X Magnifier reduces the exit pupil size of the AIM-PRO collimator
by 3.5 times. For maximum visibility, accurate positioning of your eye
in relation to the 3X Magnifier exit pupil is necessary. For eye relief,
see Table 2-7.
3. If necessary, reposition the 3X Magnifier in the clamp (B); you must first re-
lease the fixing screws (E). Using a 2.5mm Allen key, tighten the screws.
A
B
E
D
C
FIGURE 3-7. AIM-PRO ASSEMBLED WITH AN OPTIONAL 3X MAGNIFIER