Low-voltage box wiring details, Plenum installation guide – GE Industrial Solutions Limitamp AR User Manual
Page 7
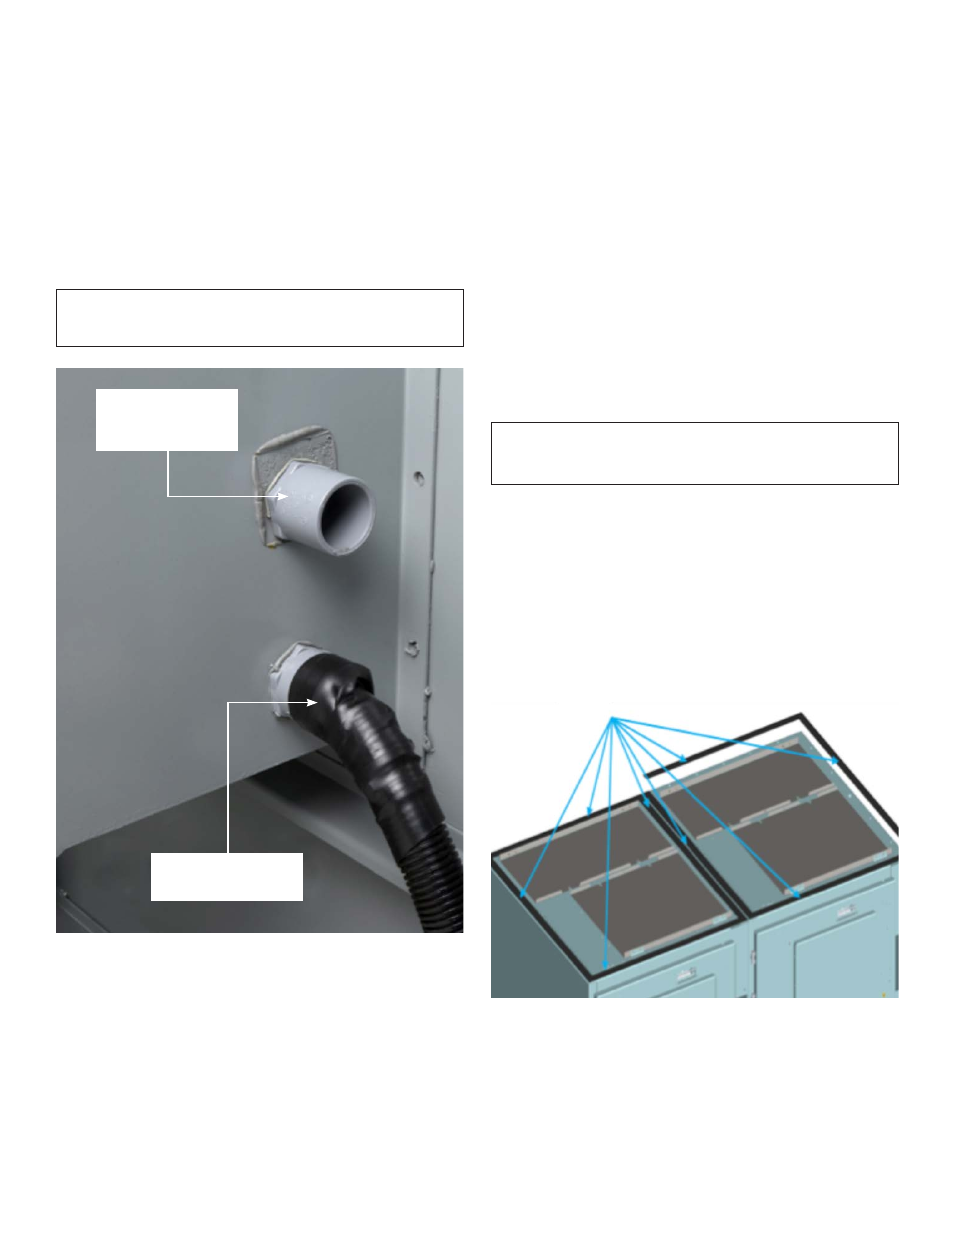
Low-Voltage Box Wiring Details
Step 1: All low voltage wiring entering and exiting the low
voltage box must be routed through the bushings provided on
the box.
Step 2: Once all wiring is complete fill the bushings with R.T.V
or other equivalent sealant material.
Step 3: Wrap the outside of bushings and wiring with 3M, 130C
tape. Tape must extend down the wire bundle for a minimum
of 6 inches. Refer figure 14 for details.
WARNING: Ensure all wire way openings are properly
sealed before energizing.
Figure 14. Low-voltage box wiring.
Bushing Provided
for Customer Wiring
Purpose
Properly Sealed and
Taped Bushing
Figure 15. Apply sealer around the top perimeter of the shell.
Sealer
Plenum Installation Guide
The Limitamp AR design requires the use of a ventilation
plenum to route any arcing gases away from the equip-
ment. Each section requires a plenum and extra extension
plenum parts can be used to exhaust the arcing gases out
of the building. The plenum parts are shipped with the
equipment and it is the end user’s responsibility to install
the plenum part on the equipment.
Store the plenum or extension plenums on a level surface to
avoid distortion. Ensure pleum or extension plenums are kept
in clean and dry condition with ample air circulation.
NOTE: It is recommended NOT to store the plenum outdoors.
At the installation site, remove all separately packaged
components shipped within the Limitamp
AR unit. Find the
plenums, cover plates, mounting hardware and place them in
the work area. It is recommended that the plenum parts be
installed in the sequence listed below.
WARNING: Allow at least 12 feet of unobstructed space
for exhaust gases. Serious injury or death may occur.
Step 1: Before plenum installation begins remove all
plastic snap-in clips in top vent flaps to ensure vent flaps
operate properly.
Step 2: Apply a strip of sealer around the top perimeter of
the first shell. Sealer should be placed on the outside of the
mounting holes on the shell top.
Step 3: Lift plenum box for the first section with appropriate
means and place it on top of the unit taking care to not
damaging flaps on roof.
CR 194 One/Two-High Vacuum Limitamp
®
AR Control
Page 7