High-voltage door latches – GE Industrial Solutions Limitamp AR User Manual
Page 4
High-Voltage Door Latches
The Limitamp AR design uses special high strength door latch
parts to keep the door closed during an arcing event. All of the
latches must be properly engaged for the product to function
properly. On the outside of the high-voltage door there is a
door latch operating handle. Rotating this handle operates all
of the latch locking pins at one time.
The door latch locking pins are all adjusted prior to shipping
from the factory. If any of the door latch pins are moved or
replaced make sure they are adjusted per the sketch below.
Make sure to tighten the locking stud on the locking pin bridge.
When the door handle is in the locked position adjust locking
pin bridge to provide a 0.150” gap between the bridge and the
welded “U” fork on the door.
Latch Handle
Figure 4. Rotating
the high-voltage
door latch handle.
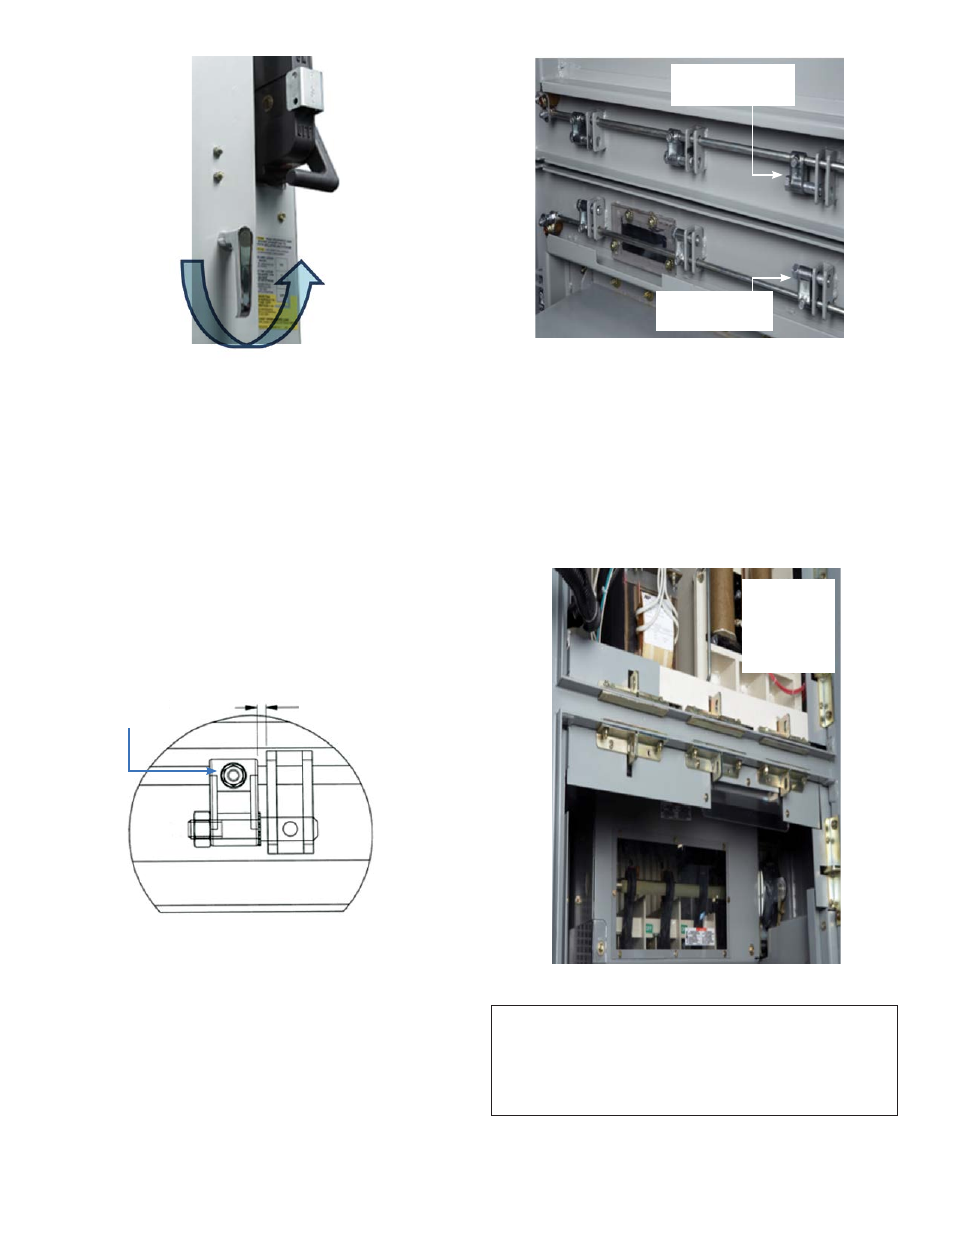
Figure 6. View of locking pins on high-voltage door.
Figure 5. View to show gap between locking
pin bridge and “U” fork on the door.
Locking Stud
Locking Pins in
Unlocked Position
Locking Pins in
Locked Position
The mating part of the latch system is shown in the Figure 7
below. The enclosure side latch parts are mounted to the
frame using a stud plate that passes through the flange of the
case. The latch parts can be adjusted in all directions using the
slots in the latch parts and special spacers that mount under
the latch parts. The latch parts should be adjusted so the
locking pins on the door engage the open slot on the case side
latch part. The nominal position for the latch part is flush with
the front edge of the enclosure flange.
Figure 7. View of enclosure mounted latch parts.
Latch Plates
Should Be
Flush With
Front Flange
of Enclosure
.150
CR 194 One/Two-High Vacuum Limitamp
®
AR Control
Page 4
WARNING: Barriers or enclosure door latch parts removed
to service the equipment must be re-installed in the exact
location for safe operation. Not complying with this
instruction could lead to serious injury. Mark the location
of these items with the ink for ease of re-assembly.