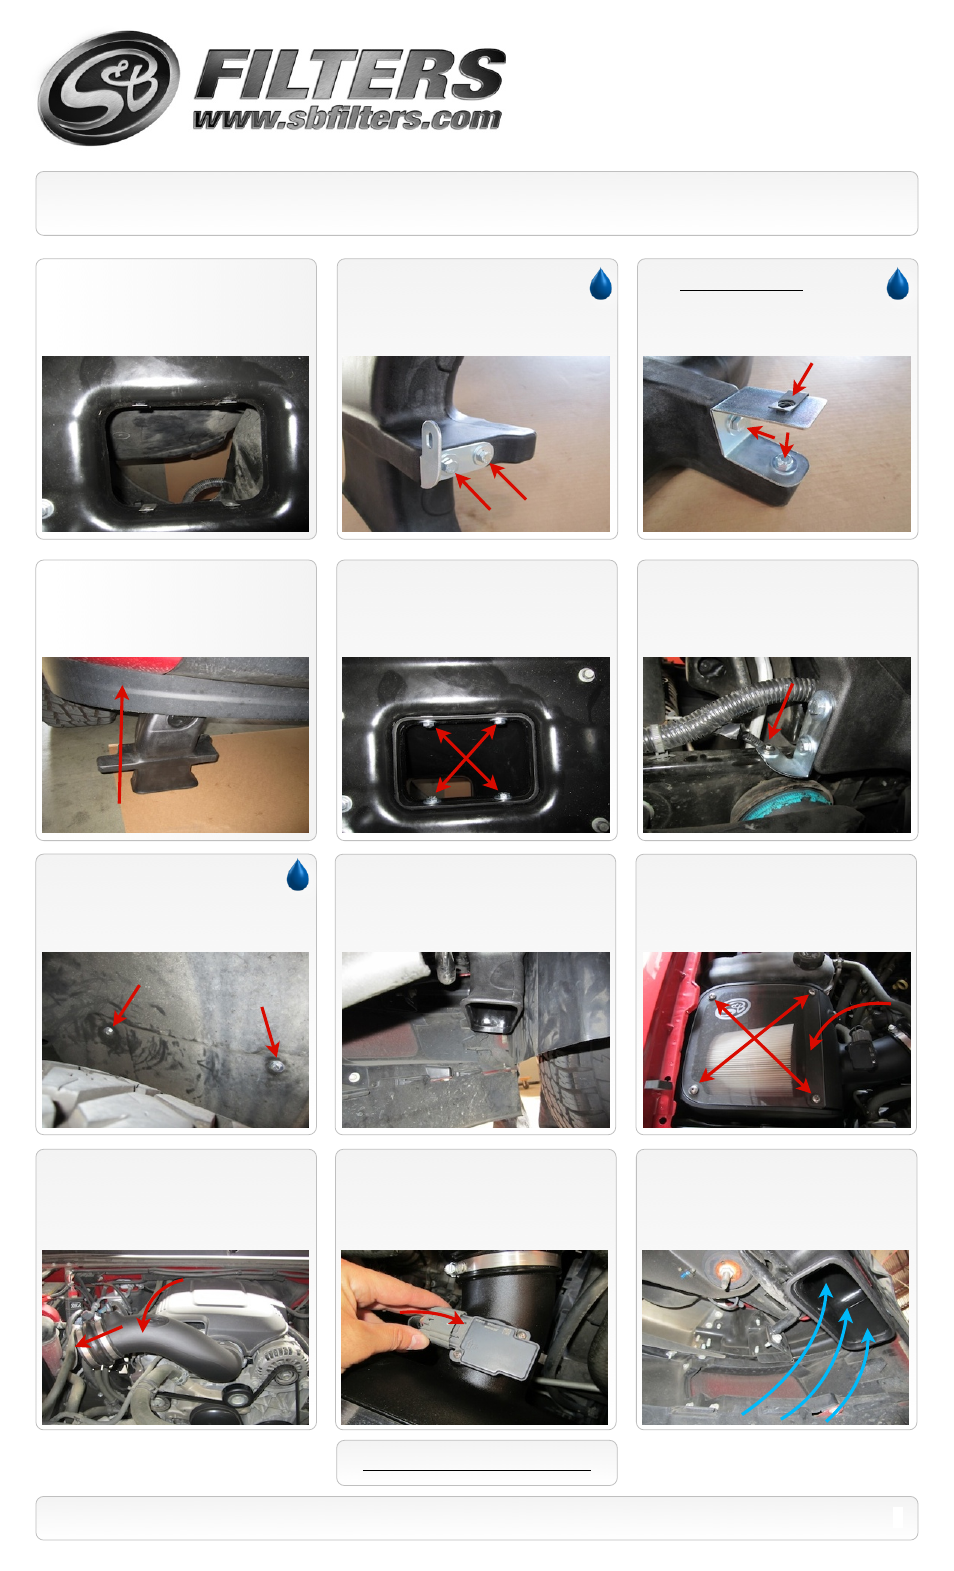
Installation instructions (continued) p/n: as-1003 – S&B Filters Cold Air Intake Scoop AS-1003 User Manual
Page 3
15461 Slover Ave., Fontana, CA 92337 - Phone: (909) 947-0015 - Fax: (909) 947-0603 -
INSTALLATION INSTRUCTIONS (continued)
P/N: AS-1003
SEE EXPLODED VIEW ON PAGE 5
3
11.
Chevy Models Only! Attach the
Chevy Bracket
(G)
to the Scoop
(A)
using
two 1/4”-20x1/2” Hex Screws
(D)
and 1/4”
Washers
(E)
. Then install the Clip Nut
(B)
onto the bracket.
10.
Install the Mounting Bracket
(F)
to the
Scoop
(A)
using two 1/4”-20x1/2” Hex Screws
(D)
and 1/4” Washers
(E).
9.
Install the 4 Clip Nuts
(B)
to the bottom
flange of the air box. Be sure that they snap
into the holes.
17.
Reinstall the Air Filter/ Adapter tube
assembly and lid. Do not use thread locker on
lid hardware.
16.
Check to make sure the Scoop
assembly does not interfere with the wheel or
wheel well liner. Check all connections to
make everything is secure
14.
Attach the Mounting Bracket to the front
support using the OE screw and a supplied
1/4” Washer
(E)
.
13.
Using the four 1/4-20x1.0” Hex Screws
(C)
and 1/4” Washers
(E)
secure the scoop
assembly to the air box.
12.
Install the scoop assembly up into the
bottom of the air box from under the truck.
15.
Reattach the fender liner to scoop
using two 1/4”-20x1/2” Hex Screws
(D)
and
1/4” Washers
(E)
. Chevy models will use one
1/4-20x1.0” Hex Screw
(C)
securing the
fender liner to the Chevy Bracket
(G)
.
20.
Reconnect the negative battery terminal.
Inspect the installation, be sure the kit is
properly positioned and all fasteners are
secure. Installation is complete!
19.
Reconnect the MAF sensor wiring
harness (and Pressure Sensor if equipped).
18.
Reposition the intake tube and reattach
the hump coupler to the filter adapter tube.
Tighten all hose clamps when you are
satisfied with the position.