Installation instructions, P/n: as-1003, Vehicle application – S&B Filters Cold Air Intake Scoop AS-1003 User Manual
Page 2: Tools required
INSTALLATION INSTRUCTIONS
VEHICLE APPLICATION
Year: 2009-12
Make: Chevy/ GMC
Model: Silverado/ Sierra 1500
(Trucks only)
Engine: 4.8L, 5.3L, 6.0L, 6.2L
NOTES
Kit may NOT fit with the following:
• Aftermarket Bumper
• Body Lift or Lowering Kit
• Front Hitch
• Front Tow Hooks
• Oversized Wheels and Tires
• Aftermarket Fog lights
15461 Slover Ave., Fontana, CA 92337 - Phone: (909) 947-0015 - Fax: (909) 947-0603 -
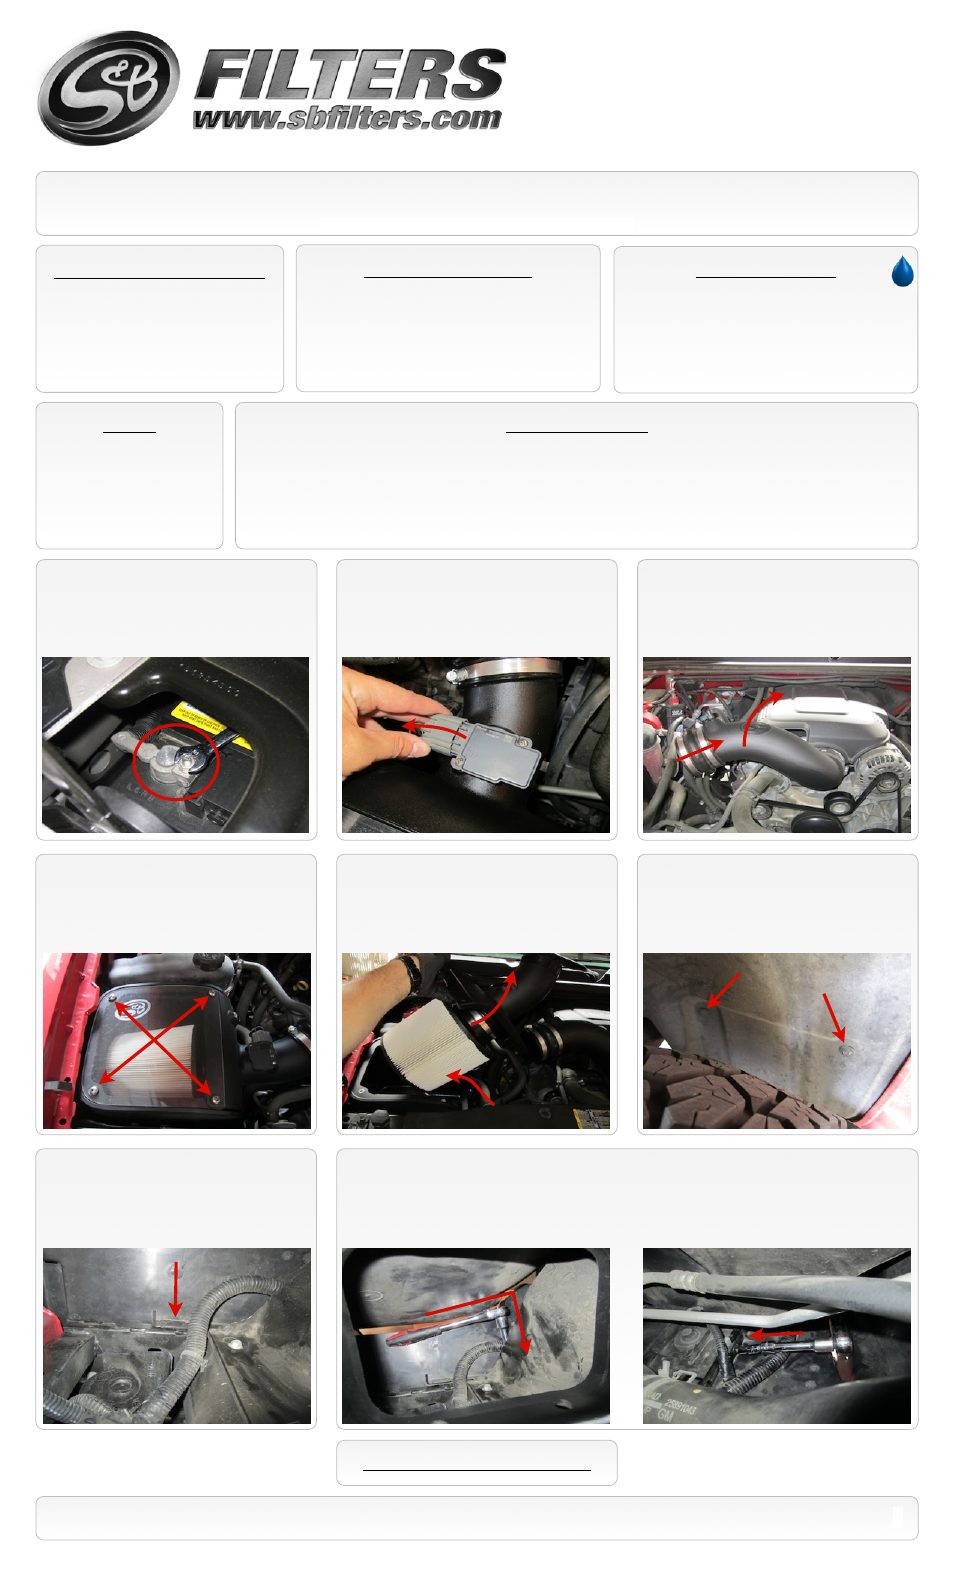
2.
Disconnect the MAF sensor wiring
harness (and Pressure Sensor if equipped).
6.
From inside the wheel well, remove the
screw on the right using a 10mm socket and
the panel pin on the left using a flat blade
screwdriver.
P/N: AS-1003
SEE EXPLODED VIEW ON PAGE 4
2
Important: Read warning page prior to proceeding.
BEFORE YOU START
• Please read the entire product guide before proceeding.
• Ensure all components listed on page 5 are present.
• If you are missing any of the components, call our customer support at (909) 947-0015.
• Do not work on your vehicle while engine is hot.
• Make sure the engine is turned off and the vehicle is in Park or the Parking Brake is set.
Thread Locker Use
We have provided a small tube of thread locker in
your kit. Whenever you see the symbol above on a step
of the instructions apply 1 small drop of the thread locker
to the threads of the screws or bolts. This will keep your
hardware from vibrating loose during rough driving. If the
hardware ever needs to be removed, do so slowly to
avoid having the inserts strip out from the plastic. DO
NOT USE ON LID HARDWARE, MAY CAUSE CRACKS.
7.
Looking through the bottom of the air box,
remove the panel pin mounting the plate
between the wheel liner and front support.
8.
Using a 7mm socket and extension, position the ratchet through the air box and go around the
support to access the other screw mounting the plate. This screw will be reused with the new scoop.
Remove the plate from the vehicle from under the truck by pulling down and towards the motor.
TOOLS REQUIRED
• Ratchet and Extensions
• 7mm, 7/16”, 10mm Sockets
• 10mm, 7/16” Wrenches
• 5/16” Nut driver
• Flat and Phillips Screwdrivers
• Pliers
3.
Loosen the two hose clamps on the
Hump Coupler and one on the throttle body.
Then rotate the assembly out of the way.
1.
With the ignition switched off and the
parking brake set, disconnect the negative
battery cable on the passenger’s side.
4.
Remove the four screws from the lid.
Then remove the lid from the vehicle.
5.
Carefully remove the Air Filter/ Adapter
tube assembly up out of the air box.