Rough Country 770S User Manual
Page 8
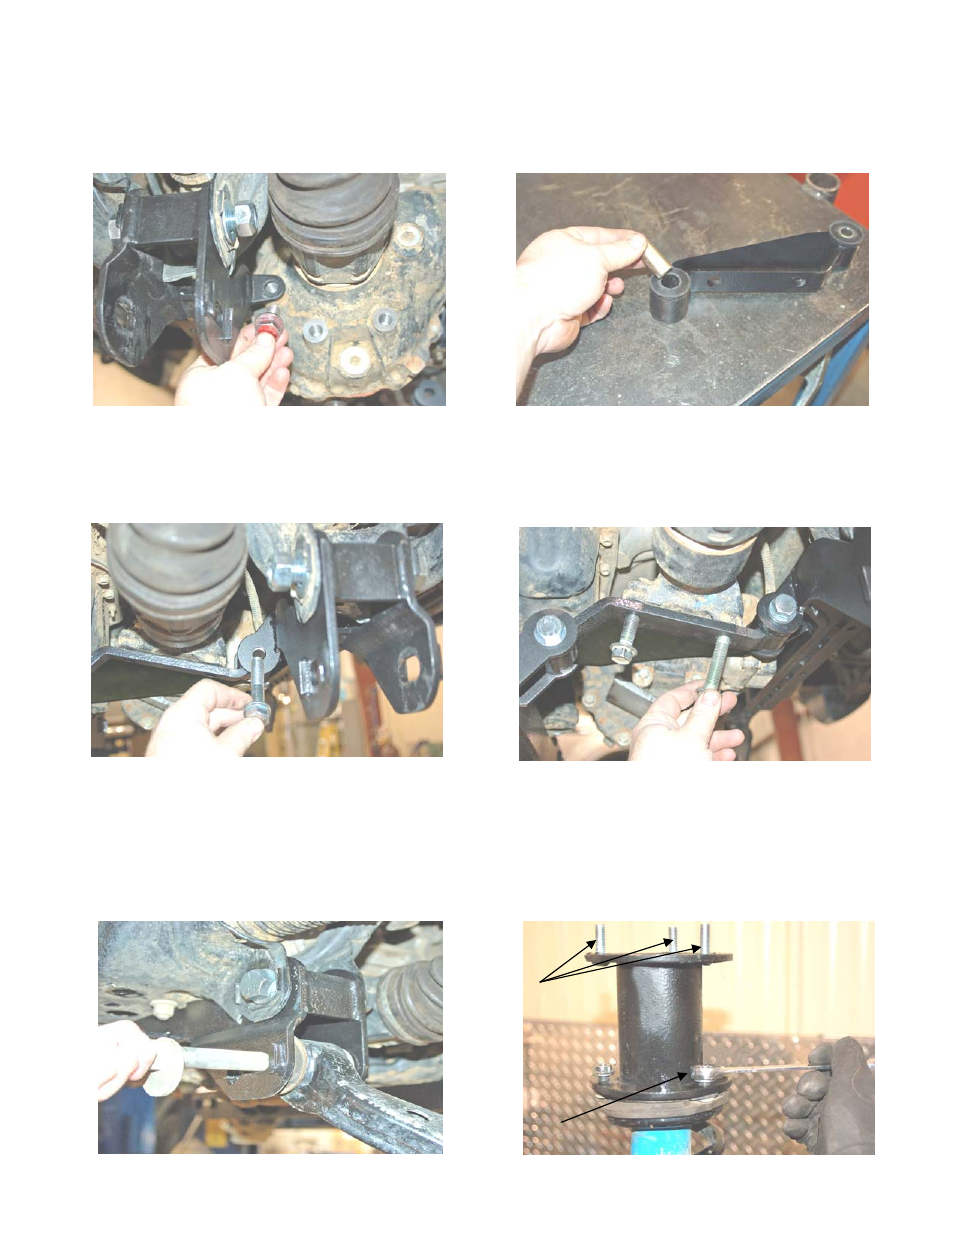
29. Install the rear cross member into the rear mounting pockets using the supplied 14mmx130mm bolt from 1770 bag2.
30. Using the 14mmx25mm bolt and washer from 1770bag3, bolt the differential to the tab on the front cross member as
shown in PHOTO 23.
31. Insert the bushings and sleeves from 1770bag3 into the passenger diff bracket, as shown in PHOTO 24.
PHOTO 23
PHOTO 24
32. Using the 9/16” x 3 1/2”” bolts, washers and nuts, from 1770bag3, bolt the passengers side diff bracket to the front
and rear cross member as shown in PHOTO 25.
33. Using the factory hardware install the bolts in the bottom of the bracket into the differential as shown in PHOTO 26.
PHOTO 25
PHOTO 26
PHOTO 27
34. Using the factory hardware, reinstall the lower control arms as shown in PHOTO 27.
35. Locate the supplied 3/8” stud extensions. Using a 9/16” socket snug self clinching stud in the new spacer. The stud
should clinch with about 35-45 ft/lbs of torque. Do not over torque the nut.
36. Place the strut extension on top of the factory strut. Due to the flange of the factory nut being too large to install back
on the factory strut bolts, use the 3/8” nuts from 1770bag6.See PHOTO 28. Tighten the nuts to 30ft. lbs. using a
14mm wrench. The stock strut nuts will install on top of the new strut spacer.
PHOTO 28
PHOTO 27