VEGA RS232_Ethernet connection User Manual
Page 10
10
4 Adjustment with PACTware
RS232/Ethernet connection • VEGAMET 391/624/625, VEGASCAN 693, PLICSRADIO C62
30325-EN-130701
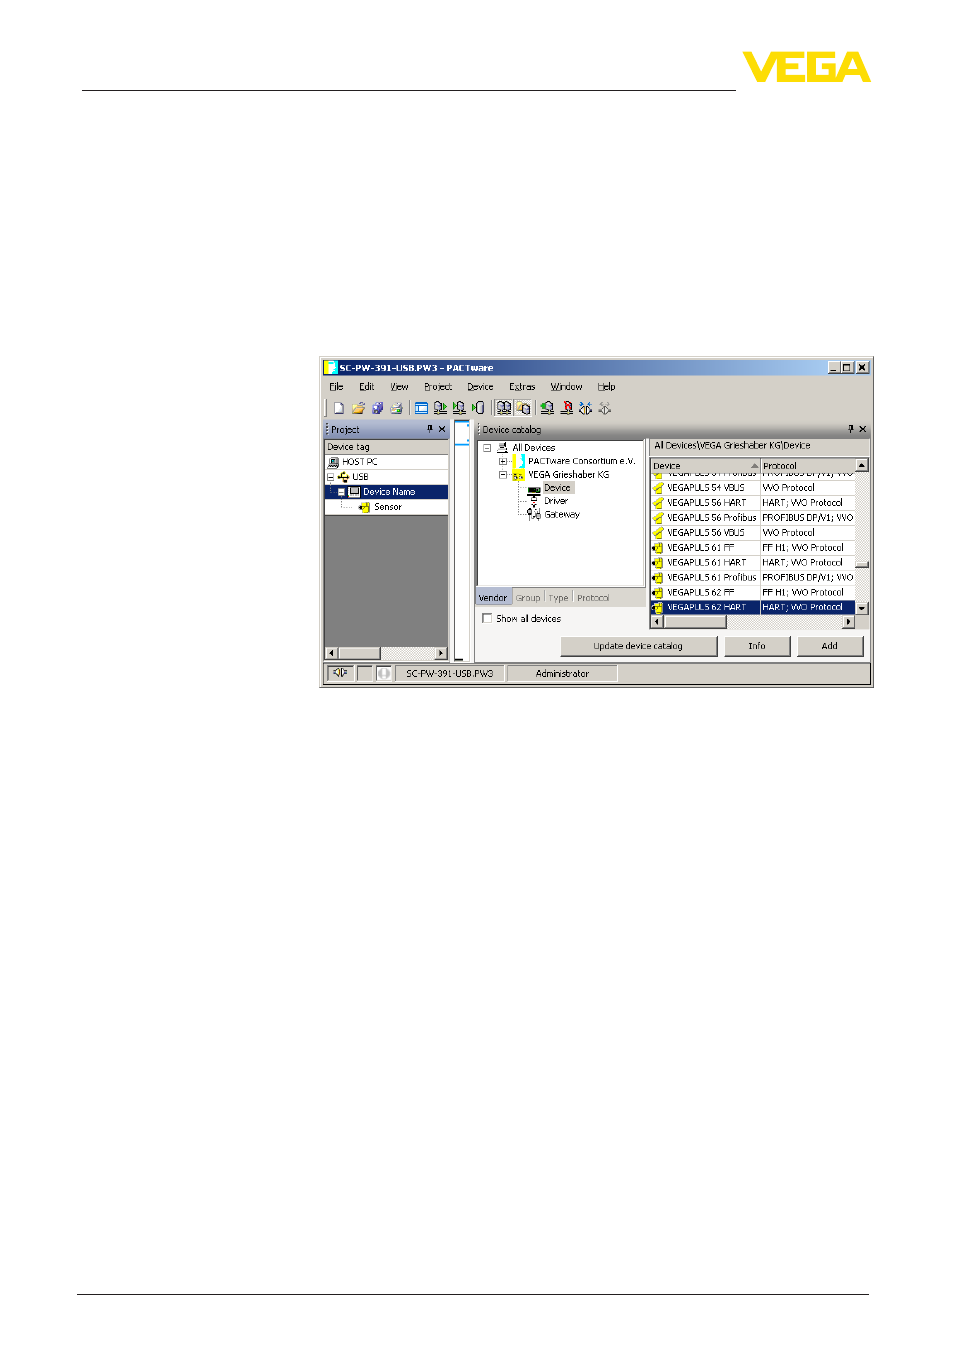
1. In the device catalogue, first select the "VEGA USB" DTM from
the category "Driver" and transfer it, e.g. by double clicking, to the
project window.
2. Select the VEGAMET 391 DTM from the category "Gateways"
and transfer it into the project window.
3. Select the requested sensor DTM from the category "Device" and
transfer it to the project window.
4. Now open the DTM by double clicking on the sensor in the project
window and carry out the desired settings, see chapter "Param-
eter adjustment".
Fig. 2: Project with VEGAPULS
Project creation, VEGAMET 624 with sensor
The following example shows a typical project containing a sensor
connected to a VEGAMET 624. Communication with VEGAMET
624 is carried out in this example via network and Ethernet. We
recommend using the "VEGA project assistant" as this considerably
facilitates project creation and helps avoid errors. All participating
components are found automatically and integrated into the project.
In case the planning is nevertheless carried out manually, e.g. when
creating an offline project, the following DTMs must be added to the
project tree:
1. In the device catalogue, first select the "VEGA Ethernet" DTM
from the category "Driver" and transfer it, e.g. by double clicking,
to the project window.
2. Select the VEGAMET 624 DTM from the category "Gateways"
and transfer it to the project window.
3. Select the requested sensor DTM from the category "Device" and
transfer it to the project window.
4. Select the "VEGA-Ethernet" DTM in the project tree and select via
the right mouse key the menu item "Additional functions - Change
DTM addresses". Enter in the field "New address" the IP address
or the Host name the VEGAMET should get later on in real opera-
tion.
Connection, VEGAMET
624 via Ethernet