Veris Industries TURBO SERIES Recordal Install User Manual
Page 7

Page 7
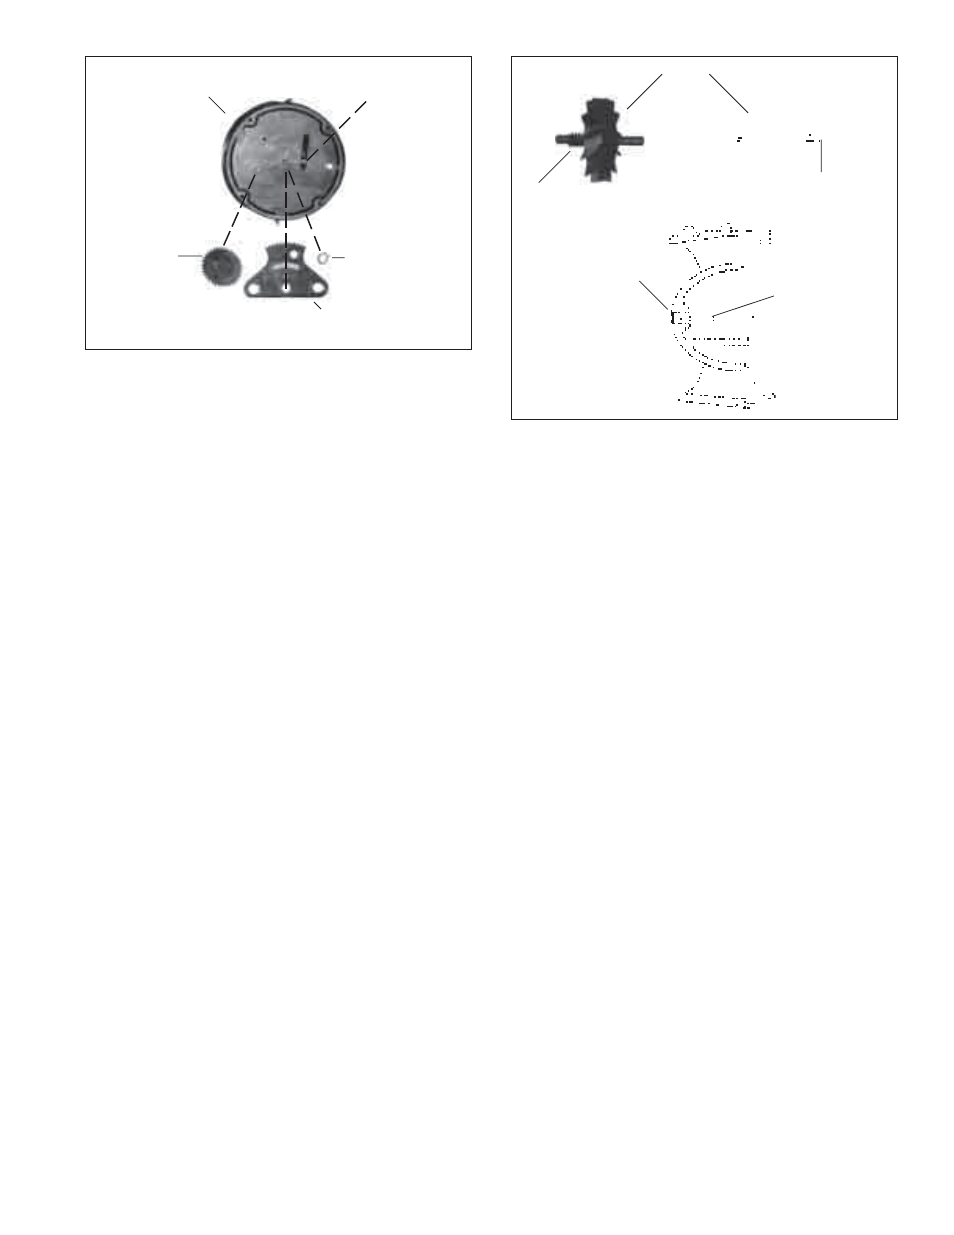
Figure 4b. Calibration Ring/Linkage Assembly, 6"
RETAINING RING
TRANSMISSION
GEAR
CALIBRATION DRIVE
PLATE
CAGE INSERT
(TOP VIEW)
PIN OF
CALIBRATION
RING
NOTE
When reassembling, the pin on the perimeter of the
calibration ring must be aligned with the arrow tip located
on the nose cone assembly (see Figure 4a). For 1 1/2"-
4" sizes, the calibration linkage is to be installed into cage
with larger hole to engage calibration ring tab, and side of
chamfered edge of hole towards nose cone assembly
(see Figure 4a). With calibration linkage fully inserted to
cage stop, install nose cone onto cage and rotate counter-
clockwise. This rotation engages pin of ring to calibration
linkage. The hole of the calibration linkage has to be
aligned onto the calibration shaft, engaging it fully so that
the calibration ring cannot vibrate during operation. The
calibration shaft lock screw should also be tightened
securely to hold the calibration ring in its desired position.
After the calibration mechanism is serviced or replaced, be sure to check
the accuracy and calibration in accordance with the instructions in
section 3-4 of this manual.
4-7. MAGNET CARRIER/TOP GEAR SET
Remove the magnet carrier from the measuring element insert by lifting
it off the stainless steel pin (see Figures 3a and 3b). Check the
condition of the magnet and gear on the magnet carrier for damage or
wear. If significant wear or damage is present, replace the magnet
carrier.
Remove the hold down strap (see Figures 3a and 3b.) Check the
condition of the transmission shaft gear for damage or wear. If
significant wear or damage is present, replace the gear. Remove gear
by lifting off the shaft.
Figure 5. Rotor and Nose Cone Assembly (1 1/2" - 6" Turbo
Meters)
4-8. ROTOR AND BEARINGS
The rotor can be inspected by removing the nose cone assembly from the
measuring element insert as outlined in section 4-5 of this manual.
Check the rotor worm and blades for signs of damage and wear. Also
inspect the bearing bushings in the front and rear shaft. If damage or
wear has occurred, replace the part (see Figure 5).
The rotor bearing pins in the straightening vane and nose cone
assembly should be inspected for signs of damage and wear (see
Figure 5). The spherical end of the bearing pin must not show any drag
lines and/or wear.
NOTE
Only highly-polished bearing pin ends insure a minimum
of friction and optimal meter performance. Bearing pins
are an integral part of the straightening vane and nose
cone assembly. Wear or damage would require the
replacement of this component.
To reassemble, the rear nose cone must be installed to cage. See
section 4-5. Now place the rotor assembly with worm gear side leading
through the cage, place on the rear rotor bearing pin, while tipping the
assembly back so that the opening is up. See section 4-6 to insure
calibration rings are properly assembled with nose cone assembly.
Insert the front nose cone assembly partially onto the cage insert,
engaging the bearing pin with the front bearing of the rotor. Tilt the
measuring element insert assembly forward and back to see that the
rotor now engages the bearing pins on the straightening vane/nose
cones and is free to rotate and slide fore and aft.
ROTOR
ROTOR
WORM
BEARINGS
(2)
NOSE CONE
ASSEMBLY
(2)
BEARING
PIN
