Veris Industries TURBO SERIES Recordal Install User Manual
Page 6

carefully pressing (with flat surface of blade screwdriver) on bottom of
tube located inside rear nose cone. Press to release detent lock,
approximately 1/4" vertical travel, then lift tube out from top of cage
insert. Lift transmission shaft assembly up and out of bottom bearing,
then slide shaft downward and diagonally out (towards you) to remove
from nose cone/cage assembly. Finally, holding cage firmly with one
hand, rotate nose cone clockwise with other hand, then carefully lift off
cage. Reinstallation is reverse of removal.
Refer to Section 4-8 of this manual to correctly reassemble compo-
nents.
4-6. CALIBRATION MECHANISM
To disassemble the calibration ring assembly, the following proce-
dures are required (see Figures 3a and 3b). Refer to Sections 4-2
through 4-5 above. Remove the calibration shaft seal plug and
unscrew the calibration shaft lock screw from the cover plate. Remove
the calibration shaft thrust washer and calibration shaft. The calibra-
tion shaft can be pressed out of the cover plate from below. The
calibration shaft O-ring may be removed if a leak exists at this point in
the disassembly of the meter. If replaced, the O-ring should be coated
slightly with a silicon grease before insertion. Clean all parts as
required.
To gain access to the calibration ring, the straightening vane/nose
cone must be removed. See Section 4-5 to remove. To remove
calibration ring from nose cone assembly, align the ring slots with
bayonettes of nose cone assembly located on inner ring of calibration
ring. To remove, carefully lift the calibration ring from the nose cone
assembly. Reinstallation is the reverse of this procedure.
Page 6
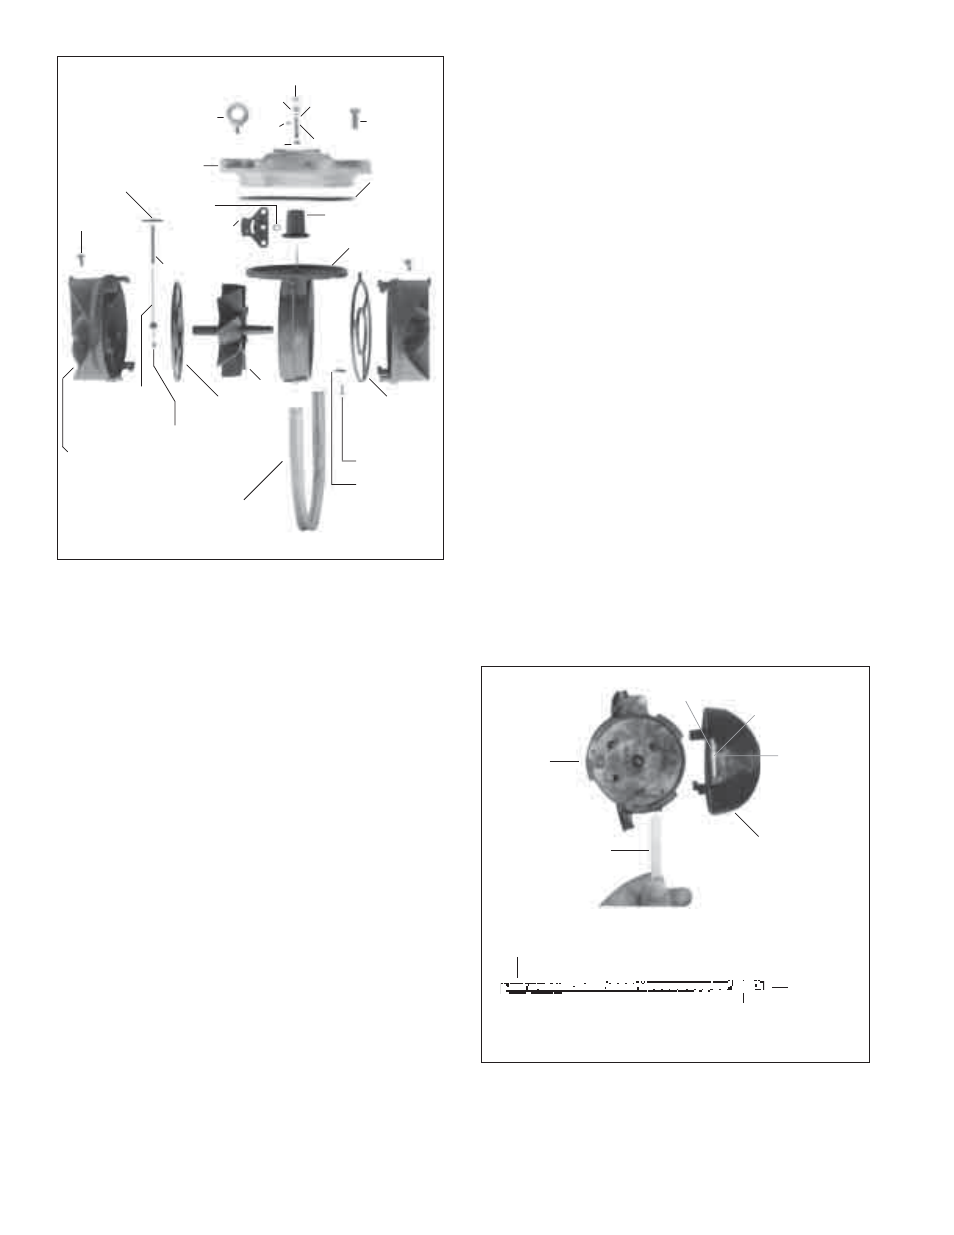
Figure 3b. Register and Measuring
Element Assembly, 6"
MAGNET
CARRIER
CAGE
INSERT
HEAD
O-RING
COVER
PLATE
NOSE CONE
SETSCREW
TRANSMISSION
SHAFT GEAR
PROTECTION
TUBE
EYEBOLTS
HEAD BOLT
SEAL PLUG
LOCK SCREW
THRUST WASHER
O-RING
CALIBRATION GEAR
CALIBRATION
SHAFT
CALIBRATION
DRIVE PLATE
RETAINING
RING
Figure 4a. Calibration Ring/Linkage Assembly, 1 1/2" - 4"
CALIBRATION
LINKAGE
ARROW
TIP
CAGE
INSERT
NOSE
CONE
TOP SIDE
SMALL HOLE
WITH
CHAMFER UP
LARGE HOLE
WITH
CHAMFER
DOWN
INTO CAGE
THIS END
CALIBRATION
RING
PIN
4-4. MEASURING ELEMENT ASSEMBLY
Remove the O-ring and cage seal. Check for damage and clean or
replace prior to reassembly.
NOTE
A cage seal is installed in the 1 1/2" - 6" Recordall
®
Turbo
Series so that the entire water volume flows through the
measuring element.
To remove measuring element from cover, remove calibration shaft
seal plug and lock screw (see Figures 3a and 3b). Place cover register
side down on table or flat surface. Lightly tap or press calibration shaft
from wet side out of bore in cover (1 1/2" - 4" only). Care should be
taken not to strike or bend the calibration linkage.
The measuring element insert can be removed from the cover plate for
service or replacement by removing the cage set screw (see Figures
3a and 3b, quantity 4 for 6" size. Holding the cover plate in one hand,
rotate the thermoplastic element counter clockwise until the bayonette-
like tabs are aligned with open areas of the cover plate (1 1/2" - 4" only).
Remove element from cover plate.
4-5. STRAIGHTENING VANES/NOSE CONE
The straightening vanes are an integral part of the upstream and
downstream nose cone assemblies (see Figures 3a and 3b). To gain
access, the measuring element must be removed from cover as
outlined in Section 4-4 above.
Removal of upstream nose cone provides access to rotor, calibration
ring and transmission assembly. To remove nose cone, unscrew the
upstream nose cone setscrew. For 1 1/2" - 4", slide calibration linkage
into cage insert stop. Take hold of the nose cone/straightening vanes
and turn clockwise, thereby disengaging the calibration linkage from
the tab on the calibration ring and unlocking bayonettes of nose cones
from cage (see Figure 4a). If tab of calibration ring has not disengaged
linkage, rotate ring carefully by pushing struts at interior of element
(between straightening vanes and rotor). Pull the nose cone assembly
out from the measuring element insert. For 6", remove transmission
gear by lifting off shaft, noting alignment of "D" shaped bore with flat
that holds down calibration drive plate, located under magnet carrier
magnet (see Figures 3b and 4b). Remove drive plate. Rotate
calibration ring until pin clears slot of cage. Take hold of the nose cone/
straightening vanes and turn clockwise. Pull the nosecone assembly
out from the measuring element insert. Remove rotor assembly.
Rear nose cone removal requires transmission shaft removal (see
Figures 3a, 3b, 4a and 4b). First, remove strap over gear (1 1/2" - 4"
only). Gear is removed from shaft by simply lifting off. Note shaft has
a flat that matches with "D" shaped bore in gear (required to align for
assembly). Remove nose cone set screw. Remove protection tube by
on shaft (required to align for assembly). Next remove retaining ring
NOSE CONE/
STRAIGHTENING
VANE ASSEMBLY (2)
TRANSMISSION
SHAFT ASSEMBLY
BEARING
CALIBRATION
RING (REAR)
CAGE SEAL
CALIBRATION
RING (FRONT)
CAGE
SETSCREW (4)
WASHER (4)
ROTOR
