RIDGID CountPlus User Manual
Page 8
Ridge Tool Company
Tools For The Professional
TM
SeeSnake
®
CounTPluS Cable-CounTeR
This basic information should only need to be entered when first setting up
the unit, unless it changes. If the measured count on the screen goes higher
than the set cable length, a + icon will precede the measurement on-screen.
Units of Measure
The CountPlus can be set to report in feet and inches, or in meters. Several
formats are available in either measurement system.
Feet
Meters
XX’ YY”
X.xx m
XX ft YY in
X.x m
XX.x ft
To set the preferred measurement units and format:
1. Press the Menu Key
. Select the Tools Menu
and then the
Measure menu .
2. Arrow to the left-hand column and use the Up Arrow
to set the
choice to Feet or Meters.
Arrow to the right hand column and use the Up and Down Keys
to select one of the available formats. Press the Menu Key
to accept
the change and exit.
Figure 9: Units of Measure Screen
The Reel setting for cable length and the distance measure on the screen
will display in the units of measure selected.
Setting Up Text Slides
The CountPlus provides the ability to create titles and up to 6 lines of text
for 20 different slides. These slides can then be used to title individual
scenes or segments from the captured video. When a slide is displayed on
the screen, any recording being done will include the text of that slide in the
recorded frames.
The operator can choose several actions in order to have the slides appear
in a recording as he prefers.
1. Create a new slide for display.
2. Edit an existing slide.
3. Choose an existing slide for display.
4. Turn slide display on or off.
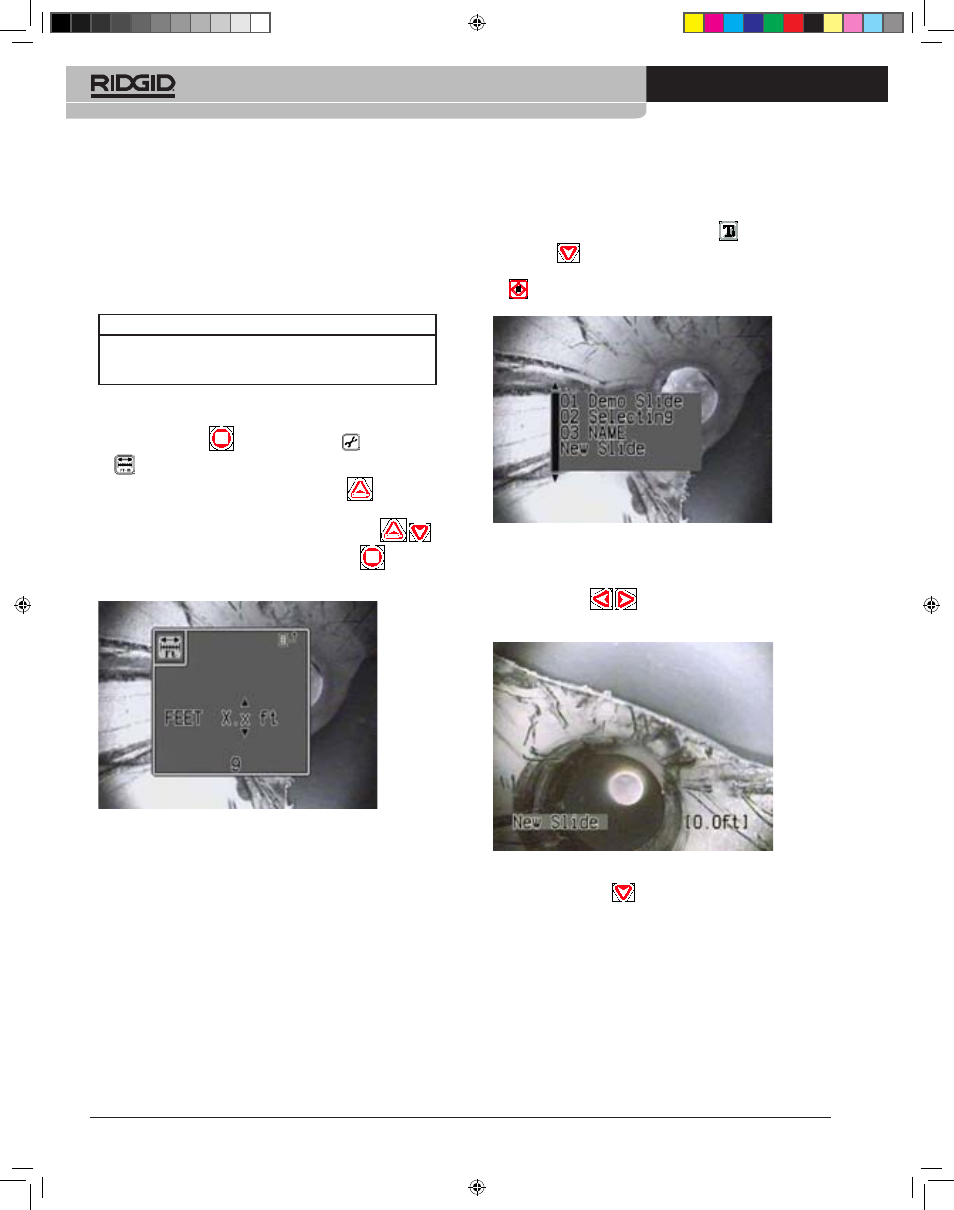
Creating a New Slide
To create a new slide for display:
1) With text display toggled on using the Text Key
, press the Down
Arrow Key
. A list of existing slides will appear with “New Slide” listed
at the bottom. Arrow down until “New Slide” is blinking, and press Select
.
Figure 10: Selecting the ‘New Slide’ Option
2) A new slide will appear in Edit mode. The cursor will be in the Slide Title
area. You can scroll through the characters of the title using the Left and
Right Arrow Keys
. You can add a title for the slide by select-
ing characters (see step 4 below).
Figure 11: New Slide
3) Press the Down Arrow
to leave the Slide Title and enter the text
area. Use the arrow keys to locate the cursor where you want your text
to appear. Note: If you do not create a Title for the slide, the CountPlus
will use the first ten characters of text from the body of the slide as a title.
This only occurs if the Title area is blank.
744_031-601_0A_RevA_Countplus_ma6 6
9/04/2009 10:27:54