Jet Tools C30 User Manual
Page 58
4.
INSTALLAZIONE • INSTALLATION
ENGLISH
ITALIANO
– 60 –
9
040_017_1.tif
E
F
P
N
Q
E
A
C
D
L
C
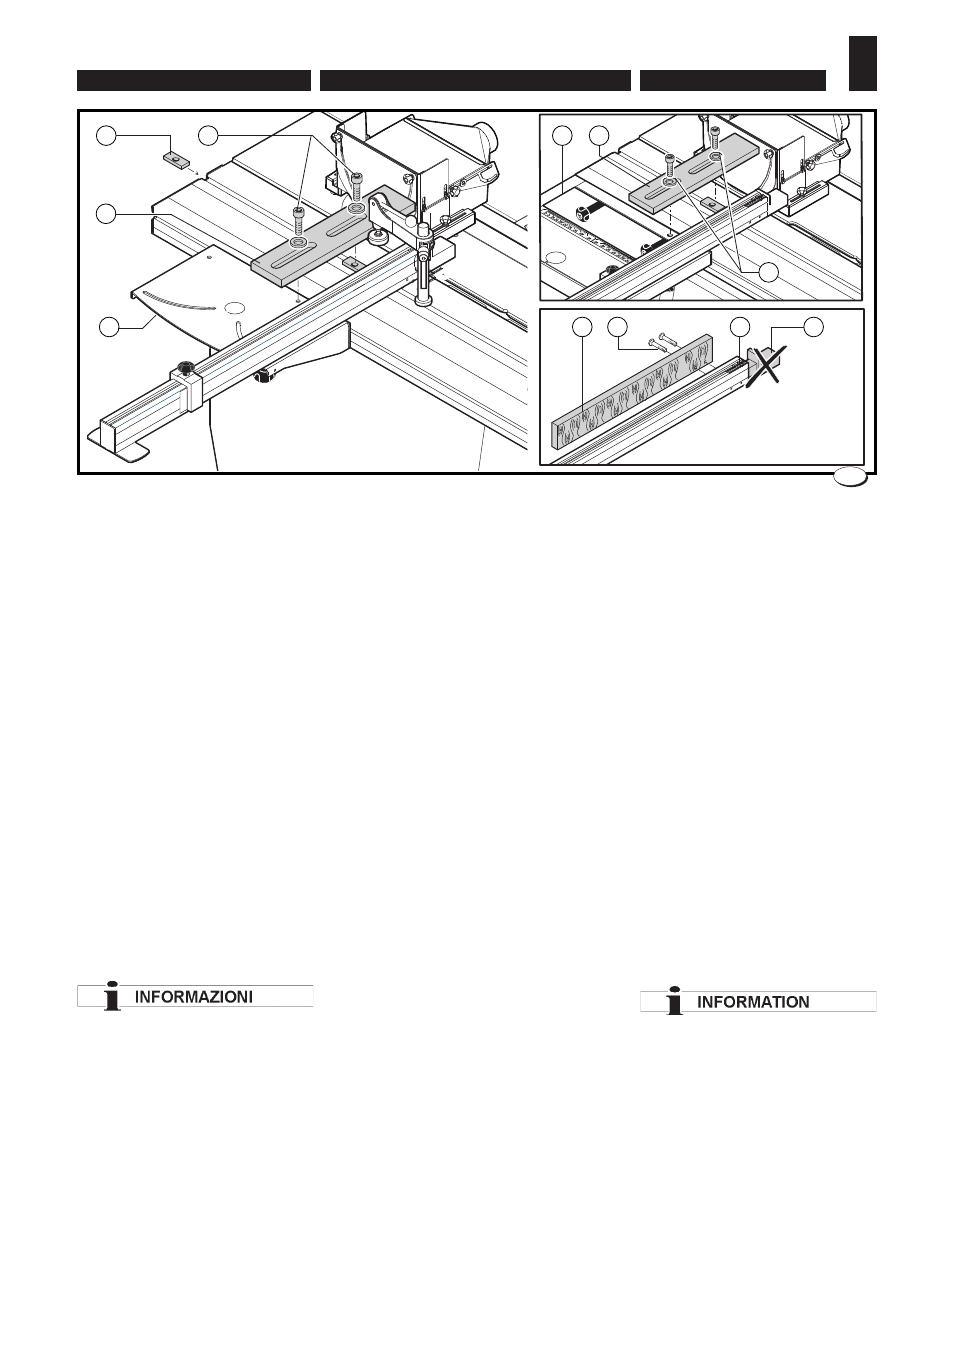
4.3.6 Pianetto a tenonare e
Protezione -
Installazione (fi g. 9)
– Inserire il lardone
A nella sca-
nalatura del vagone.
– Fissare il pianetto a tenonare
C sul piano D o F, mediante le
viti
E.
Paraschegge
Il paraschegge
N non è indicato
per le lavorazioni di tenonatura: In
questo caso è necessario:
– allentare la vite
P e togliere il
paraschegge
N.
– Costruire un tassello di legno
Q
di lunghezza tale da assicurare
un appoggio suffi ciente per il
pezzo da lavorare.
– Fissarlo alla guida utilizzando
due viti di fi ssaggio
L svasate.
La testa delle viti deve essere
inserita nel legno per evitare che
faccia spessore.
4.3.6 Tenoning table and
guard -
Installation (fi g. 9)
– Insert the wedge
A in the slot on
the wagon.
– Fasten the tenoning table
C to
the table
D or F, using screws E.
Chip shield
The chip shield
N is not suitable for
tenoning: Therefore:
– Loosen screw
P and remove the
chip shield
N.
– Construct a wooden dowel
Q
long enough to provide a reaso-
nable support for the piece to be
worked.
– Fix it to the guide using two se-
curing countersink screws
L.
The screw heads must be sunk
completely into the wood so they
don't protrude.