Olympus VS120 User Manual
Page 27
Maintenance
23
Page
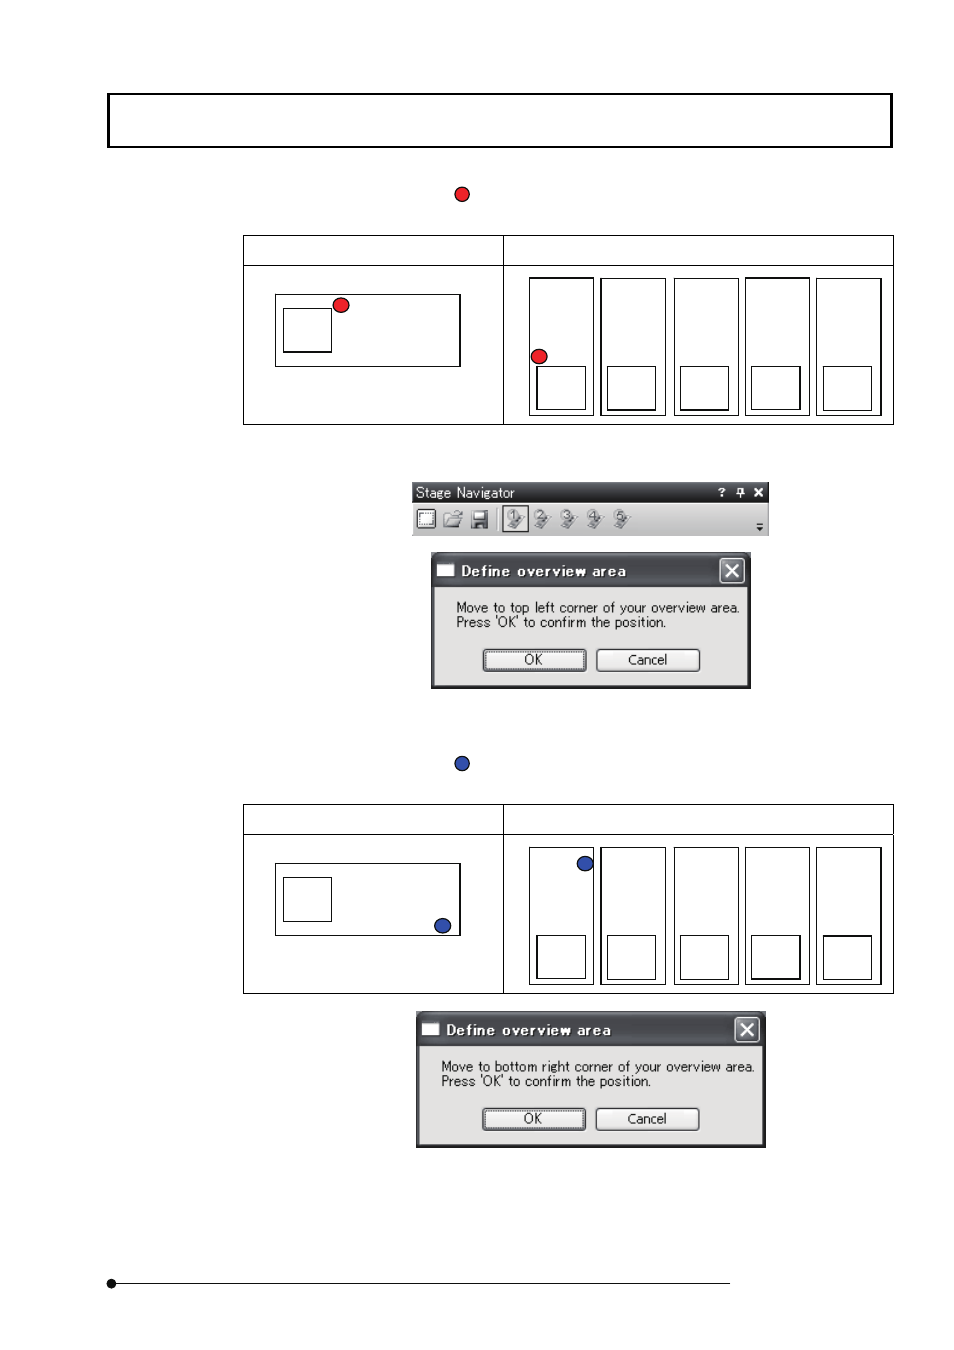
4. Move the stage to
position in the figure below. When the position is determined,
click
in
[Define Overview Area] dialog box.
VS120-S1 and VS120-L100
VS120-S5
When you are using the VS120-S5, click button 1 on the Stage Navigator tool
window.
[Define overview area] dialog box
5. Move the stage to
position in the figure below. When the position is determined,
click
in
[Define Overview Area] dialog box.
VS120-S1 and VS120-L100
VS120-S5
[Define overview area] dialog box
The overview image area has been defined.