Turning on the av controller, Turning on and standby, Turning on & first time setup – Onkyo PR-SC885 User Manual
Page 43: Utton (43), Andby indicator (43), Up and running in a few easy steps
43
Turning On the AV Controller
STANDBY/ON
MASTER VOLUME
CD
TUNER
TAPE
CBL/SAT
GAME/TV
AUX 1
AUX 2
VCR/DVR
DVD
AUDIO SEL
PURE AUDIO
PHONO
DISPLAY
PUSH TO OPEN
OFF
TONE
HDMI OUT
DIGITAL INPUT
ZONE 2
ZONE 3
LEVEL
PHONES
POWER
ON
OFF
STEREO
THX
RT/PTY/TP MEMORY
LISTENING MODE
TUNING
MODE
SETUP
PRESET
TUNING
TUNING
RETURN
ENTER
SETUP MIC
VIDEO
S VIDEO
DIGITAL
AUX 2 INPUT
AUDIO
L
R
CLEAR
STANDBY
ZONE 2
ZONE 3
STANDBY/ON
POWER
INPUT SELECTOR
ON
STANDBY
DIMMER
CDR/MD
SAT
TAPE/AMP
SLEEP
MACRO
REMOTE MODE
--/--- 10
11
12
TV
TV CH
TV VOL
DVD
AUX
1
AUX
2
GAME/TV
CBL/SAT
VCR/DVR
D. TUN
CD
TUNER
TAPE
PHONO
TV
VCR
CABLE
DOCK
DVD
RECEIVER
CD
+
-
1
2
3
ZONE
3
ZONE
2
INPUT
+10
0
CLEAR
1
2
3
4
5
6
7
8
9
ON
RECEIVER
STANDBY
STANDBY indicator
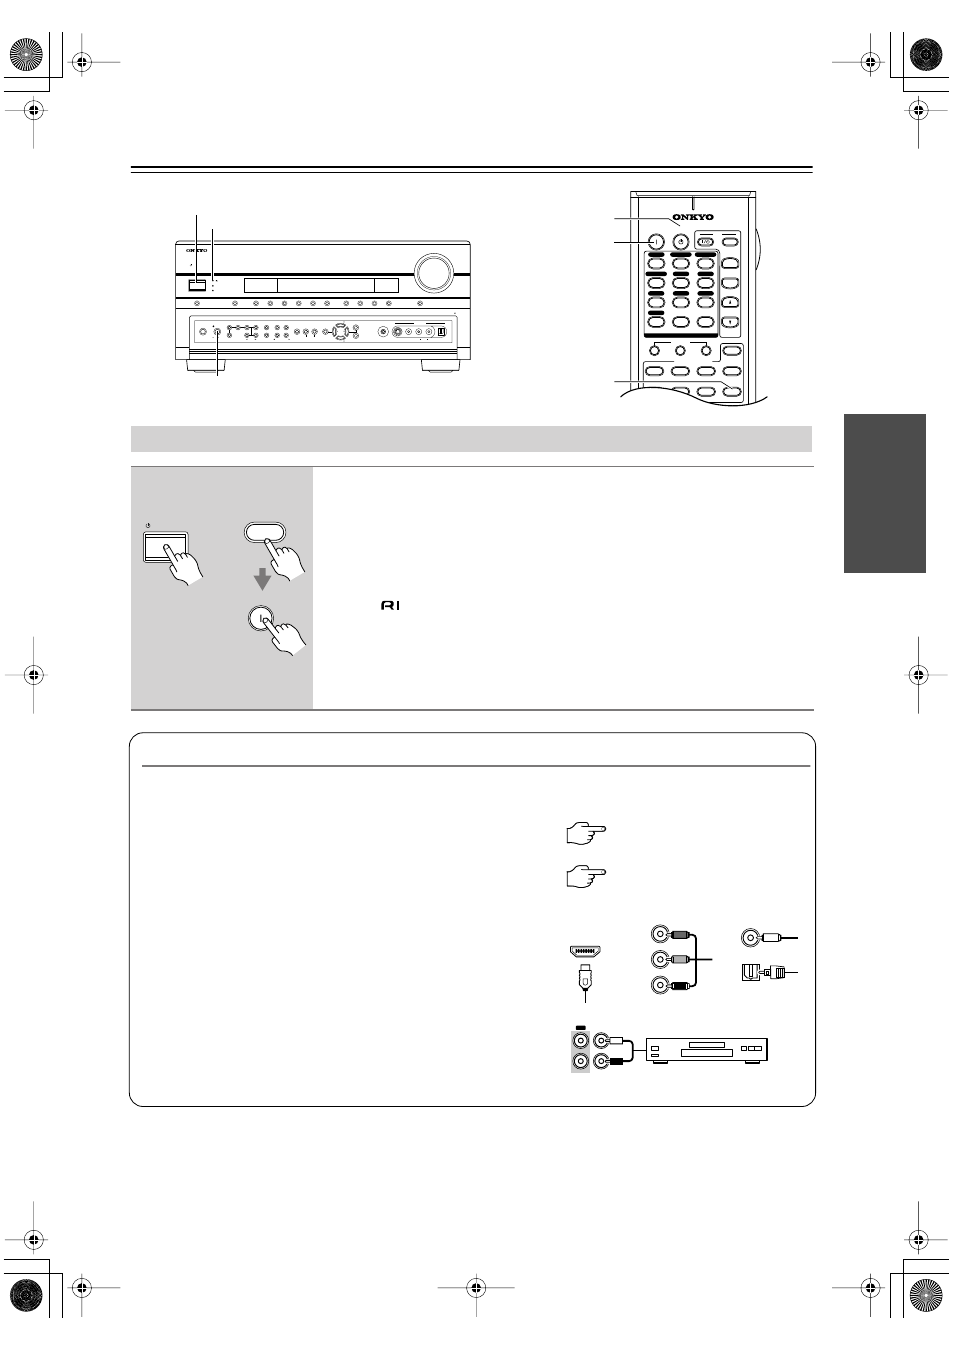
Turning On and Standby
On the AV controller, press the [STANDBY/ON] button.
On the remote controller, press the [RECEIVER] REMOTE MODE button,
followed by the [ON] button.
The AV controller comes on, the display lights up, and the STANDBY indicator goes
off.
Pressing the remote controller’s [ON] button again will turn on any components con-
nected via
.
To turn the AV controller off, press the [STANDBY/ON] button, or press the remote
controller’s [STANDBY] button. The AV controller will enter Standby mode. To pre-
vent any loud surprises the next time you turn on the AV controller, turn down the
volume before you turn it off.
RECEIVER
STANDBY/ON
ON
Remote
controller
AV controller
or
Up and Running in a Few Easy Steps
To get your system up and running with the minimum of fuss, here’s a few pointers to help you configure the AV
controller before you use it for the very first time. These settings only need to be made once.
■ Do the automatic speaker setup—this is essential!
See “Automatic Speaker Setup (Audyssey MultEQ XT)” on page 52.
■ Did you connect your TV to an HDMI OUT or COMPONENT
VIDEO MONITOR OUT 1 or 2?
If you did, see “HDMI Monitor Setup” on page 45.
■ Did you connect a component to an HDMI input,
component video input, or digital audio input?
If you did, see “HDMI Input Setup” on page 47, “Component Video
Input Setup” on page 48, or “Digital Input Setup” on page 49 respec-
tively.
■ Did you connect an Onkyo MD recorder, CD recorder, or RI
Dock?
If you did, see “Changing the Input Display” on page 49.
OPTICAL
COAXIAL
Y
P
B
P
R
HDMI
OUT
IN
TAPE
MD recorder, CD recorder,
RI Dock