Operational specifications – Renesas M3A-HS37 User Manual
Page 49
Operational Specifications
3.2.3 Serial Port/SRAM Select Jumpers (JP7 to JP11), RCAN-I/O Jumpers (JP12, and JP13)
Rev.1.00 Oct 09, 2008
3-19
REJ11J0021-0100
3
3.2.3 Serial Port/SRAM Select Jumpers (JP7 to JP11), RCAN-I/O Jumpers (JP12, and JP13)
Set JP7 to JP13 to change the SH7137 SCI channels connected to the serial port connector (J3).
SCI channel 0 is connected to the serial port connector (J3) as default.
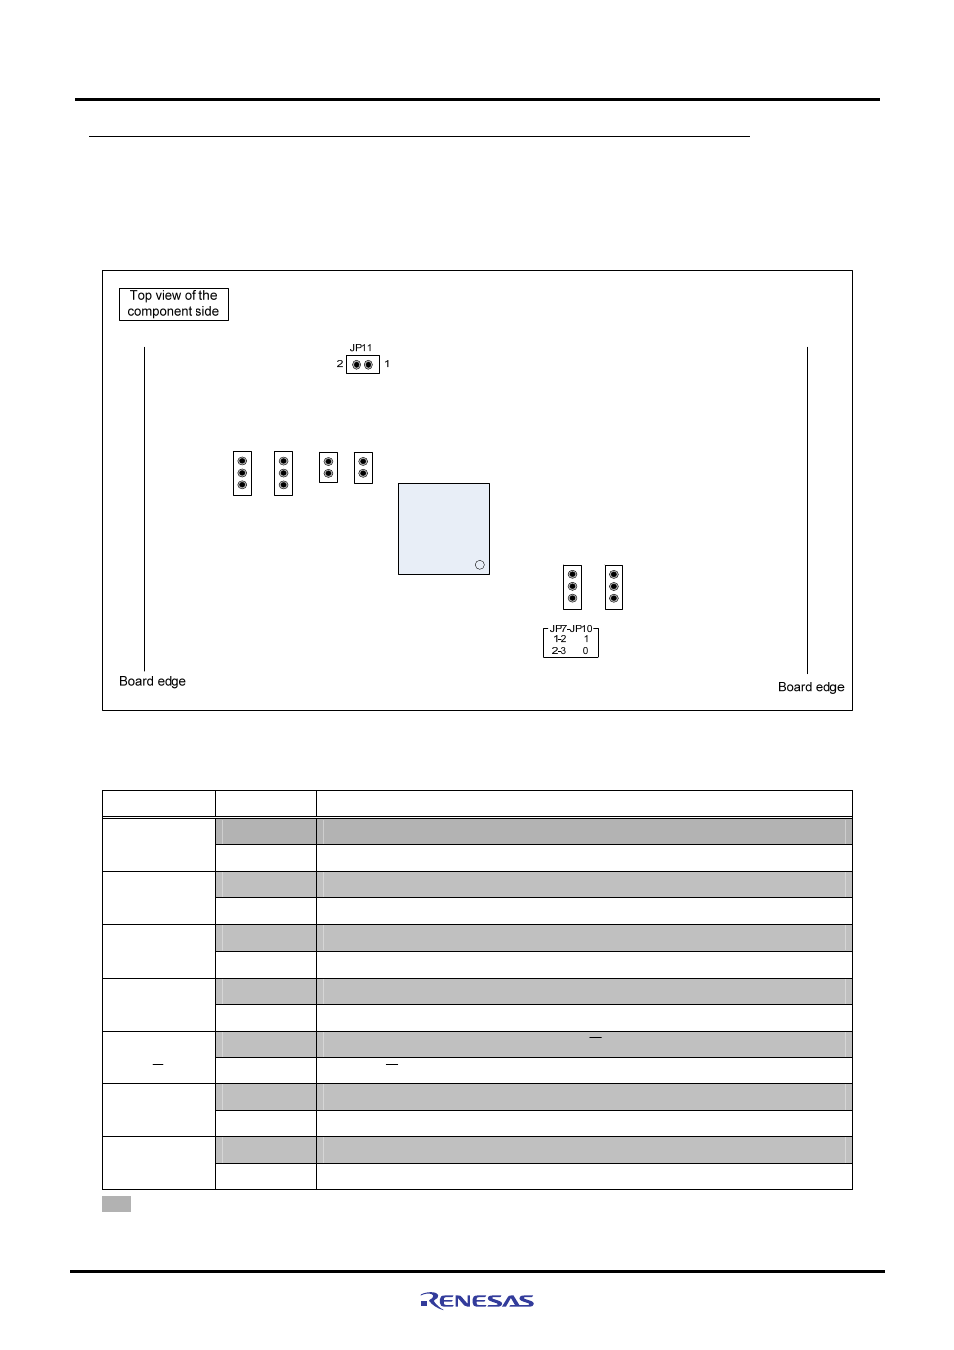
Figure 3.2.4 shows the serial port select jumper assignments. Table 3.2.3 lists the serial port select jumper setting.
1
3
JP9
1
3
JP
10
SH
71
37
CPU
A4
A3
1
3
JP
7
1
3
JP
8
A4
A3
TXD-
S
E
L
RX
D-S
E
L
1
2
1
2
JP1
2
JP1
3
Figure 3.2.4 Serial Port Select Jumper Assignments (JP7 to JP13)
Table 3.2.3 Serial Port Select Jumper Setting (JP7 to JP13)
No. Setting
Function
1-2
The SH7137 PA4/TXD1 pin is connected to the serial port connector (J3)
JP7
TXDSEL
2-3
The SH7137 PE2/TXD0 is connected to the serial port connector (J3)
1-2
The SH7137 PA3/RXD1 pin is connected to the serial port connector (J3)
JP8
RXDSEL
2-3
The SH7137 PE1/RXD0 pin is connected to the serial port connector (J3)
1-2
GND is connected to the A4 of the SRAM (U2)
JP9
A4
2-3
The SH7137 PA4/TXD1 pin is connected to the A4 of the SRAM (U2)
1-2
GND is connected to the A3 of the SRAM (U2)
JP10
A3
2-3
The SH7137 PA3/RXD1 pin is connected to the A3 of the SRAM (U2)
1-2
The SH7137 CS0 pin is connected to the S pin of the SRAM (U2)
JP11
S
Open
Releases S pin of the SRAM (U2)
1-2
The SH7137 CTx0 pin is connected to the TxD pin of the RCAN
JP12
CTx0
Open
Releases the CTx0 pin of the SH7137 MCU
1-2
The pin SH7137 CRx0 is connected to the RxD pin of the RCAN
JP13
CRx0
Open
Releases the CRx0 pin of the SH7137 MCU
indicates the default setting.
Note: Do not make any change with the jumper setting while the M3A-HS37 is operating. Ensure to turn the power OFF
before changing the setting. JP7 to JP10 must be set in the same way.