Connecting and verifying the silentwriter 1765 – NEC SILENTWRIT 1700 Series User Manual
Page 26
2–8
1765 Network Printer Configuration Guide
Connecting and Verifying the
Silentwriter 1765
This section describes the steps to connect the network
cable to your 1765 and verify its operation. The steps are
1.
Identify the LAN card panel.
2.
Connect the network cable.
3.
Turn on the printer.
4.
Print a configuration page.
After completing the tasks in this section you will be
ready to install NEC 1765 software and connect the
Silentwriter to your network.
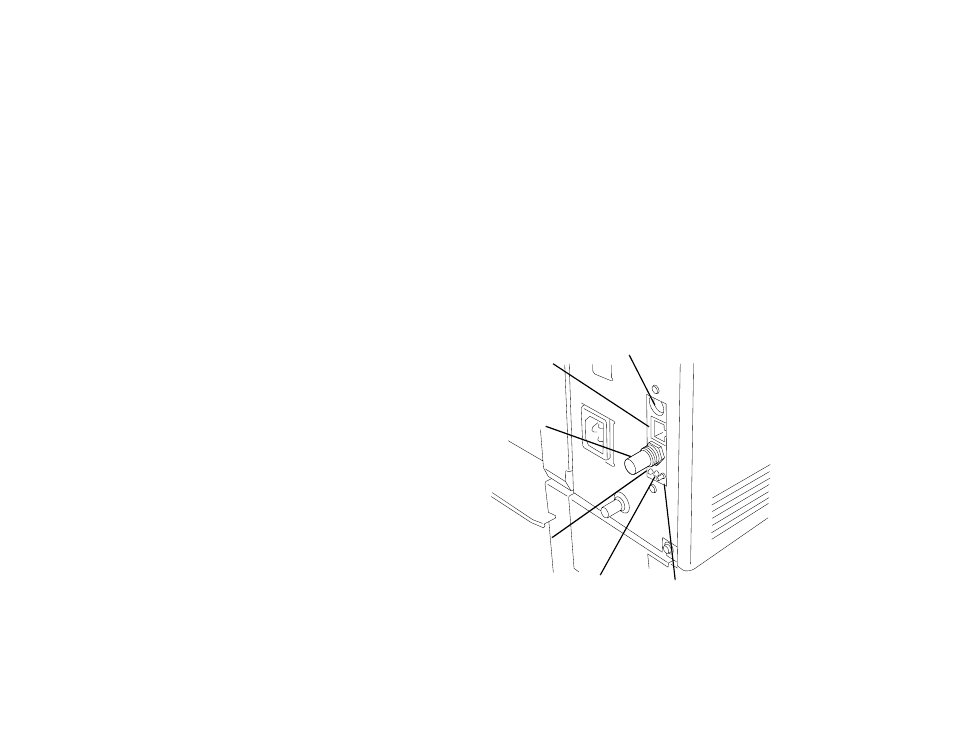
Identify the LAN Card Panel
The diagram shows the LAN card panel and its
components
Configuration Button:
Use this button to print a
configuration page or restore the LAN card to its
factory default settings.
Green LED:
Lights up when the Silentwriter is
receiving a packet or downloading flash-ROM
information
Red LED:
Lights up when transmitting a packet
Printing a Configuration Page
To print a configuration page, turn on the printer and
press the configuration button. For more information
about the configuration page, see “Print a Configuration
Page” on page 2-13.
Restoring Factory LAN Card Settings
You can use the configuration button to restore the LAN
card to factory default settings.
Caution!
Any custom settings will be lost when
you restore factory default settings. Before restoring,
print a configuration page so you have a record of
custom settings.
To use this button as a reset button
1.
Turn the power off.
2.
Press and hold the button.
3.
Turn the printer power on.
4.
Continue to press the button for at least 15 seconds.
5.
Release the button.
Red LED
Green LED
LocalTalk (AppleTalk) connector
LAN Card Panel
Twisted Pair
Ethernet
Connector
Thin Coaxial
Ethernet
Connector
Configuration
Button