Protect/releasing protection, Print (dpof) – Panasonic DMR-E60 User Manual
Page 46
46
Editing still pictures (continued)
Protect/Releasing protection
[SD/CARD] [RAM]
You can set/release protection for whole folders or for individual still
pictures.
After performing steps 1 to 2 of “Displaying still pictures
(Album Display)” (page 43), perform the following steps:
3
Select the folder for displaying to set/release the
protection.
(page 42, “Selecting the drive and the
folder”)
4
Use [
3, 4] (10) to select “Protect” and press
[ENTER]
(10).
5
Use [
3, 4, 2, 1] (10) to select “Folder” or still
picture you wish to protect/unprotect and press
[ENTER]
(10).
≥Repeat this if you set/release protection of more than one still
picture.
ª To select all the still pictures in the folder
Use [
3, 4, 2, 1] (10) to select “Folder” and press [ENTER]
(10).
(A check mark
appears on the folder’s name; check marks
inputted separately will be erased.)
To cancel check marks:
Use [
3, 4, 2, 1] (10) to select the folder or still picture with
the check mark and press [ENTER]
(10).
6
Use [
3, 4, 2, 1] (10) to select “Protect”/“Cancel”
and press [ENTER]
(10).
≥The confirmation screen appears.
7
Use [
2, 1] (10) to select “Yes” and press [ENTER]
(10).
≥The padlock mark appears/disappears on the selected folder
or still picture.
ªTo stop partway through
Select “No” in step 7 and press [ENTER]
(10).
Or
Press [RETURN]
(28).
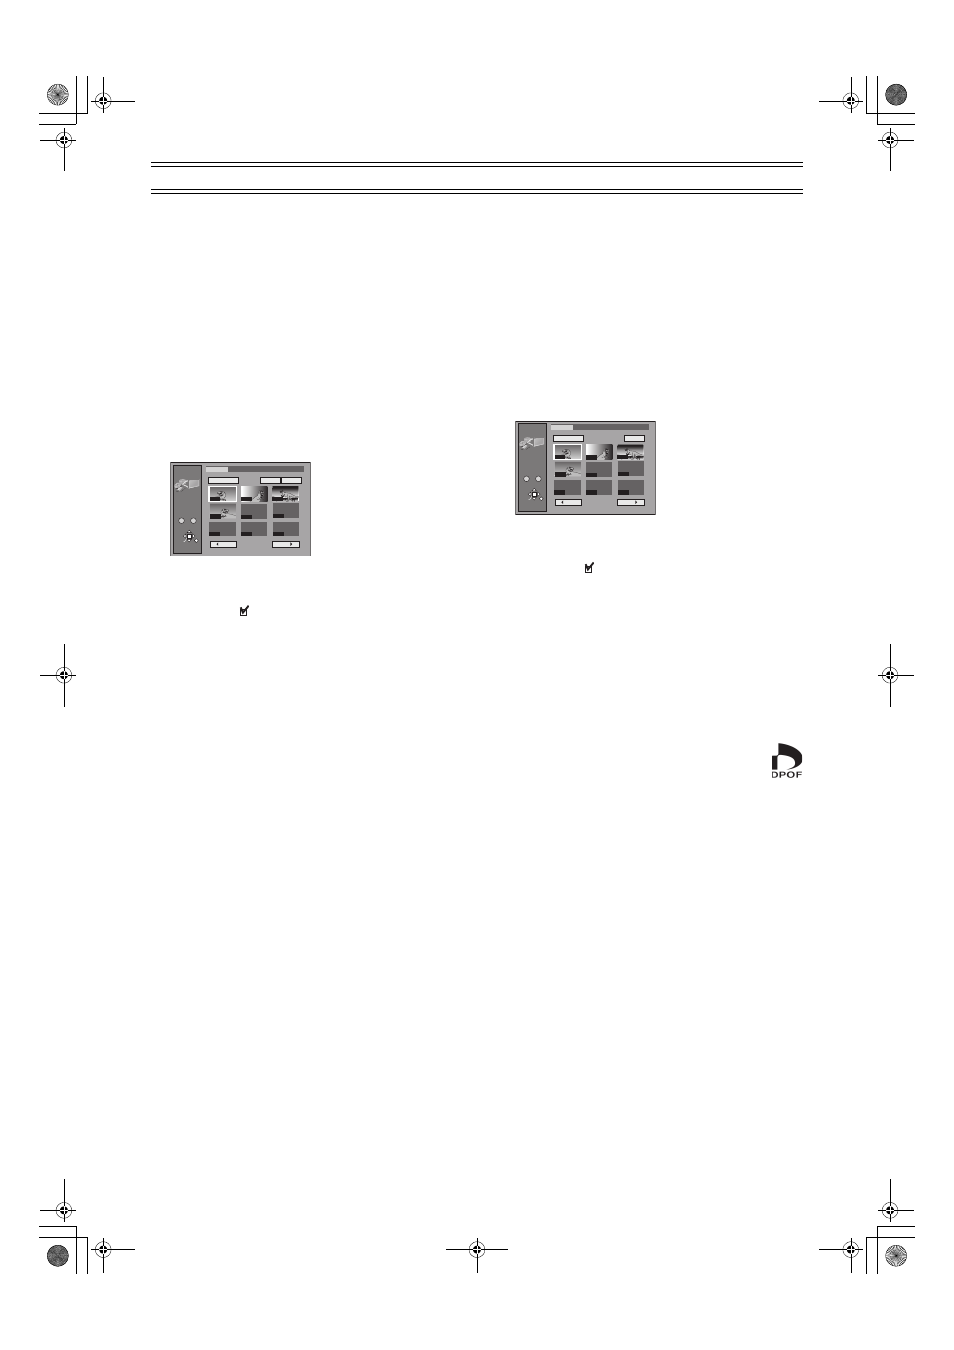
Print (DPOF)
[SD/CARD]
You can select a whole folder or individual pictures for printing and
specify the number of prints to be made (maximum 999 files).
After performing steps 1 to 2 of “Displaying still pictures
(Album Display)” (page 43), perform the following steps:
3
Select the folder for displaying to set the DPOF.
(page 42 “Selecting the drive and the folder”)
4
Use [
3, 4] (10) to select “Print (DPOF)” and press
[ENTER]
(10).
5
Use [
3, 4, 2, 1] (10) to select the “Whole” or still
pictures you wish to print and press [ENTER]
(10).
≥Repeat this if you print more than one still picture.
ª To select all the still pictures in the folder
Use [
3, 4, 2, 1] (10) to select “Whole” and press [ENTER]
(10).
(A check mark
appears on the folder’s name; check marks
inputted separately will be erased.)
To cancel check marks:
Use [
3, 4, 2, 1] (10) to select the folder or still picture with
the check mark and press [ENTER]
(10).
6
Use [
3, 4, 2, 1] (10) to select “DPOF” and press
[ENTER]
(10).
≥The confirmation screen appears.
7
Confirm that “Number of prints” is selected and use
[
2, 1] (10) to set number of pages (0 to 9).
8
Use [
3, 4, 2, 1] (10) to select “Set” and press
[ENTER]
(10).
≥The DPOF mark appears if you set one or more
pictures to print.
ªTo stop partway through
Select “Cancel” in step 8 and press [ENTER]
(10).
Or
Press [RETURN]
(28).
ªTo change print (DPOF) settings
1) In step 5, use [
3, 4, 2, 1] (10) to select “Whole” or a still
picture with DPOF mark and press [ENTER]
(10).
2) Use [
3, 4, 2, 1] (10) to select “DPOF” and press [ENTER]
(10).
3) Use [
2, 1] (10) to change the print setting.
≥The print setting will be cancelled if you set number of pages
to “0”.
4) Use [
3, 4, 2, 1] (10) to select “Set” and press [ENTER]
(10).
For your reference
≥Settings cannot be made for folders and files not in accordance
with DCF standards.
≥Print settings (DPOF) made using this unit may not be viewable
on other equipment.
≥Settings cannot be made if there is no remaining space on the
card.
≥All settings made on other equipment, except the number of
prints, will be canceled.
JPEG
Protect
RETURN
ENTER
SELECT
Input
PC CARD 100CDPFP
Select Page
0
–
9
1 / 1
Back
Next
Folder
Protect
Cancel
- - - -
- - - -
- - - -
- - - -
0002
0003
0004
- - - -
0001
JPEG
DPOF
RETURN
ENTER
SELECT
Input
PC CARD 100CDPFP
Select Page
0
–
9
1 / 1
Back
Next
Whole
DPOF
- - - -
- - - -
- - - -
- - - -
0002
0003
0004
- - - -
0001